13 Freezer Meal Ideas for Busy Moms To Simplify Your Weeknight Dinners
Finding time to whip up dinner can feel impossible when you’re juggling a busy schedule. With a little planning, freezer meals can be a lifesaver for moms on the go. Here are 13 delicious freezer meal ideas that are not only easy to prepare but also sure to please the whole family!
Creamy Tomato Basil Pasta
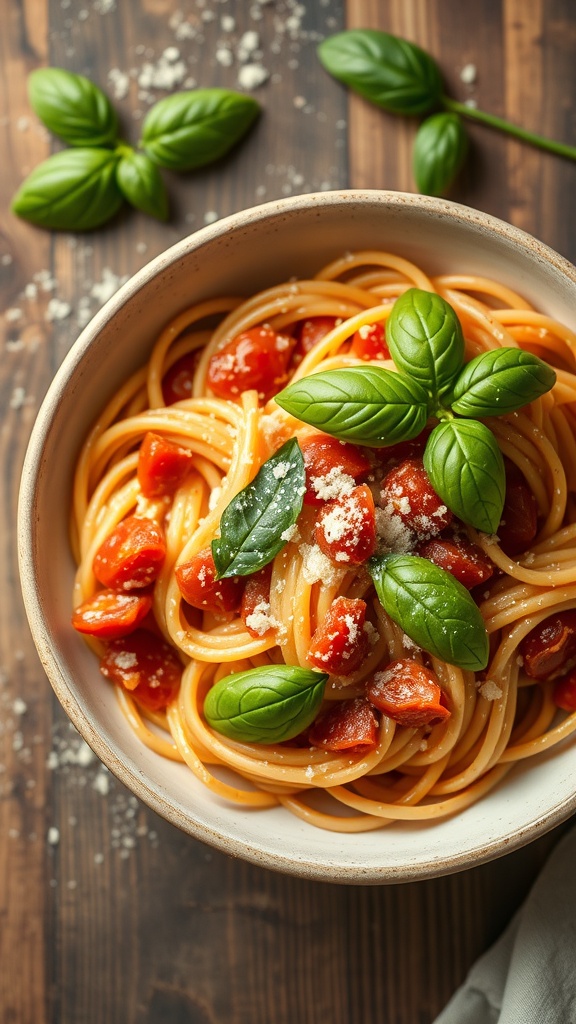
Creamy Tomato Basil Pasta is a delightful dish that brings comfort to busy evenings. The vibrant colors of the fresh basil and rich tomato sauce make it visually appealing. This meal is not only quick to prepare but also satisfying for the whole family. You can whip it up in no time, making it perfect for those hectic nights when you need something delicious without the fuss.
The key ingredients include pasta, fresh tomatoes, basil, and a touch of cream. Each bite is a burst of flavor, with the creamy sauce perfectly complementing the tangy tomatoes. Plus, it’s a great way to sneak in some veggies!
To make this dish, you’ll start by cooking your pasta until al dente. In a separate pan, sauté garlic and fresh tomatoes, then add cream and basil for that rich flavor. Combine everything, and you have a meal that feels gourmet but is easy enough for any busy mom to prepare.
Slow Cooker Chicken Tacos
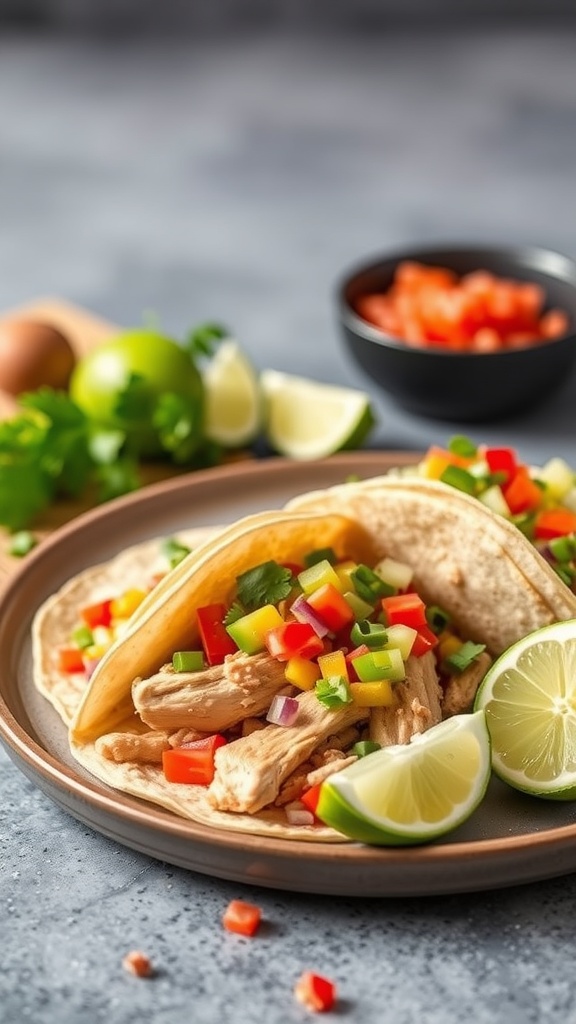
Slow cooker chicken tacos are a lifesaver for busy moms. They are easy to prepare, packed with flavor, and perfect for family dinners. Just throw everything in the slow cooker, and let it do the work while you focus on other tasks.
The image shows delicious chicken tacos topped with colorful diced peppers and fresh cilantro. The vibrant colors make them look appealing and appetizing. The lime wedges on the side add a zesty touch, perfect for squeezing over the tacos.
This meal is not only quick to make but also customizable. You can add your favorite toppings like cheese, salsa, or avocado. It’s a great way to get the kids involved in dinner prep, letting them choose their toppings.
Here’s how to make these tasty slow cooker chicken tacos:
Ingredients
- 2 pounds boneless, skinless chicken breasts
- 1 packet taco seasoning
- 1 cup salsa
- 1 tablespoon lime juice
- 8 small flour or corn tortillas
- 1 cup diced bell peppers
- 1/2 cup chopped fresh cilantro
- Lime wedges for serving
Instructions
- Place the chicken breasts in the slow cooker.
- Sprinkle the taco seasoning over the chicken.
- Pour the salsa and lime juice on top.
- Cover and cook on low for 6-8 hours or high for 3-4 hours.
- Once cooked, shred the chicken with two forks and mix it with the sauce in the slow cooker.
- Warm the tortillas in a skillet or microwave.
- Assemble the tacos by adding the shredded chicken and topping with diced bell peppers and cilantro.
- Serve with lime wedges on the side for an extra burst of flavor.
Sweet Potato and Black Bean Chili

Sweet Potato and Black Bean Chili is a fantastic option for busy moms. It’s hearty, nutritious, and easy to make ahead of time. The vibrant colors of the sweet potatoes and black beans make this dish not only delicious but also visually appealing. You can easily freeze leftovers for a quick meal later in the week.
This chili is packed with flavor and can be customized to suit your family’s taste. Add some spices for a kick or keep it mild for the little ones. It’s a great way to sneak in some veggies while keeping everyone satisfied.
Here’s how to make this delightful chili:
Ingredients
- 2 medium sweet potatoes, peeled and diced
- 1 can (15 oz) black beans, drained and rinsed
- 1 can (14.5 oz) diced tomatoes
- 1 cup vegetable broth
- 1 small onion, chopped
- 2 cloves garlic, minced
- 1 teaspoon cumin
- 1 teaspoon chili powder
- Salt and pepper to taste
- Fresh cilantro for garnish
Instructions
- In a large pot, sauté the onion and garlic over medium heat until softened.
- Add the diced sweet potatoes, black beans, diced tomatoes, vegetable broth, cumin, chili powder, salt, and pepper.
- Bring to a boil, then reduce heat and let simmer for about 20-25 minutes, or until the sweet potatoes are tender.
- Adjust seasoning as needed. Serve hot, garnished with fresh cilantro.
Spinach and Cheese Stuffed Shells
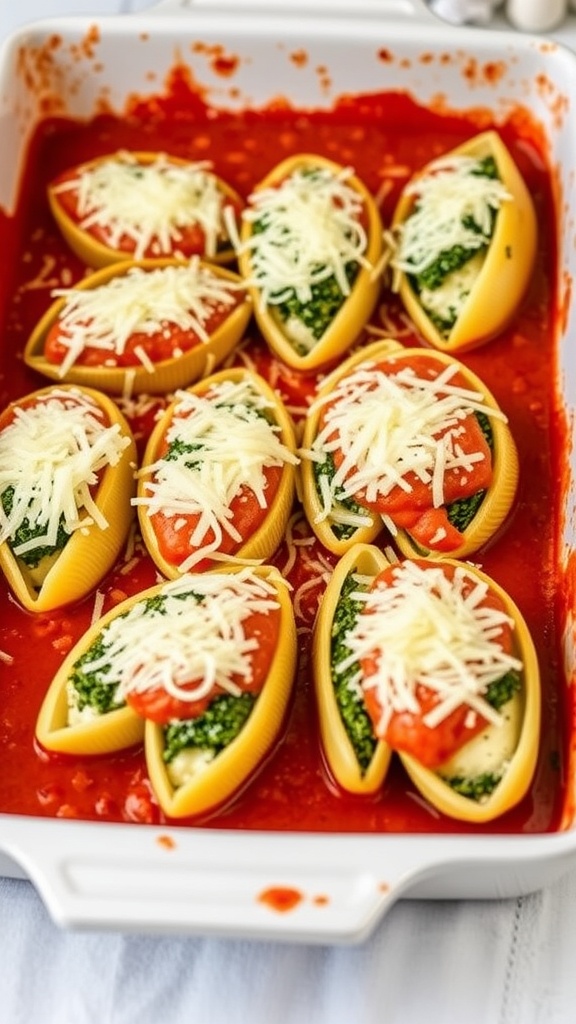
Spinach and cheese stuffed shells are a fantastic meal for busy moms. They are easy to prepare and can be made ahead of time, making dinner a breeze on hectic days. These shells are filled with a creamy mixture of ricotta cheese, spinach, and herbs, then topped with marinara sauce and mozzarella cheese. The result is a comforting dish that the whole family will love.
To make these stuffed shells, start by cooking large pasta shells until al dente. While they cool, mix together ricotta cheese, cooked spinach, and a bit of Parmesan cheese in a bowl. Once the shells are cool enough to handle, stuff each one with the cheese mixture. Place them in a baking dish, cover with marinara sauce, and sprinkle mozzarella on top. Bake until bubbly and golden.
This dish not only tastes great but also freezes well. You can prepare a big batch and store them in the freezer. When you’re ready to eat, just pop them in the oven for a quick meal.
Ingredients
- 12 large pasta shells
- 2 cups ricotta cheese
- 2 cups fresh spinach, cooked and chopped
- 1/2 cup grated Parmesan cheese
- 1 teaspoon garlic powder
- 1 teaspoon Italian seasoning
- 2 cups marinara sauce
- 1 cup shredded mozzarella cheese
Instructions
- Preheat your oven to 375°F (190°C).
- Cook the pasta shells according to package instructions until al dente. Drain and set aside.
- In a bowl, mix ricotta cheese, cooked spinach, Parmesan cheese, garlic powder, and Italian seasoning until well combined.
- Stuff each shell with the cheese mixture and place them in a greased baking dish.
- Pour marinara sauce over the stuffed shells and sprinkle mozzarella cheese on top.
- Bake for 25-30 minutes, or until the cheese is melted and bubbly.
- Let cool for a few minutes before serving.
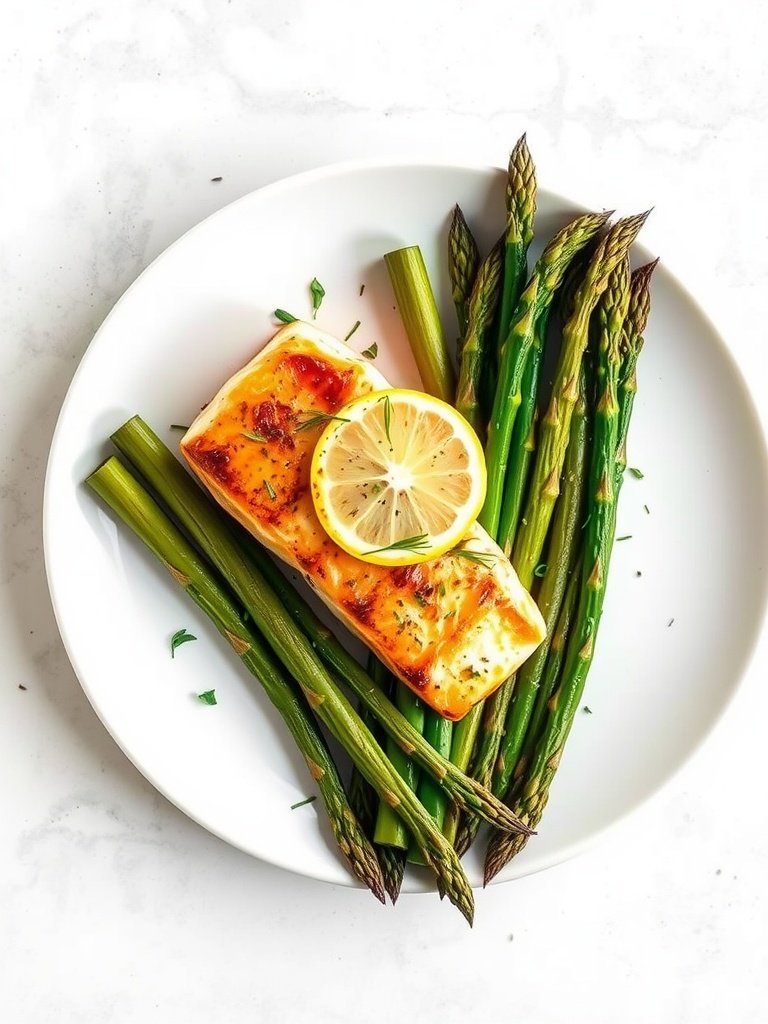
Teriyaki Salmon with Rice
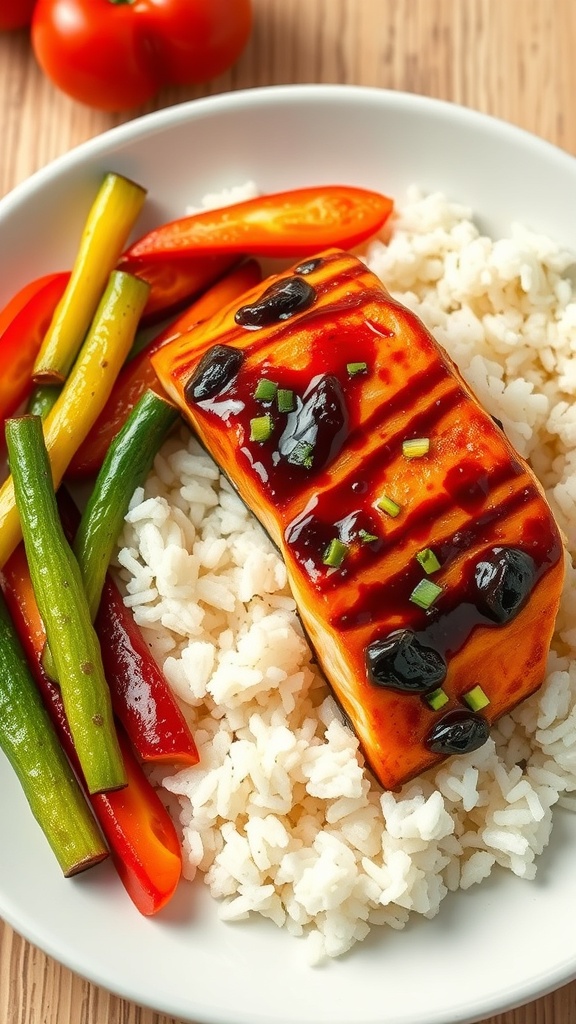
Teriyaki Salmon with Rice is a fantastic meal for busy moms. It’s quick to prepare and packed with flavor. The salmon is glazed with a sweet and savory teriyaki sauce, making it a hit with kids and adults alike. Served over fluffy rice and accompanied by colorful veggies, this dish is as pleasing to the eyes as it is to the palate.
In the image, you can see a beautifully cooked piece of salmon, glistening with teriyaki sauce. It’s placed on a bed of white rice, surrounded by vibrant green and red vegetables. This meal not only looks appetizing but also offers a balanced plate with protein, carbs, and veggies.
Making this dish is simple and can be done in under 30 minutes. It’s perfect for those busy weeknights when you want something healthy and delicious without spending hours in the kitchen.
Ingredients
- 2 salmon fillets
- 1/4 cup teriyaki sauce
- 1 cup jasmine rice
- 2 cups water
- 1 cup mixed bell peppers, sliced
- 1 cup green beans, trimmed
- 1 tablespoon olive oil
- Salt and pepper to taste
- Chopped green onions for garnish
Instructions
- Cook the Rice: In a pot, combine jasmine rice and water. Bring to a boil, then reduce heat to low, cover, and simmer for about 15 minutes until the rice is tender and water is absorbed.
- Prepare the Salmon: While the rice cooks, heat a non-stick skillet over medium heat. Add the salmon fillets, skin-side down, and pour the teriyaki sauce over them. Cook for about 4-5 minutes on each side, or until the salmon is cooked through.
- Sauté the Vegetables: In another pan, heat olive oil over medium heat. Add the sliced bell peppers and green beans. Sauté for about 5-7 minutes until they are tender but still crisp. Season with salt and pepper.
- Assemble the Dish: Once everything is cooked, fluff the rice with a fork. Serve the salmon on a bed of rice, topped with extra teriyaki sauce if desired. Add the sautéed vegetables on the side and garnish with chopped green onions.
Lemon Herb Grilled Chicken
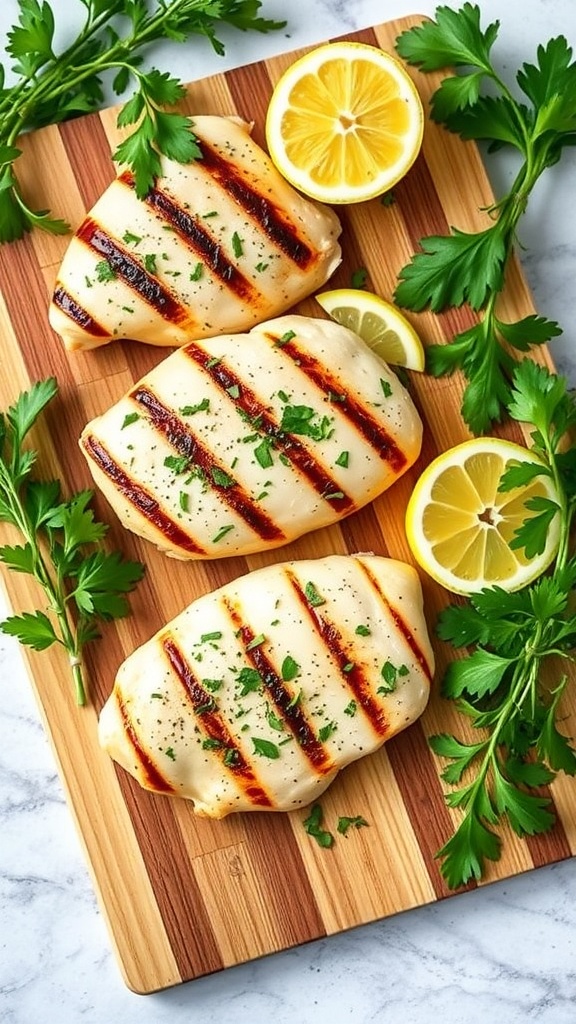
Lemon Herb Grilled Chicken is a fantastic option for busy moms looking to prepare healthy meals in advance. This dish is not only easy to make but also packed with flavor. The bright taste of lemon combined with fresh herbs makes it a family favorite. Plus, it’s perfect for freezing, so you can whip it out on a hectic weeknight.
To make this dish, start with some boneless chicken breasts. Marinate them in a mixture of lemon juice, olive oil, garlic, and your choice of herbs like parsley or thyme. Let them soak up those delicious flavors for at least 30 minutes. When you’re ready to cook, grill the chicken until it’s perfectly charred and cooked through.
Once cooked, you can slice it up and serve it with a side of veggies or toss it into salads for a quick lunch. The leftovers freeze well, making it easy to have a healthy meal ready to go whenever you need it. Just remember to label your containers with the date!
Ingredients
- 4 boneless, skinless chicken breasts
- 1/4 cup olive oil
- Juice of 2 lemons
- 3 cloves garlic, minced
- 1 tablespoon fresh parsley, chopped
- 1 tablespoon fresh thyme, chopped
- Salt and pepper to taste
Instructions
- Prepare the Marinade: In a bowl, whisk together olive oil, lemon juice, garlic, parsley, thyme, salt, and pepper.
- Marinate the Chicken: Place the chicken breasts in a resealable bag or shallow dish. Pour the marinade over the chicken and let it sit in the refrigerator for at least 30 minutes.
- Preheat the Grill: Heat your grill to medium-high heat.
- Grill the Chicken: Remove the chicken from the marinade and place it on the grill. Cook for about 6-7 minutes on each side, or until the internal temperature reaches 165°F (75°C).
- Rest and Serve: Let the chicken rest for a few minutes before slicing. Serve with your favorite sides or store in the freezer for later!
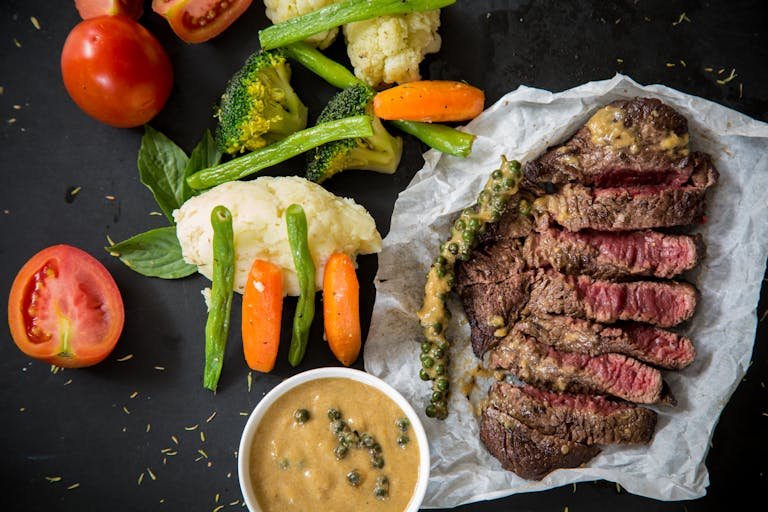
Beef and Broccoli Freezer Meal
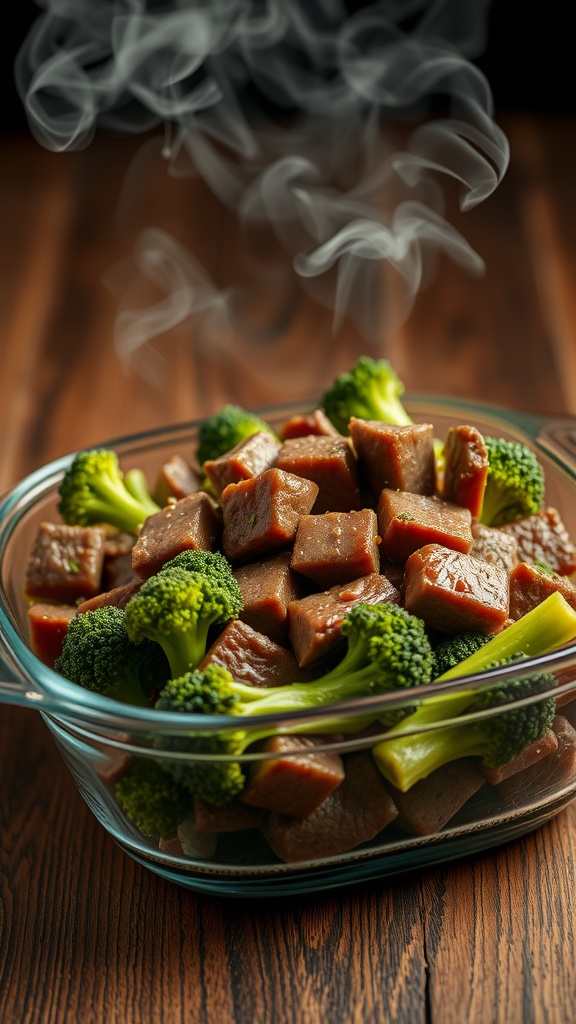
Beef and broccoli is a classic dish that’s perfect for busy moms. It’s quick to prepare and freezes beautifully, making it a great option for meal prep. In the image, you can see tender pieces of beef paired with vibrant green broccoli, all steaming in a glass container. This meal not only looks appetizing but is also packed with nutrients.
To make this freezer meal, you’ll want to gather some simple ingredients. The combination of beef and broccoli is not only delicious but also offers a good balance of protein and veggies. Plus, it’s a hit with kids!
Ingredients
- 1 pound beef (flank steak or sirloin), sliced thinly
- 2 cups broccoli florets
- 1/4 cup soy sauce
- 2 tablespoons cornstarch
- 2 tablespoons vegetable oil
- 2 cloves garlic, minced
- 1 tablespoon ginger, minced
- 1/4 cup beef broth
- 1 tablespoon sesame oil
Instructions
- Marinate the Beef: In a bowl, combine the sliced beef, soy sauce, and cornstarch. Let it marinate for at least 30 minutes.
- Cook the Beef: Heat vegetable oil in a skillet over medium-high heat. Add the marinated beef and cook until browned, about 5 minutes. Remove from the skillet and set aside.
- Stir-Fry the Broccoli: In the same skillet, add garlic and ginger. Sauté for about 1 minute, then add broccoli and beef broth. Cover and steam for 3-4 minutes until broccoli is tender.
- Combine: Return the beef to the skillet and add sesame oil. Stir everything together and cook for another 2 minutes.
- Cool and Freeze: Let the meal cool completely before transferring it to a freezer-safe container. Label it and store it in the freezer for up to 3 months.
When you’re ready to enjoy this meal, simply thaw it overnight in the fridge and reheat in a skillet or microwave. It’s a quick and satisfying dinner option that your family will love!
Vegetable Quinoa Stir-Fry
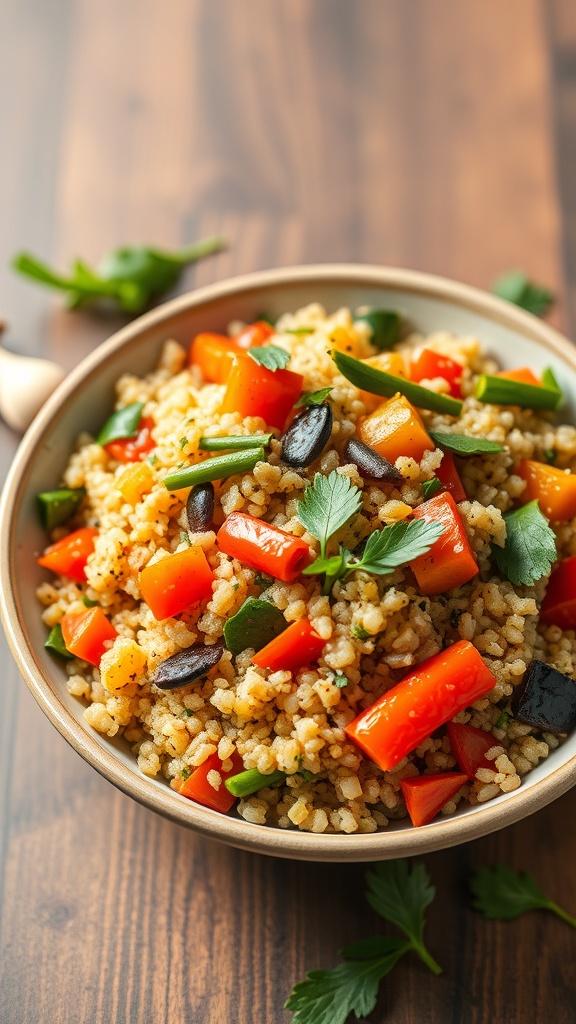
Vegetable Quinoa Stir-Fry is a fantastic option for busy moms looking to whip up a quick, nutritious meal. This dish is colorful and packed with flavor, making it a hit with kids and adults alike. The vibrant mix of bell peppers, green onions, and fresh herbs adds a delightful crunch and freshness to the meal.
Quinoa is not only a great source of protein, but it also cooks quickly, making it perfect for those hectic weeknights. You can easily customize this stir-fry with whatever vegetables you have on hand, ensuring it’s both versatile and budget-friendly.
To make this dish, simply sauté your favorite veggies in a bit of oil, add cooked quinoa, and toss everything together with some soy sauce or your favorite stir-fry sauce. It’s that easy! Plus, it stores well in the freezer, so you can make a big batch and enjoy it later.
Ingredients
- 1 cup quinoa
- 2 cups vegetable broth or water
- 1 red bell pepper, diced
- 1 green bell pepper, diced
- 1 cup snap peas
- 1/2 cup green onions, chopped
- 2 cloves garlic, minced
- 2 tablespoons soy sauce
- 1 tablespoon olive oil
- Salt and pepper to taste
- Fresh parsley for garnish
Instructions
- Rinse the quinoa under cold water. In a medium pot, bring vegetable broth or water to a boil. Add quinoa, reduce heat, cover, and simmer for about 15 minutes or until the liquid is absorbed.
- In a large skillet, heat olive oil over medium heat. Add garlic and sauté for about 1 minute until fragrant.
- Add the diced bell peppers and snap peas to the skillet. Cook for 5-7 minutes until the vegetables are tender-crisp.
- Stir in the cooked quinoa and soy sauce. Mix well and cook for an additional 2-3 minutes to heat through.
- Season with salt and pepper to taste. Garnish with fresh parsley before serving.
Beef Lasagna
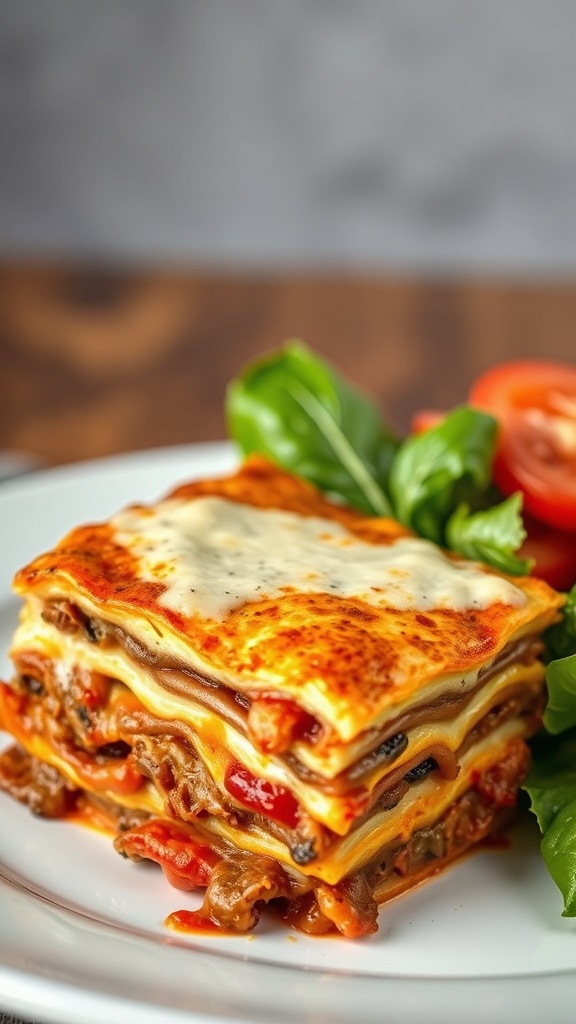
Beef lasagna is a classic dish that brings comfort and satisfaction to any dinner table. This layered pasta dish features rich beef, tangy tomato sauce, and creamy cheese, all baked to perfection. It’s a go-to meal for busy moms who want to serve something hearty and delicious without spending hours in the kitchen.
The beauty of beef lasagna lies in its simplicity. You can prepare it ahead of time and freeze it for later. Just pop it in the oven when you’re ready to eat, and you’ll have a warm, filling meal in no time. Plus, the leftovers are just as tasty, making it a great option for meal prep.
To make your own beef lasagna, gather the following ingredients:
Stuffed Bell Peppers
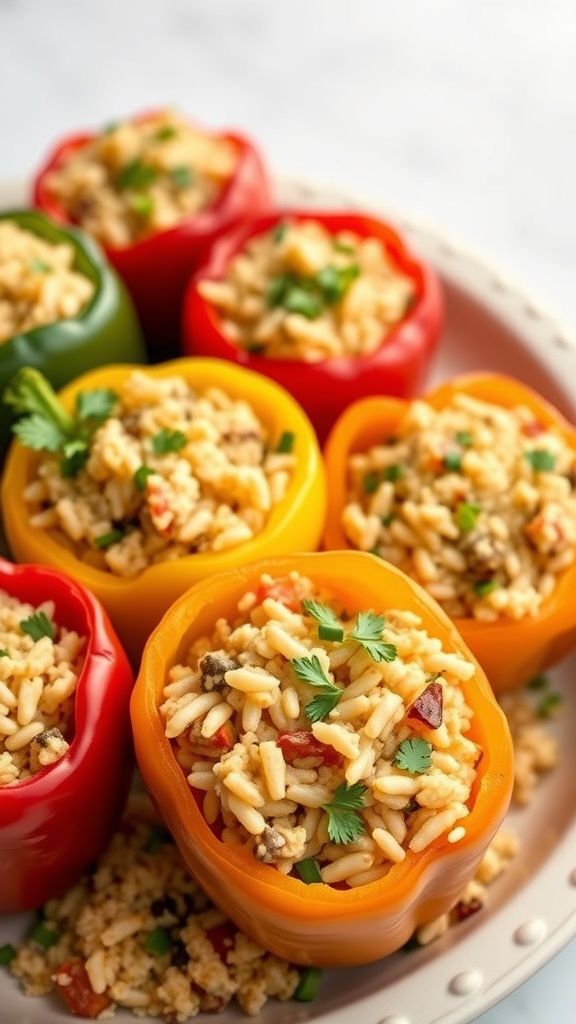
Stuffed bell peppers are a colorful and tasty option for busy moms looking to prepare meals ahead of time. These vibrant peppers are filled with a delicious mixture that can be customized to suit your family’s taste. The combination of rice, meat, and spices makes for a satisfying dish that everyone will love.
Making stuffed bell peppers is simple and fun. You can use any color of bell pepper you like, whether it’s red, yellow, or green. The filling can include ground beef, turkey, or even a vegetarian option with beans and veggies. This dish is not only nutritious but also visually appealing, making it a hit at the dinner table.
Once prepared, these stuffed peppers freeze well. Just pop them in the freezer, and you’ll have a quick meal ready to go on busy nights. Just heat them up, and dinner is served!
Ingredients
- 4 large bell peppers (any color)
- 1 cup cooked rice
- 1 pound ground beef or turkey
- 1 can diced tomatoes (14.5 oz)
- 1 teaspoon garlic powder
- 1 teaspoon onion powder
- 1 teaspoon Italian seasoning
- Salt and pepper to taste
- 1 cup shredded cheese (optional)
- Fresh parsley or cilantro for garnish
Instructions
- Preheat your oven to 375°F (190°C).
- Cut the tops off the bell peppers and remove the seeds. Place them in a baking dish.
- In a skillet, cook the ground beef or turkey over medium heat until browned. Drain excess fat.
- Add cooked rice, diced tomatoes, garlic powder, onion powder, Italian seasoning, salt, and pepper to the skillet. Mix well and let simmer for a few minutes.
- Stuff each bell pepper with the meat and rice mixture. If desired, top with shredded cheese.
- Cover the baking dish with foil and bake for 25-30 minutes. Remove the foil for the last 10 minutes to allow the cheese to melt and brown.
- Garnish with fresh parsley or cilantro before serving.
Chicken and Vegetable Stir-Fry
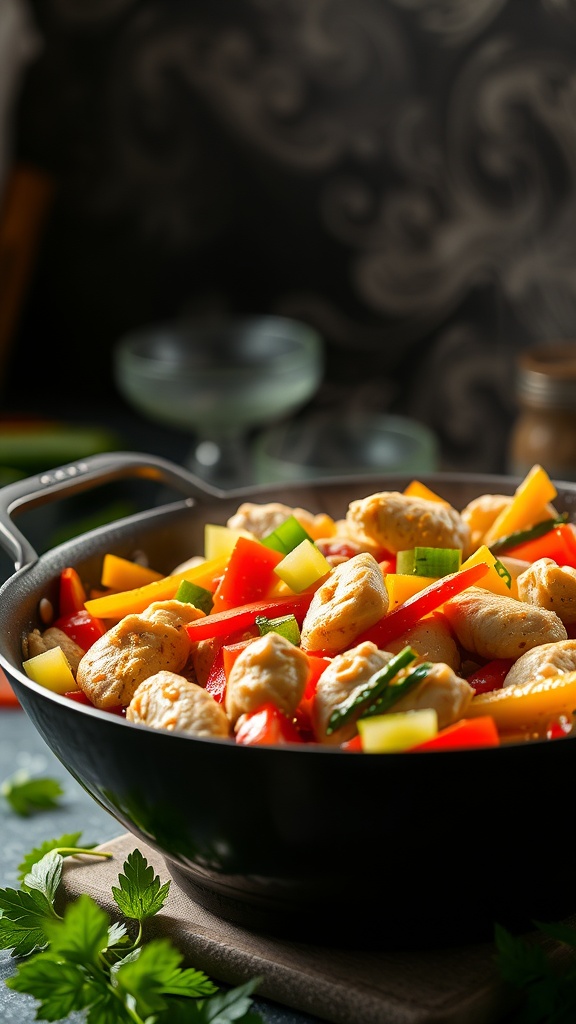
Chicken and vegetable stir-fry is a go-to meal for busy moms. It’s quick, colorful, and packed with nutrients. The vibrant mix of bell peppers, zucchini, and tender chicken pieces makes it not just tasty but also visually appealing. You can whip this up in no time, making it perfect for those hectic weeknights.
This dish is versatile too! You can swap in your family’s favorite veggies or whatever you have on hand. Plus, it freezes well, so you can make a big batch and save some for later. Just pop it in the freezer, and you’ll have a homemade meal ready to go whenever you need it.
Here’s how to make your own chicken and vegetable stir-fry:
Ingredients
- 1 lb chicken breast, cut into bite-sized pieces
- 2 cups bell peppers (red, yellow, green), sliced
- 1 cup zucchini, sliced
- 1 cup broccoli florets
- 3 tablespoons soy sauce
- 2 tablespoons olive oil
- 2 cloves garlic, minced
- 1 teaspoon ginger, minced
- Salt and pepper to taste
- Cooked rice or noodles, for serving
Instructions
- Heat olive oil in a large skillet over medium-high heat.
- Add chicken pieces and cook until browned and cooked through, about 5-7 minutes.
- Stir in garlic and ginger, cooking for another minute until fragrant.
- Add the bell peppers, zucchini, and broccoli. Stir-fry for about 5-6 minutes until the veggies are tender-crisp.
- Pour in the soy sauce, stirring to coat everything evenly. Season with salt and pepper to taste.
- Serve hot over cooked rice or noodles.
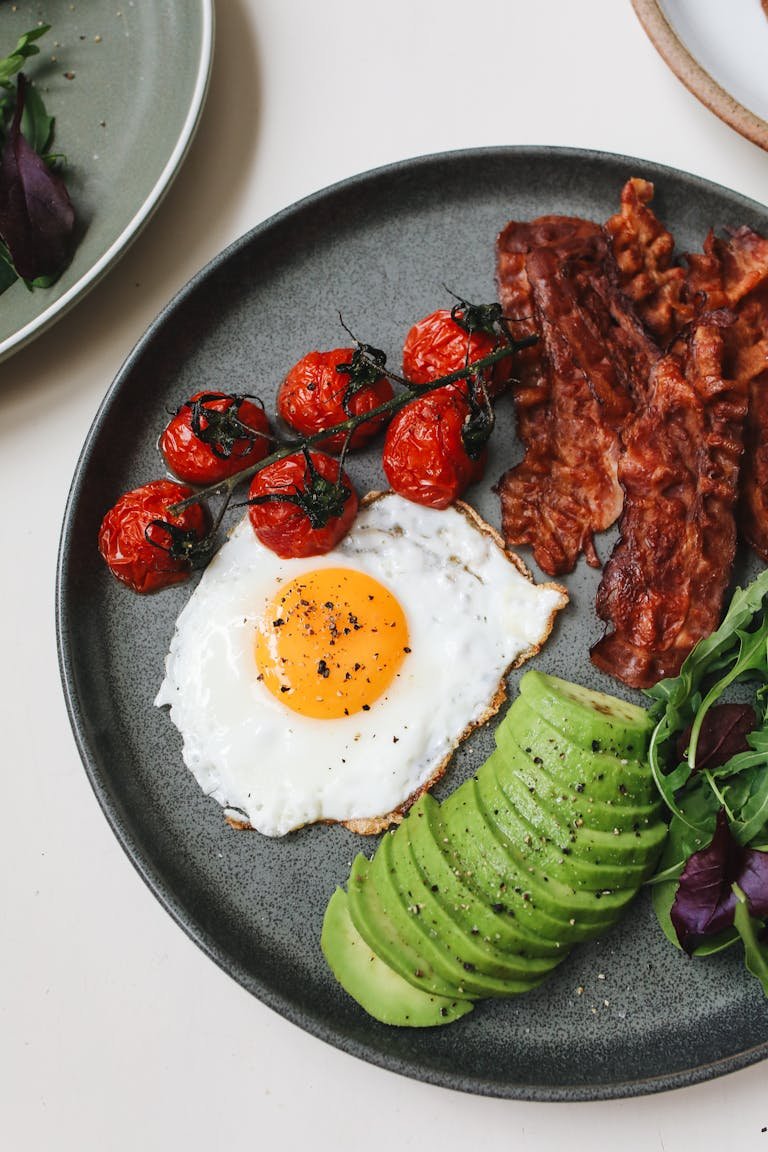
Breakfast Burritos for Busy Mornings

Breakfast burritos are a fantastic choice for busy mornings. They are quick to prepare and can be made ahead of time, making them perfect for moms on the go. The image shows a delicious burrito wrapped in foil, filled with eggs, tomatoes, and spices, alongside a fresh avocado. This combination not only looks appetizing but also packs a nutritious punch.
These burritos can be customized with your favorite ingredients. You can add sausage, cheese, or even beans for extra protein. The best part? You can make a batch over the weekend and freeze them. When morning comes, just grab one, heat it up, and you’re ready to go!
Ingredients
- 8 large eggs
- 1 cup diced tomatoes
- 1 cup cooked sausage or bacon
- 1 cup shredded cheese
- 4 large flour tortillas
- 1 avocado, sliced
- Salt and pepper to taste
- Fresh cilantro for garnish
Instructions
- Scramble the Eggs: In a large bowl, whisk the eggs with salt and pepper. Cook in a skillet over medium heat until fully scrambled.
- Add Ingredients: Stir in the diced tomatoes, cooked sausage, and cheese until everything is heated through.
- Assemble the Burritos: Lay a tortilla flat and spoon some of the egg mixture onto the center. Fold in the sides and roll it up tightly.
- Wrap and Freeze: Wrap each burrito in foil and place them in a freezer-safe bag. Store in the freezer.
- Heat and Serve: When ready to eat, remove the foil and microwave for about 2-3 minutes or until heated through. Serve with sliced avocado and garnish with cilantro.
Vegetarian Lentil Soup
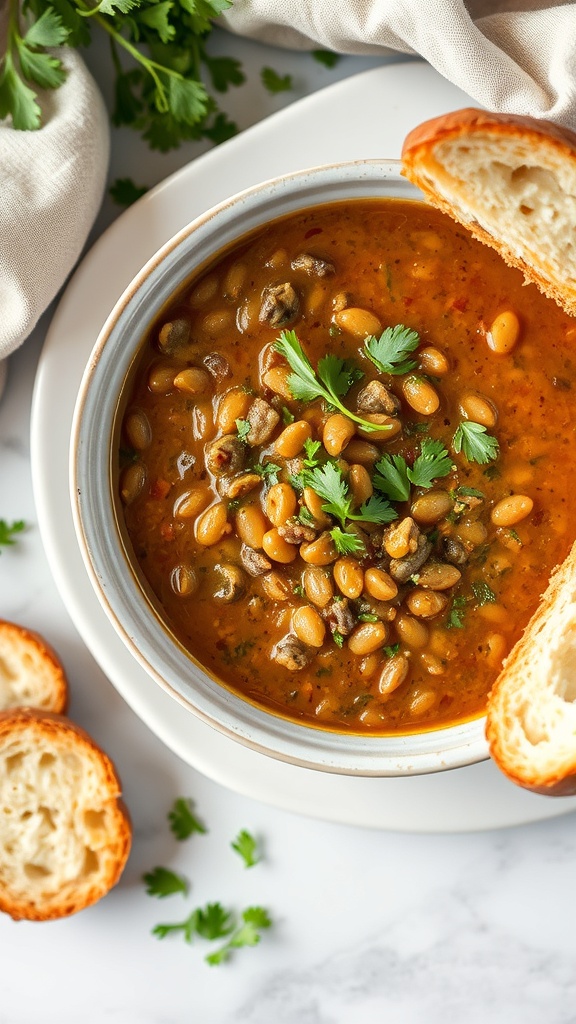
Vegetarian lentil soup is a warm and hearty dish that’s perfect for busy moms. It’s packed with protein and fiber, making it a nutritious choice for the whole family. The vibrant colors of the soup, with lentils and fresh herbs, make it visually appealing too!
This soup is not only easy to prepare but also freezes well. You can make a big batch and store it for those days when you need a quick meal. Just heat it up, and you’re ready to go!
Pair it with some crusty bread for a complete meal. The combination of flavors from the spices and vegetables creates a comforting dish that everyone will love.
Ingredients
- 1 cup dried lentils (any color)
- 1 tablespoon olive oil
- 1 medium onion, chopped
- 2 carrots, diced
- 2 celery stalks, diced
- 3 cloves garlic, minced
- 1 teaspoon ground cumin
- 1 teaspoon smoked paprika
- 1 can (14.5 oz) diced tomatoes
- 4 cups vegetable broth
- 2 cups spinach or kale
- Salt and pepper to taste
- Fresh cilantro for garnish
Instructions
- Rinse the lentils under cold water and set aside.
- In a large pot, heat olive oil over medium heat. Add the onion, carrots, and celery. Sauté for about 5 minutes until the vegetables are softened.
- Add the garlic, cumin, and smoked paprika. Cook for another minute until fragrant.
- Stir in the lentils, diced tomatoes, and vegetable broth. Bring to a boil, then reduce the heat and simmer for about 25-30 minutes, or until the lentils are tender.
- Add the spinach or kale and cook for an additional 5 minutes. Season with salt and pepper to taste.
- Serve hot, garnished with fresh cilantro and enjoy with crusty bread!