15 Delicious Work Lunch Meal Prep Ideas to Save Time and Eat Healthy
Work lunch meal prep is the perfect way to take the stress out of your weekdays while enjoying tasty, nutritious meals. By planning and preparing your lunches in advance, you save time, money, and the hassle of deciding what to eat last minute. Plus, you can customize your meals to suit your tastes and dietary needs, making lunchtime something to look forward to! Let’s jump right into some easy ideas to get you started.
Savory Wraps with Fresh Ingredients
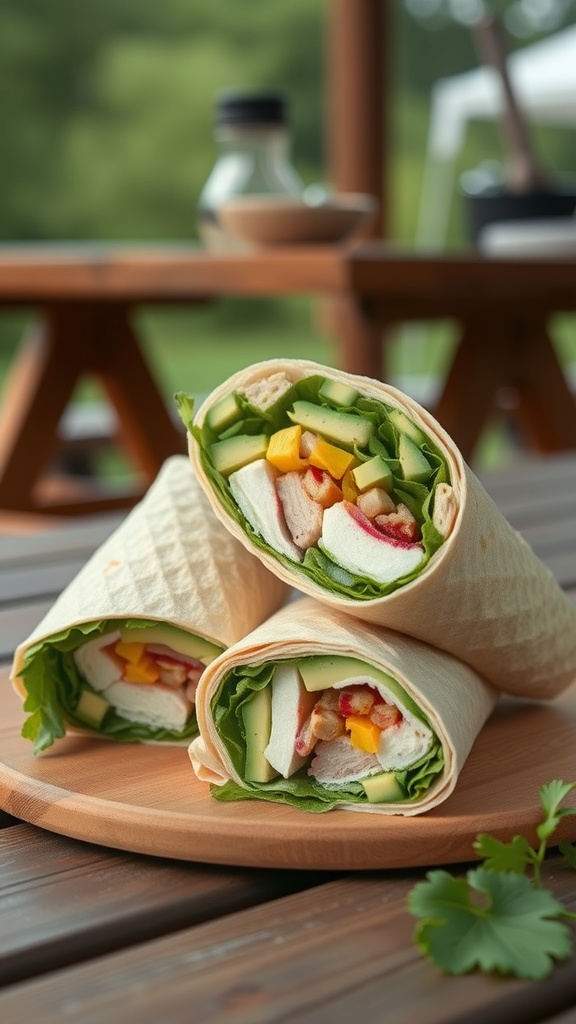
Wraps are a fantastic option for a work lunch. They are easy to make, portable, and can be filled with a variety of fresh ingredients. The image shows a trio of delicious wraps, neatly arranged on a wooden platter. Each wrap is packed with vibrant greens, colorful veggies, and lean proteins, making them both nutritious and satisfying.
Using fresh ingredients not only enhances flavor but also boosts the nutritional value of your meal. You can mix and match your favorite fillings, such as grilled chicken, bell peppers, cucumbers, and leafy greens. This flexibility allows you to customize your wraps to suit your taste.
To prepare these tasty wraps, start with a soft tortilla. Layer your choice of protein, followed by a generous amount of fresh vegetables. Roll it tightly, slice it in half, and you’re ready to go! These wraps are perfect for a quick lunch at the office or a picnic in the park.
Ingredients
- 4 large tortillas
- 1 cup cooked chicken breast, sliced
- 1 cup mixed greens (spinach, arugula, etc.)
- 1/2 cup bell peppers, sliced
- 1/2 cucumber, thinly sliced
- 1/2 cup shredded carrots
- 1/4 cup hummus or your favorite spread
- Salt and pepper to taste
Instructions
- Prepare the Tortillas: Lay out the tortillas on a clean surface.
- Spread the Base: Evenly spread hummus or your chosen spread over each tortilla.
- Add the Fillings: Layer the chicken, mixed greens, bell peppers, cucumber, and carrots on top of the spread.
- Season: Sprinkle with salt and pepper to taste.
- Roll It Up: Starting from one end, roll the tortilla tightly around the fillings. Slice in half to serve.
Healthy Snack Packs for Midday Boost
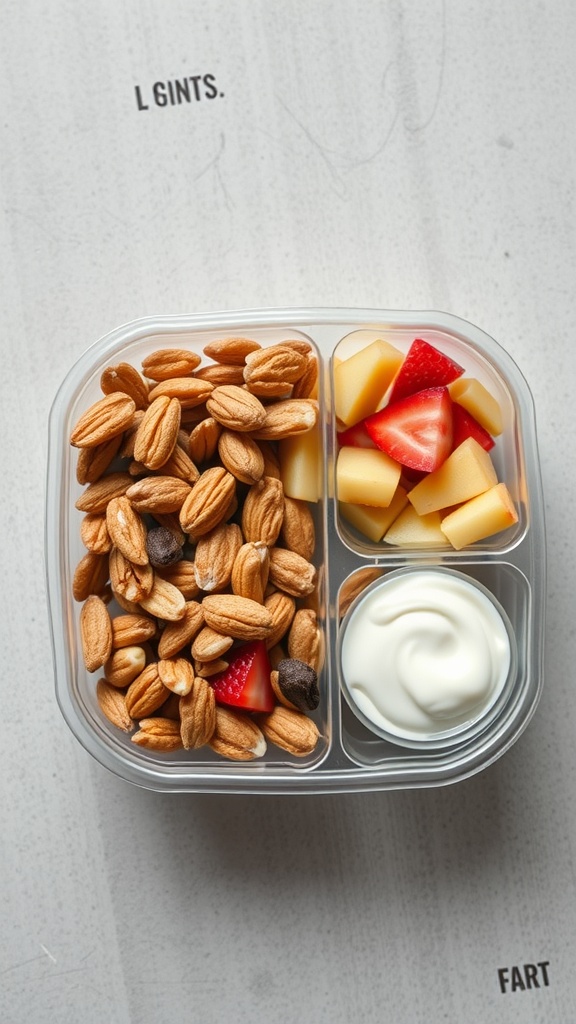
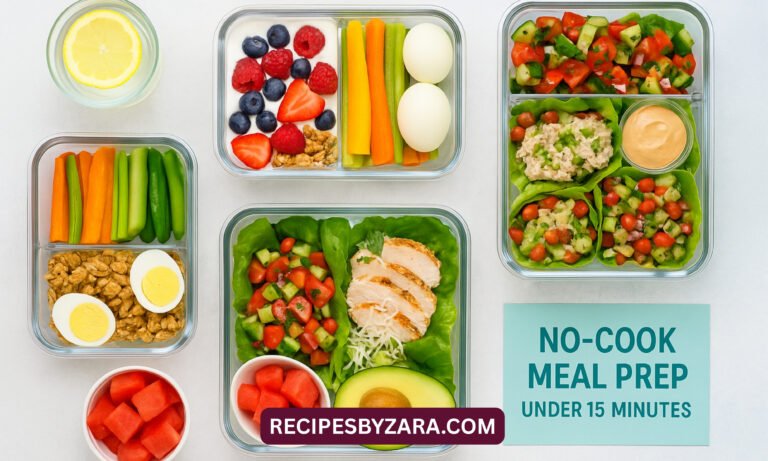
Snack packs are a great way to keep your energy up during the workday. They are easy to prepare and can be customized to fit your taste. The image shows a well-balanced snack pack with almonds, fresh fruit, and a creamy dip. This combination offers protein, healthy fats, and vitamins.
In the first section, we see a generous portion of almonds. They provide a satisfying crunch and are packed with nutrients. Next to them, there are diced apples and strawberries, adding a refreshing sweetness. Finally, the creamy dip is perfect for pairing with the fruit, making the snack both fun and nutritious.
These snack packs are not just tasty; they also help you stay focused and energized throughout the day. Preparing them ahead of time means you can grab one on your way out the door. Plus, they are a healthier alternative to vending machine options.
Ingredients
- 1 cup almonds
- 1 cup diced apples
- 1 cup diced strawberries
- 1/2 cup yogurt (plain or flavored)
Instructions
- Prepare the Fruit: Wash and dice the apples and strawberries into bite-sized pieces.
- Assemble the Snack Pack: In a divided container, place the almonds in one section, the diced fruit in another, and the yogurt in a small container.
- Store: Seal the container and store it in the fridge until you’re ready to take it to work.
- Enjoy: Grab your snack pack for a quick and healthy midday boost!
Balanced Grain Bowls for Energy
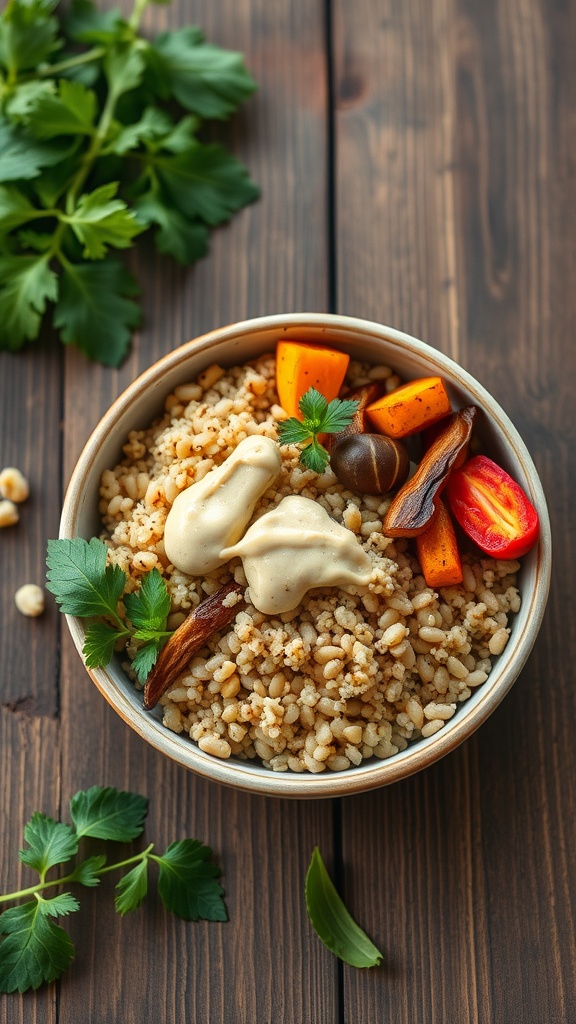
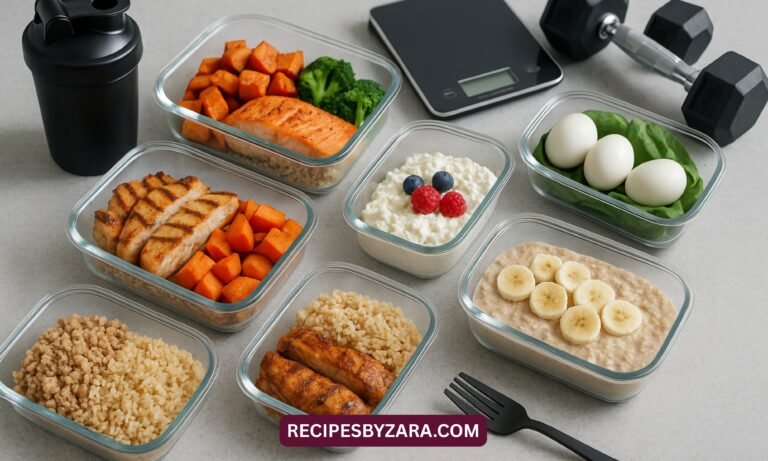
Grain bowls are a fantastic option for work lunches. They are easy to prepare and can be customized to suit your taste. The image shows a delicious bowl filled with grains, roasted vegetables, and a creamy sauce. This combination provides a great balance of nutrients to keep your energy levels up throughout the day.
Using whole grains like barley or quinoa as a base is a smart choice. They are packed with fiber and protein, which helps you feel full longer. Adding colorful veggies not only makes the bowl visually appealing but also boosts the nutritional value. The fresh herbs sprinkled on top add a burst of flavor and freshness.
To make your own balanced grain bowl, you can follow this simple recipe:
Ingredients
- 1 cup cooked barley or quinoa
- 1 cup mixed roasted vegetables (like sweet potatoes, bell peppers, and carrots)
- 1/4 cup hummus or tahini sauce
- Fresh herbs (like parsley or cilantro)
- Salt and pepper to taste
Instructions
- Cook the grain according to package instructions and let it cool.
- Chop your choice of vegetables and roast them in the oven at 400°F (200°C) for about 20-25 minutes until tender.
- In a bowl, layer the cooked grain, roasted vegetables, and drizzle with hummus or tahini sauce.
- Top with fresh herbs and season with salt and pepper.
- Mix everything together and enjoy your nutritious lunch!
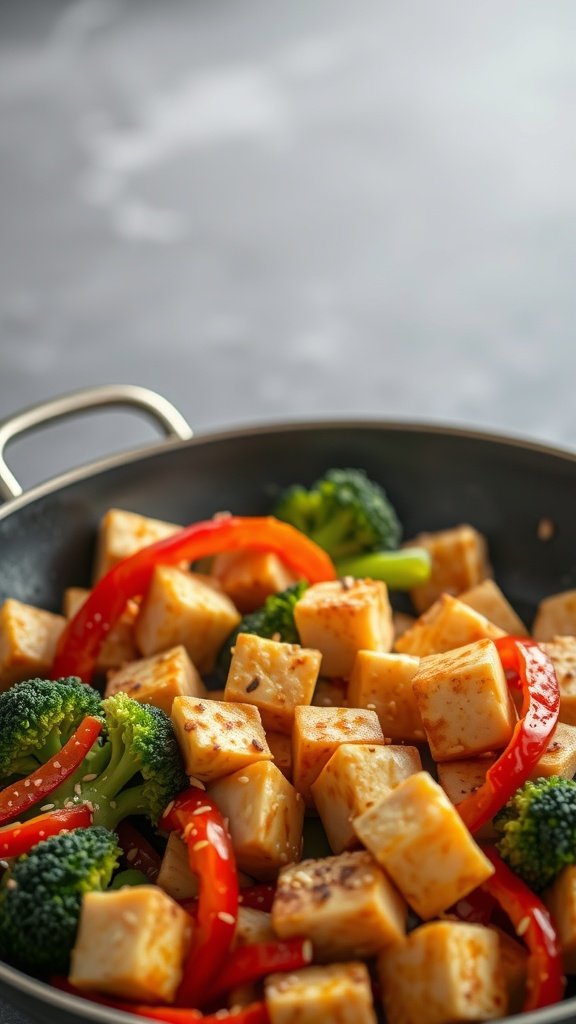
Simple Stir-Fry Meal Prep

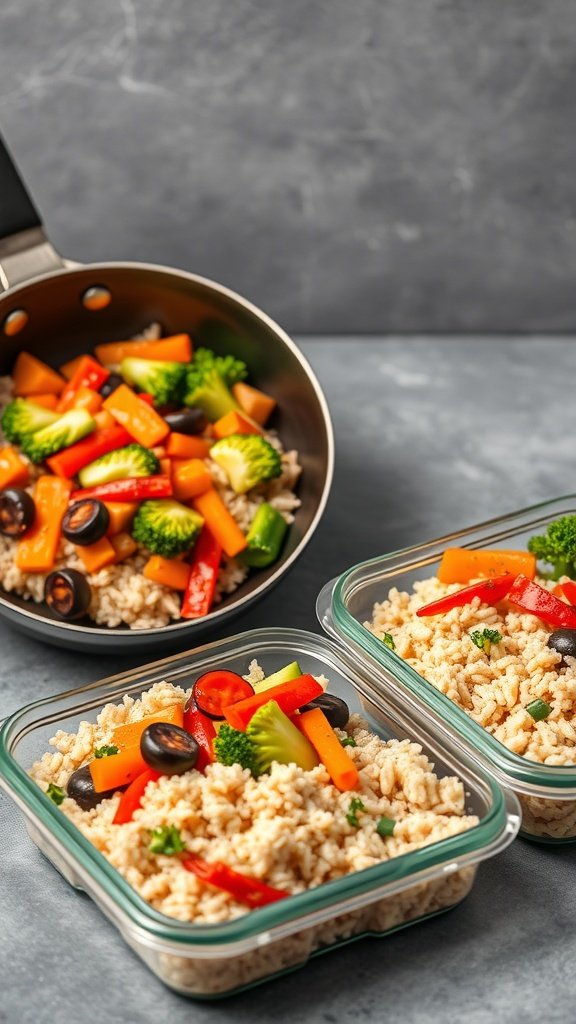
Stir-fry meal prep is a fantastic way to enjoy healthy lunches throughout the week. The image shows a colorful mix of vegetables being sautéed in a pan, alongside neatly packed containers filled with rice and vibrant veggies. This meal is not only visually appealing but also packed with nutrients.
Using a variety of vegetables like bell peppers, broccoli, and olives adds flavor and crunch. The rice serves as a hearty base, making it filling and satisfying. Meal prepping like this can save time and help you stick to your healthy eating goals.
Let’s get into how you can whip up this simple stir-fry meal prep at home!
Ingredients
- 2 cups cooked brown rice
- 1 cup broccoli florets
- 1 red bell pepper, sliced
- 1 yellow bell pepper, sliced
- 1 green bell pepper, sliced
- 1/2 cup black olives, sliced
- 2 tablespoons soy sauce
- 1 tablespoon olive oil
- 1 teaspoon garlic powder
- Salt and pepper to taste
Instructions
- Heat olive oil in a large pan over medium heat.
- Add broccoli and bell peppers. Stir-fry for about 5-7 minutes until they are tender but still crisp.
- Stir in the cooked brown rice and black olives.
- Add soy sauce, garlic powder, salt, and pepper. Mix well and cook for another 2-3 minutes.
- Remove from heat and let it cool slightly before packing into meal prep containers.
- Store in the fridge for up to 5 days. Enjoy your healthy lunches!
Protein-Packed Mason Jar Salads
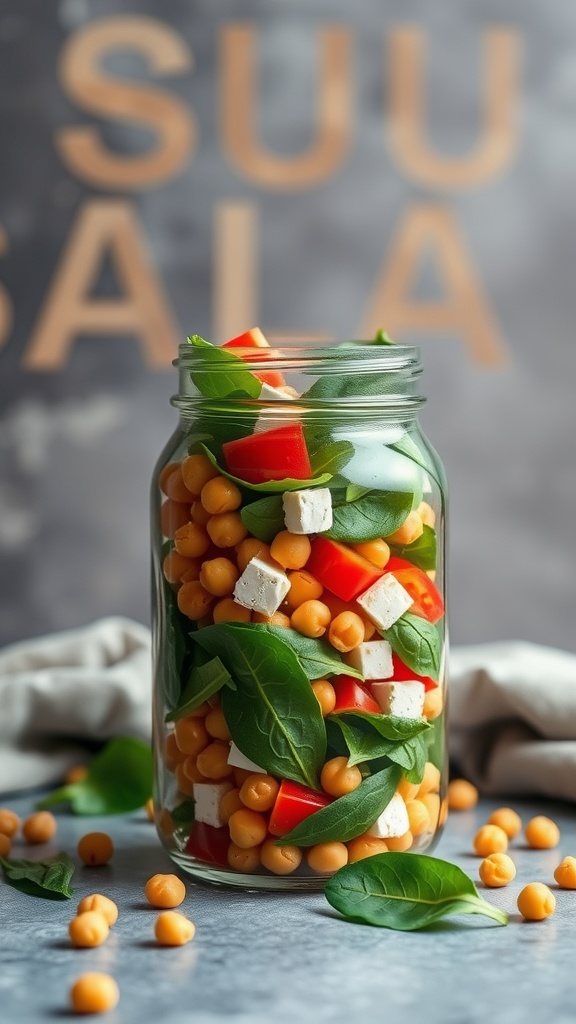
Mason jar salads are a fun and practical way to enjoy a healthy lunch at work. They are easy to prepare and can be customized to fit your taste. The image shows a vibrant salad layered in a jar, featuring chickpeas, fresh spinach, and colorful bell peppers. This not only looks appealing but also packs a nutritious punch.
The key to a great mason jar salad is the layering. Start with the heavier ingredients at the bottom, like chickpeas, to prevent them from getting soggy. Next, add your veggies, and finish with greens at the top. This keeps everything fresh until you’re ready to eat.
These salads are perfect for meal prep. You can make several jars at once and store them in the fridge for the week. Just grab one on your way out, and you have a healthy meal ready to go!
Ingredients
- 1 cup cooked chickpeas
- 2 cups fresh spinach
- 1 red bell pepper, diced
- 1/2 cup feta cheese, cubed
- 1/4 cup cherry tomatoes, halved
- 1/4 cup olive oil
- 2 tablespoons lemon juice
- Salt and pepper to taste
Instructions
- Layer the chickpeas at the bottom of the mason jar.
- Add the diced red bell pepper on top of the chickpeas.
- Next, add the feta cheese and cherry tomatoes.
- Pack the fresh spinach on top to keep it from wilting.
- In a small bowl, whisk together olive oil, lemon juice, salt, and pepper.
- When ready to eat, pour the dressing into the jar, shake it up, and enjoy your protein-packed salad!
Zesty Quinoa and Black Bean Salad
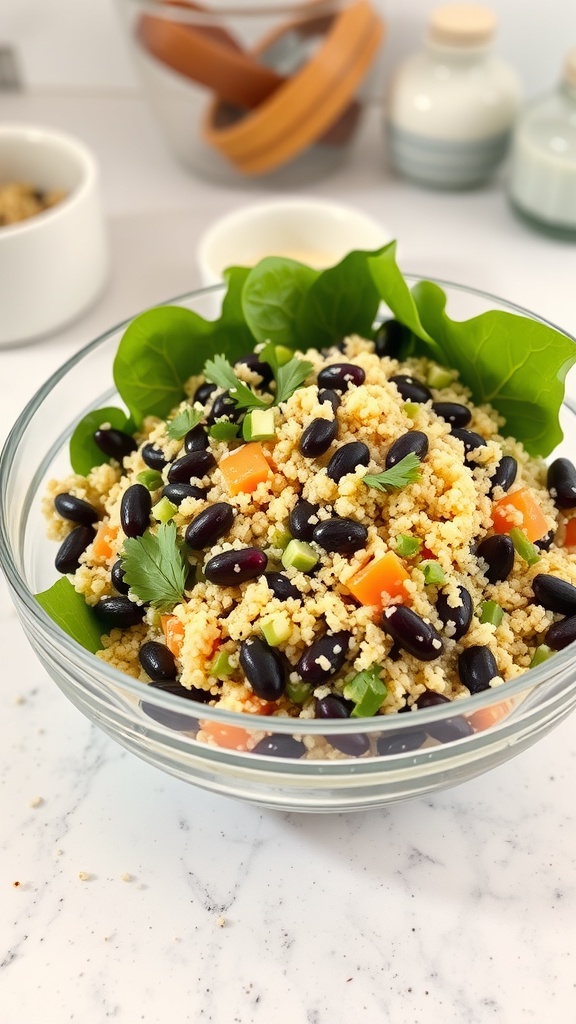
This Zesty Quinoa and Black Bean Salad is a colorful and nutritious option for your work lunch. Packed with protein and fiber, it keeps you full and energized throughout the day. The vibrant colors of the ingredients make it visually appealing, and the fresh flavors are sure to brighten your lunch hour.
The salad features fluffy quinoa, hearty black beans, and crisp veggies like bell peppers and green onions. A sprinkle of fresh cilantro adds a refreshing touch. This dish is not only easy to prepare but also perfect for meal prep. You can make a big batch and enjoy it all week long!
To make this salad, you’ll need a few simple ingredients. It’s a great way to use up any leftover veggies you have in your fridge. Just toss everything together, and you’re ready to go!
Ingredients
- 1 cup quinoa
- 2 cups water
- 1 can (15 oz) black beans, rinsed and drained
- 1 bell pepper, diced
- 1/2 cup green onions, chopped
- 1/4 cup fresh cilantro, chopped
- 1/4 cup olive oil
- 2 tablespoons lime juice
- 1 teaspoon cumin
- Salt and pepper to taste
Instructions
- Cook the Quinoa: Rinse the quinoa under cold water. In a saucepan, combine quinoa and water. Bring to a boil, then reduce heat to low, cover, and simmer for about 15 minutes or until water is absorbed. Fluff with a fork and let cool.
- Mix the Ingredients: In a large bowl, combine the cooled quinoa, black beans, diced bell pepper, green onions, and cilantro.
- Prepare the Dressing: In a small bowl, whisk together olive oil, lime juice, cumin, salt, and pepper.
- Toss Together: Pour the dressing over the salad and mix well to combine. Adjust seasoning if needed.
- Serve: Enjoy immediately or refrigerate for up to 3 days. This salad tastes even better after the flavors meld together!
Hearty Soup and Sandwich Combos

Nothing beats a warm bowl of soup paired with a delicious sandwich for lunch. This classic combo is not just comforting but also easy to prepare. Picture a rich tomato soup served in a vibrant bowl, alongside a perfectly toasted grilled cheese sandwich. The colors and textures make this meal visually appealing and satisfying.
Soup and sandwiches are versatile. You can mix and match flavors to suit your taste. For a hearty option, try a creamy tomato soup with a gooey cheese sandwich. The warmth of the soup complements the crunch of the sandwich, making every bite enjoyable.
Making this combo is simple. Start by preparing the soup, allowing it to simmer so the flavors meld together. While it cooks, you can whip up the sandwich. Grilling the bread until golden brown creates a delightful crunch that pairs perfectly with the smooth soup.
Ingredients
- 1 can (28 oz) crushed tomatoes
- 1 cup vegetable broth
- 1 small onion, chopped
- 2 cloves garlic, minced
- 1 teaspoon dried basil
- Salt and pepper to taste
- 4 slices of bread
- 4 slices of cheese (cheddar or your choice)
- Butter for grilling
Instructions
- Make the Soup: In a pot, sauté chopped onion and minced garlic until soft. Add crushed tomatoes, vegetable broth, and dried basil. Season with salt and pepper. Let it simmer for about 20 minutes.
- Prepare the Sandwich: While the soup is cooking, butter one side of each slice of bread. Place cheese between two slices, buttered side out.
- Grill the Sandwich: Heat a skillet over medium heat. Grill the sandwich until golden brown on both sides and the cheese is melted, about 3-4 minutes per side.
- Serve: Ladle the soup into bowls and serve with the grilled cheese on the side. Enjoy your hearty meal!
Vegetarian Buddha Bowls for Nutrients
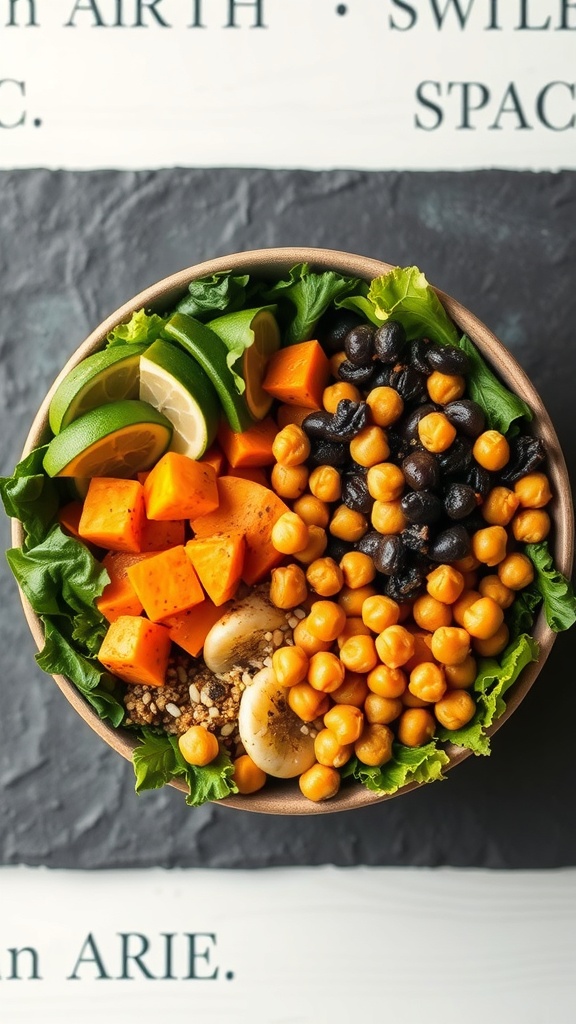
Buddha bowls are a great way to pack in nutrients while enjoying a colorful meal. This image showcases a vibrant bowl filled with fresh greens, roasted sweet potatoes, chickpeas, black beans, and a splash of lime. Each ingredient adds its own unique flavor and texture, making every bite a delight.
The combination of ingredients not only looks appealing but also offers a balanced mix of protein, fiber, and vitamins. The greens provide essential nutrients, while the beans and chickpeas contribute protein and healthy carbs. Sweet potatoes add a touch of sweetness and are rich in vitamins.
Making these bowls is simple and fun. You can customize them based on what you have on hand or your personal preferences. Just layer your favorite ingredients, and you’re good to go!
Ingredients
- 1 cup cooked quinoa
- 1 cup roasted sweet potatoes, diced
- 1 cup canned chickpeas, rinsed and drained
- 1 cup black beans, rinsed and drained
- 2 cups mixed greens
- 1 lime, cut into wedges
- Salt and pepper to taste
- Olive oil for drizzling
Instructions
- Prepare the Quinoa: Cook quinoa according to package instructions. Fluff with a fork and set aside.
- Roast the Sweet Potatoes: Preheat the oven to 400°F (200°C). Toss diced sweet potatoes with olive oil, salt, and pepper. Spread on a baking sheet and roast for about 25 minutes until tender.
- Assemble the Bowl: In a large bowl, layer the cooked quinoa, roasted sweet potatoes, chickpeas, black beans, and mixed greens.
- Garnish: Squeeze fresh lime juice over the top and drizzle with olive oil. Season with salt and pepper to taste.
- Serve: Enjoy your nutritious Buddha bowl right away or pack it for lunch!
Savory Egg Muffins for Breakfast

Start your workday with a burst of flavor and nutrition by preparing savory egg muffins. These little delights are not only easy to make but also packed with goodness. The image shows perfectly baked egg muffins, golden and fluffy, with vibrant green spinach peeking through. They are a fantastic grab-and-go option for busy mornings.
Egg muffins are versatile. You can customize them with your favorite ingredients. Spinach, cheese, and herbs are just a few options to consider. They store well in the fridge, making them a great choice for meal prep. Just pop one in the microwave, and you’re ready to enjoy a wholesome breakfast.
These muffins are also a hit for lunch or snacks. Their bite-sized nature makes them perfect for any time of the day. Plus, they are a great way to sneak in some veggies!
Ingredients
- 6 large eggs
- 1 cup fresh spinach, chopped
- 1/2 cup shredded cheese (cheddar or your choice)
- 1/4 cup milk
- 1/2 teaspoon salt
- 1/4 teaspoon black pepper
- 1/4 teaspoon garlic powder
- 1/4 teaspoon onion powder
Instructions
- Preheat your oven to 350°F (175°C) and grease a muffin tin.
- In a large bowl, whisk together the eggs, milk, salt, pepper, garlic powder, and onion powder until well combined.
- Add the chopped spinach and shredded cheese to the egg mixture. Stir until evenly mixed.
- Pour the mixture into the prepared muffin tin, filling each cup about 3/4 full.
- Bake for 18-20 minutes, or until the muffins are set and lightly golden on top.
- Let them cool for a few minutes before removing from the tin. Enjoy warm or store in the fridge for later!
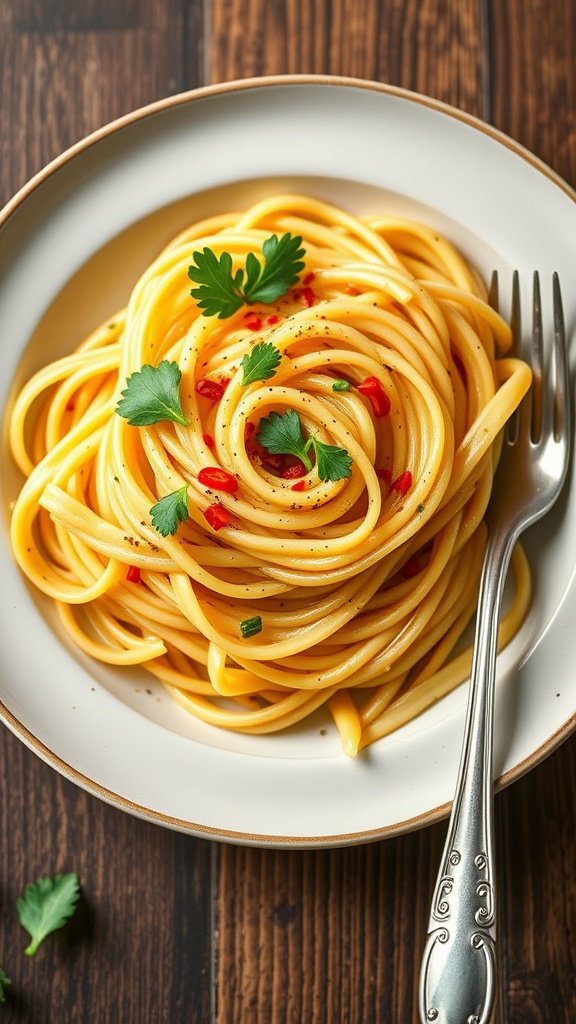
Mediterranean Pasta Salad for Flavor
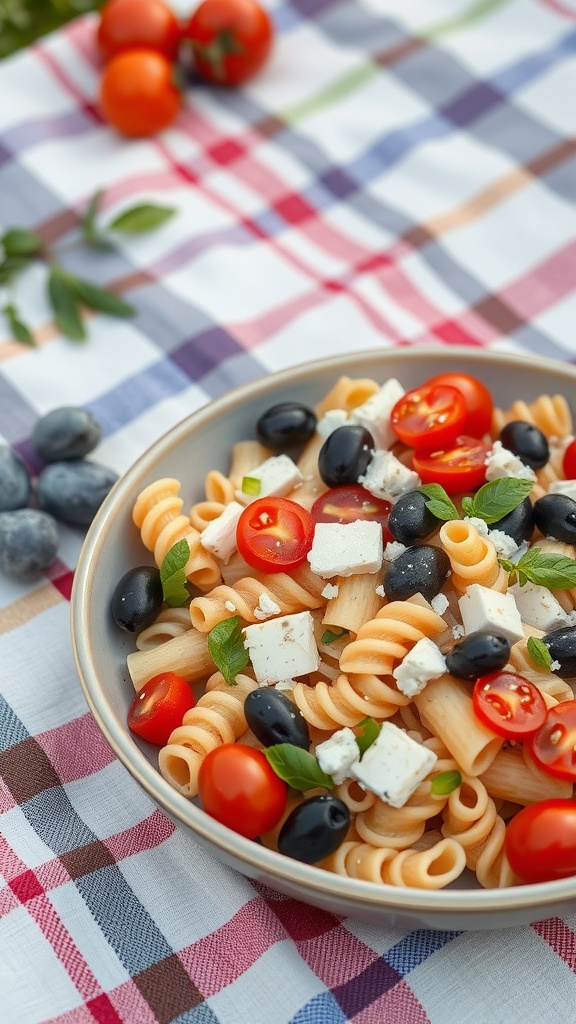
This Mediterranean pasta salad is a perfect choice for a work lunch. It’s colorful, fresh, and packed with flavor. The combination of ingredients makes it a delightful meal that can be prepared in advance. You can enjoy it cold or at room temperature, making it ideal for busy days.
The salad features spiral pasta, juicy cherry tomatoes, and briny olives. Crumbled feta cheese adds a creamy texture, while fresh herbs like basil or mint bring a burst of freshness. This dish is not only tasty but also nutritious, providing a good balance of carbs, protein, and healthy fats.
Making this salad is simple and quick. You can prepare it in about 30 minutes, and it keeps well in the fridge for several days. It’s a great option for meal prep, allowing you to grab a serving whenever you need a satisfying lunch.
Ingredients
- 2 cups spiral pasta
- 1 cup cherry tomatoes, halved
- 1 cup black olives, pitted and sliced
- 1 cup feta cheese, crumbled
- 1/4 cup fresh basil or mint, chopped
- 1/4 cup olive oil
- 2 tablespoons red wine vinegar
- 1 teaspoon garlic powder
- Salt and pepper to taste
Instructions
- Cook the Pasta: Boil water in a large pot. Add the spiral pasta and cook according to package instructions until al dente. Drain and rinse under cold water to cool.
- Mix the Ingredients: In a large bowl, combine the cooked pasta, cherry tomatoes, black olives, feta cheese, and fresh herbs.
- Prepare the Dressing: In a small bowl, whisk together olive oil, red wine vinegar, garlic powder, salt, and pepper.
- Toss Everything Together: Pour the dressing over the pasta salad and mix well to combine all the flavors.
- Chill and Serve: Let the salad sit in the fridge for at least 30 minutes before serving. This allows the flavors to meld together.
Curry Lentil Soup for Comfort
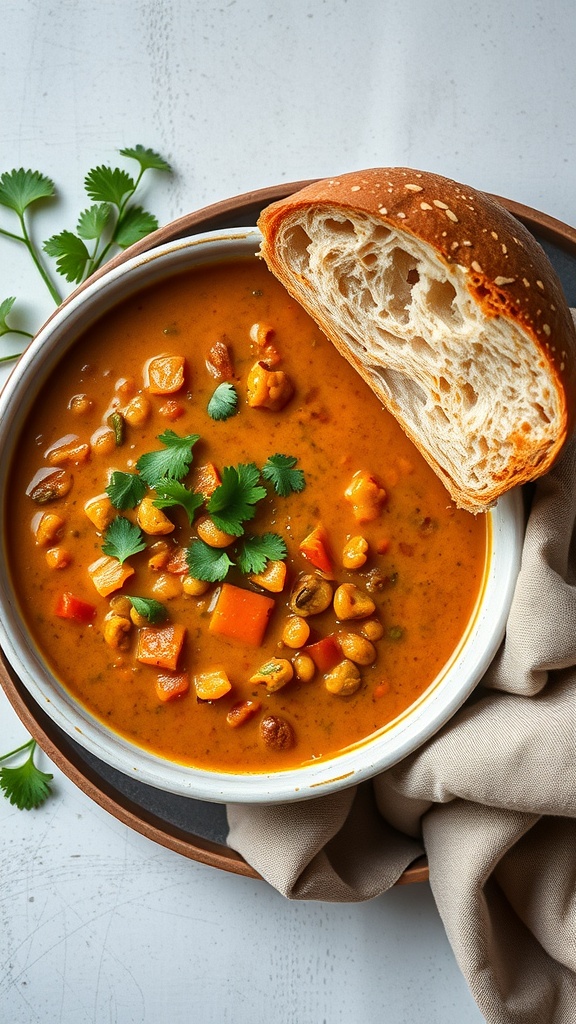
Curry lentil soup is a warm hug in a bowl. Its rich, vibrant colors and hearty texture make it a perfect meal for any work lunch. The soup is packed with protein from lentils and a variety of veggies, making it both filling and nutritious. The hint of curry adds a delightful twist, elevating the flavors and making each spoonful comforting.
This soup is not just easy to prepare, but it also stores well, making it ideal for meal prep. You can whip up a big batch on the weekend and enjoy it throughout the week. Pair it with a crusty piece of bread, and you have a satisfying meal that will keep you energized.
Let’s get into the ingredients and steps to make this delicious curry lentil soup!
Ingredients
- 1 tablespoon olive oil
- 1 onion, chopped
- 2 carrots, diced
- 2 celery stalks, diced
- 3 cloves garlic, minced
- 1 tablespoon curry powder
- 1 teaspoon ground cumin
- 1 cup red lentils, rinsed
- 6 cups vegetable broth
- 1 can (14 oz) coconut milk
- 1 cup diced tomatoes (canned or fresh)
- Salt and pepper to taste
- Fresh cilantro for garnish
Instructions
- Heat olive oil in a large pot over medium heat. Add chopped onion, carrots, and celery. Sauté for about 5 minutes until softened.
- Add minced garlic, curry powder, and ground cumin. Stir for another minute until fragrant.
- Stir in the rinsed lentils, vegetable broth, and diced tomatoes. Bring to a boil, then reduce heat and simmer for about 25 minutes, or until lentils are tender.
- Pour in the coconut milk and stir well. Let it simmer for an additional 5 minutes. Season with salt and pepper to taste.
- Serve hot, garnished with fresh cilantro and enjoy with your favorite bread!
Stuffed Peppers for a Filling Meal
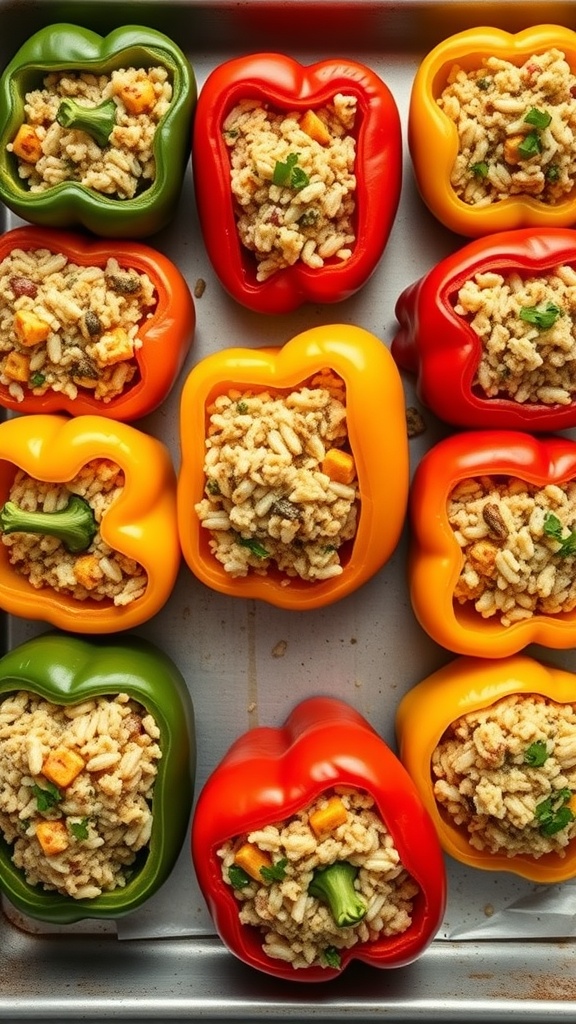
Stuffed peppers are a fantastic option for a work lunch meal prep. They are colorful, nutritious, and easy to make. The image shows a vibrant array of bell peppers filled with a delicious mixture. Each pepper is packed with rice, veggies, and seasonings, making them both filling and satisfying.
These stuffed peppers are not just visually appealing; they are also versatile. You can customize the filling based on your preferences. Whether you prefer meat, beans, or a mix of grains, the choice is yours. Plus, they hold up well in the fridge, making them perfect for meal prep.
To make these stuffed peppers, start by cooking your rice or quinoa. While that’s cooking, prepare your peppers by cutting the tops off and removing the seeds. Mix the cooked rice with your choice of protein, diced vegetables, and seasonings. Stuff each pepper generously and place them in a baking dish.
After baking, you’ll have a hearty meal ready to go for the week. Just reheat and enjoy during your lunch break!
Ingredients
- 4 large bell peppers (any color)
- 1 cup cooked rice or quinoa
- 1 cup black beans, drained and rinsed
- 1 cup corn (fresh or frozen)
- 1 cup diced tomatoes
- 1 teaspoon cumin
- 1 teaspoon chili powder
- Salt and pepper to taste
- 1 cup shredded cheese (optional)
- Fresh cilantro for garnish
Instructions
- Preheat your oven to 375°F (190°C).
- Cook the rice or quinoa according to package instructions.
- While the rice is cooking, prepare the bell peppers by cutting off the tops and removing the seeds.
- In a large bowl, combine the cooked rice, black beans, corn, diced tomatoes, cumin, chili powder, salt, and pepper. Mix well.
- Stuff each pepper with the rice mixture and place them upright in a baking dish.
- If using cheese, sprinkle it on top of the stuffed peppers.
- Bake for 25-30 minutes until the peppers are tender.
- Garnish with fresh cilantro before serving.
Fruit and Nut Energy Bites for Snacking
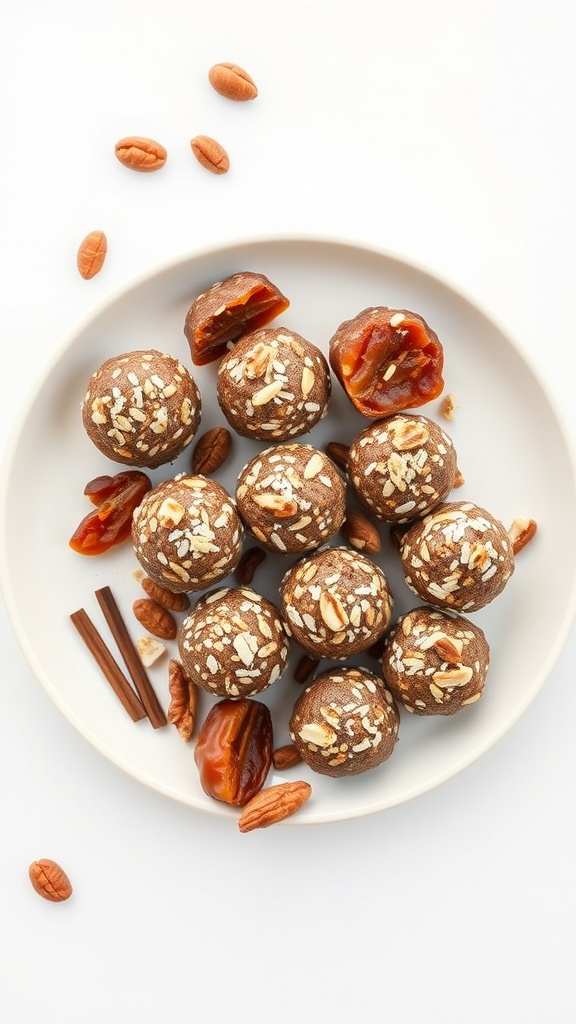
Fruit and nut energy bites are a fantastic choice for a quick snack during your workday. They are easy to make and packed with nutrients. These little bites are perfect for keeping your energy levels up without reaching for sugary snacks.
In the image, you can see a delightful assortment of energy bites. They are round, coated with oats, and have a rich, nutty appearance. The combination of nuts and dried fruits makes them not only tasty but also satisfying. You can grab a few of these bites to fuel your afternoon meetings or enjoy them as a post-lunch treat.
Making these energy bites is simple. You can customize them with your favorite nuts and dried fruits. They are great for meal prep, allowing you to have healthy snacks ready to go for the week.
Ingredients
- 1 cup pitted dates
- 1 cup mixed nuts (like almonds and pecans)
- 1/2 cup rolled oats
- 1/4 cup nut butter (peanut or almond)
- 1 teaspoon vanilla extract
- 1/4 teaspoon cinnamon
- Pinch of salt
Instructions
- Blend the Ingredients: In a food processor, combine the dates, mixed nuts, oats, nut butter, vanilla extract, cinnamon, and salt. Pulse until the mixture is well combined and sticky.
- Form the Bites: Scoop out small portions of the mixture and roll them into balls, about 1 inch in diameter.
- Chill: Place the energy bites on a baking sheet and refrigerate for at least 30 minutes to firm up.
- Store: Keep them in an airtight container in the fridge for up to a week. Enjoy them whenever you need a quick energy boost!
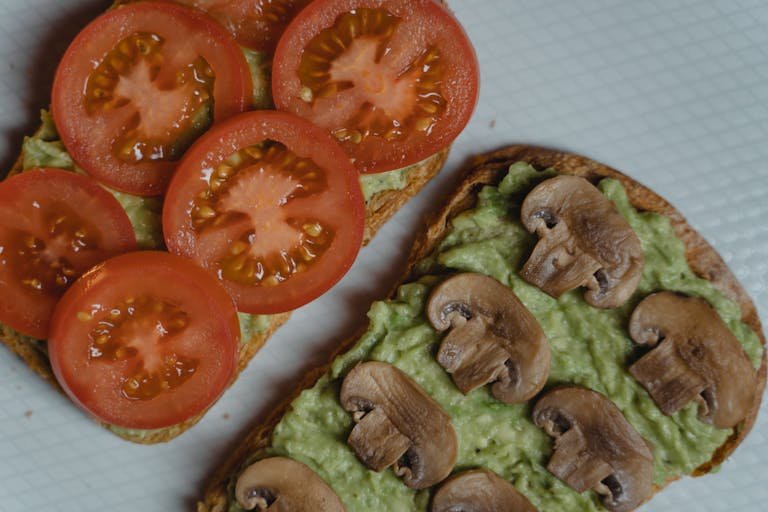
Chickpea Salad for a Protein Boost
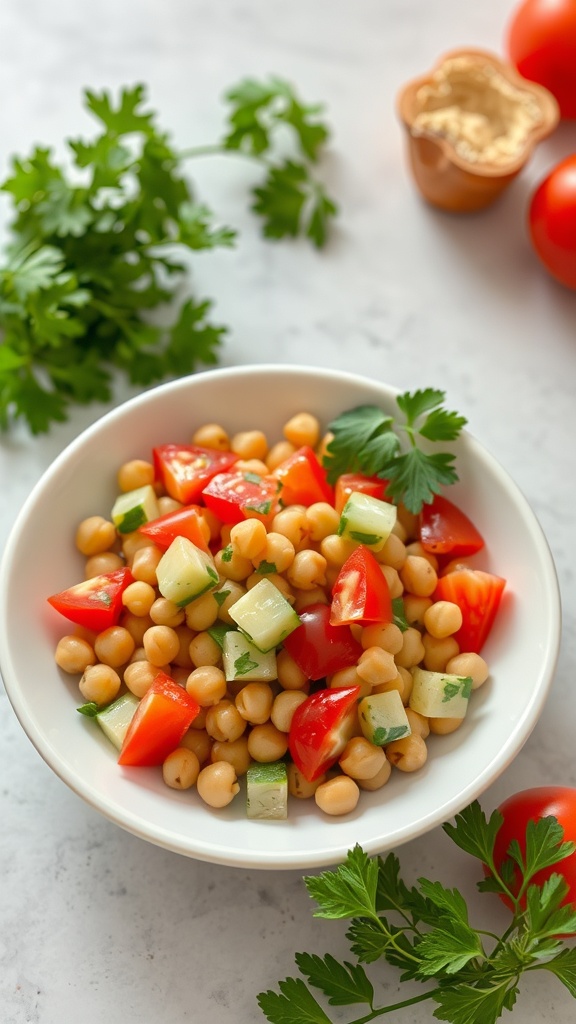
Chickpea salad is a fantastic option for a work lunch. It’s light, refreshing, and packed with protein. The bright colors of the tomatoes and cucumbers make it visually appealing, while the chickpeas provide a hearty base. This dish is not only nutritious but also easy to prepare ahead of time.
To make this salad, you’ll need some basic ingredients. Fresh tomatoes and cucumbers add crunch, while parsley brings a fresh flavor. Toss everything together with a simple dressing for a delicious meal that keeps you energized throughout the day.
Ingredients
- 1 can (15 oz) chickpeas, drained and rinsed
- 1 cup cherry tomatoes, halved
- 1 cucumber, diced
- 1/4 cup fresh parsley, chopped
- 2 tablespoons olive oil
- 1 tablespoon lemon juice
- Salt and pepper to taste
Instructions
- In a large bowl, combine the chickpeas, cherry tomatoes, cucumber, and parsley.
- In a small bowl, whisk together the olive oil, lemon juice, salt, and pepper.
- Pour the dressing over the salad and toss gently to combine.
- Let it sit for about 10 minutes to allow the flavors to meld.
- Serve chilled or at room temperature.
Homemade Sushi Rolls for Fun Lunches
Homemade sushi rolls are a fantastic way to spice up your work lunches. They’re not just tasty; they’re also fun to make and customize. You can mix and match ingredients to suit your taste. Plus, they’re easy to pack and eat on the go!
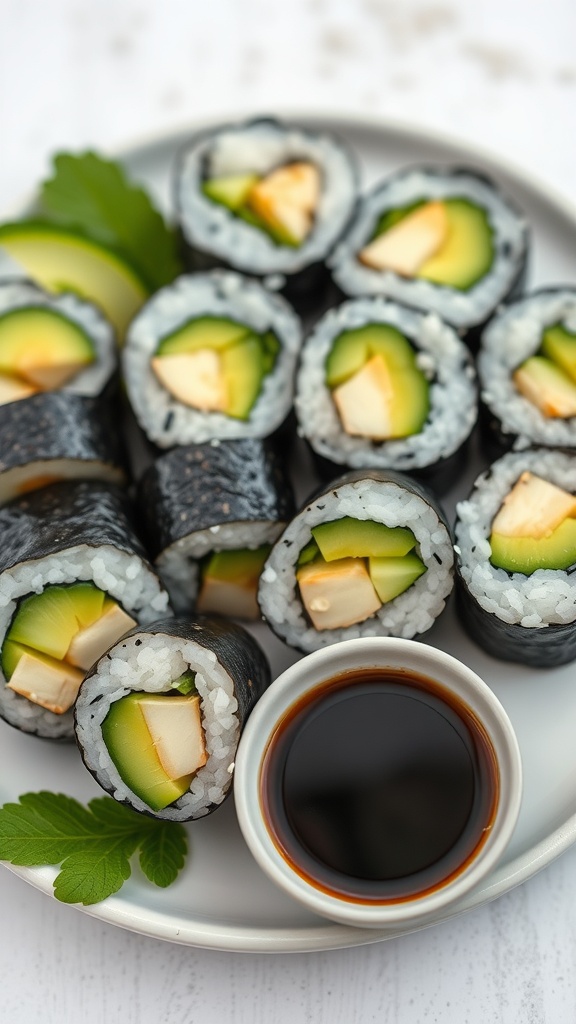
In the image, you can see a beautiful platter of sushi rolls. Each roll is neatly sliced, revealing a colorful filling of cucumber and tofu. The dark seaweed wrap contrasts nicely with the white rice and vibrant green cucumber. A small bowl of soy sauce sits alongside, ready for dipping. This setup makes for a delightful lunch that’s both satisfying and healthy.
Making sushi at home allows you to control the ingredients, ensuring you have a fresh and delicious meal. It’s a great way to use up leftover veggies or proteins. So, let’s get rolling!
Ingredients
- 2 cups sushi rice
- 2 1/2 cups water
- 1/4 cup rice vinegar
- 1 tablespoon sugar
- 1/2 teaspoon salt
- 4 sheets nori (seaweed)
- 1 cucumber, julienned
- 1 block of firm tofu, cut into strips
- Soy sauce for dipping
Instructions
- Rinse the Sushi Rice: Place the sushi rice in a fine mesh strainer and rinse under cold water until the water runs clear.
- Cook the Rice: In a pot, combine the rinsed rice and water. Bring to a boil, then reduce the heat to low, cover, and simmer for 20 minutes. Remove from heat and let it sit for 10 minutes.
- Season the Rice: In a small bowl, mix rice vinegar, sugar, and salt until dissolved. Gently fold this mixture into the cooked rice. Allow it to cool.
- Prepare the Rolls: Lay a sheet of nori on a bamboo mat. Spread a thin layer of sushi rice over the nori, leaving a small border at the top. Place cucumber and tofu strips in the center.
- Roll it Up: Using the bamboo mat, roll the sushi tightly away from you. Seal the edge with a bit of water.
- Slice and Serve: Use a sharp knife to slice the roll into bite-sized pieces. Serve with soy sauce for dipping.