15 Creative Packable Lunch Ideas for On-the-Go Meal Prep
Finding the perfect packable lunch ideas can make your day a whole lot easier and tastier! Whether you’re heading to work, school, or on a day out, having a variety of nutritious and easy-to-carry meals will keep you energized and satisfied. Below are some fun and simple options to try out!
Chickpea Salad with Avocado
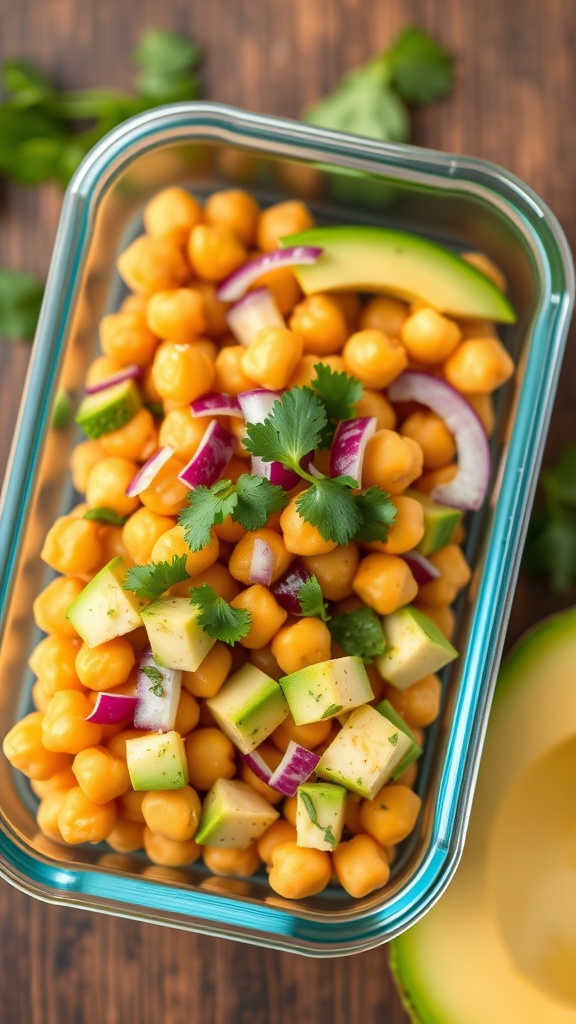
This Chickpea Salad with Avocado is a colorful and nutritious option for a packed lunch. The vibrant yellow chickpeas mix beautifully with crunchy green apples and red onions, creating a delightful contrast. Fresh cilantro adds a burst of flavor, making each bite refreshing and satisfying.
Chickpeas are not only tasty but also packed with protein and fiber, keeping you full throughout the day. The creamy avocado provides healthy fats, making this salad a balanced meal. Plus, it’s super easy to prepare and can be made ahead of time!
To make this salad, simply combine chickpeas, diced apples, red onions, and chopped cilantro in a bowl. Drizzle with a bit of olive oil and lemon juice for a zesty finish. This salad is perfect for meal prep and can be stored in the fridge for a few days.
Ingredients
- 1 can chickpeas, drained and rinsed
- 1 avocado, diced
- 1 green apple, diced
- 1/2 red onion, finely chopped
- 1/4 cup fresh cilantro, chopped
- 2 tablespoons olive oil
- 1 tablespoon lemon juice
- Salt and pepper to taste
Instructions
- In a large bowl, combine the chickpeas, diced avocado, diced apple, red onion, and cilantro.
- In a small bowl, whisk together the olive oil, lemon juice, salt, and pepper.
- Pour the dressing over the salad and gently toss to combine.
- Serve immediately or store in the fridge for up to three days.
Turkey and Hummus Wrap
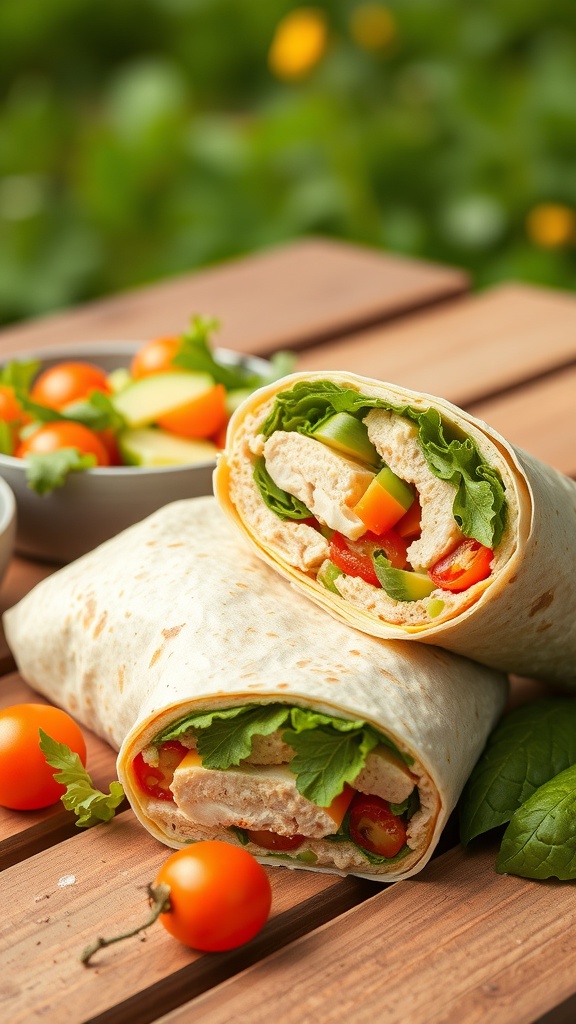
The Turkey and Hummus Wrap is a fantastic option for a quick and healthy lunch. It’s colorful, fresh, and packed with flavor. The wrap features slices of turkey, creamy hummus, and a variety of crunchy veggies, all rolled up in a soft tortilla. This meal is not only easy to prepare but also perfect for on-the-go eating.
In the image, you can see a delicious wrap cut in half, showcasing its vibrant filling. The greens, reds, and yellows of the vegetables make it visually appealing. Alongside the wrap, there’s a bowl of fresh salad, adding even more color and nutrition to the meal.
This wrap is versatile. You can customize it with your favorite ingredients. Add some cheese, swap turkey for chicken, or throw in some avocado for extra creaminess. It’s all about what you love!
Ingredients
- 1 large tortilla
- 4 ounces sliced turkey breast
- 2 tablespoons hummus
- 1/4 cup spinach or lettuce
- 1/4 cup diced bell peppers (any color)
- 1/4 cup diced cucumbers
- 1/4 cup shredded carrots
- Salt and pepper to taste
Instructions
- Spread hummus evenly over the tortilla.
- Layer the turkey slices on top of the hummus.
- Add the spinach, bell peppers, cucumbers, and carrots.
- Season with salt and pepper.
- Roll the tortilla tightly, starting from one end.
- Slice the wrap in half and enjoy!
Pasta Salad with Pesto
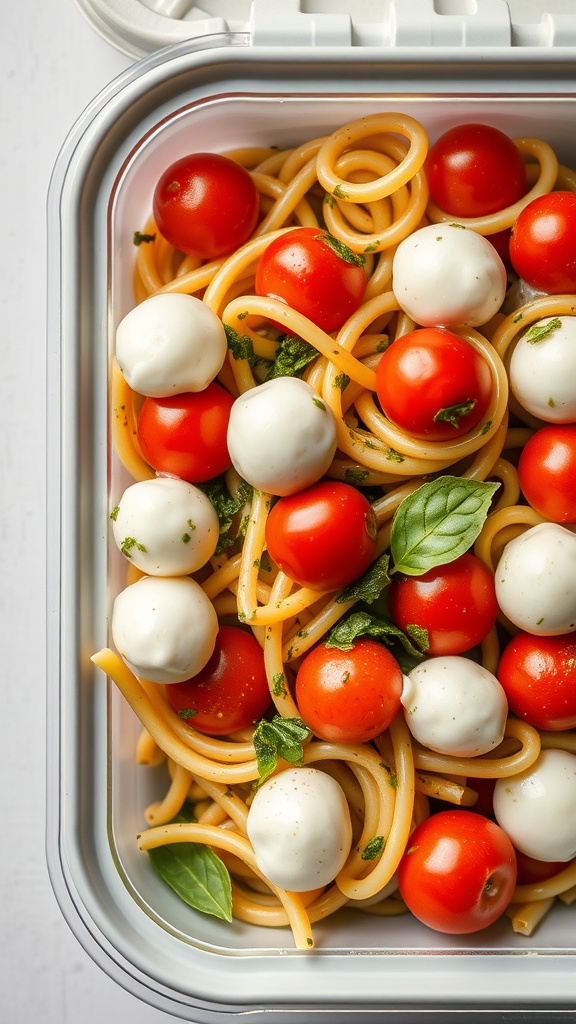
Pasta salad with pesto is a fantastic choice for a packable lunch. It’s colorful, fresh, and full of flavor. The combination of pasta, cherry tomatoes, and mozzarella balls makes it visually appealing and satisfying. Plus, it’s easy to prepare and can be enjoyed cold or at room temperature.
This dish is perfect for picnics, work lunches, or even a quick meal at home. The pesto adds a rich, herby taste that pairs wonderfully with the sweet tomatoes and creamy mozzarella. You can also customize it by adding your favorite veggies or proteins.
Here’s how to make your own pasta salad with pesto:
Ingredients
- 8 oz spaghetti or your choice of pasta
- 1 cup cherry tomatoes, halved
- 1 cup mozzarella balls
- 1/4 cup pesto sauce
- 1/4 cup fresh basil, chopped
- Salt and pepper to taste
Instructions
- Cook the Pasta: Boil water in a large pot. Add pasta and cook according to package instructions. Drain and let it cool.
- Mix Ingredients: In a large bowl, combine the cooled pasta, cherry tomatoes, mozzarella balls, and pesto sauce. Toss gently to coat everything evenly.
- Add Fresh Herbs: Stir in the chopped basil and season with salt and pepper to taste.
- Pack and Serve: Transfer the pasta salad to a container. It can be served immediately or stored in the fridge for later.
Mini Quiches with Spinach and Cheese
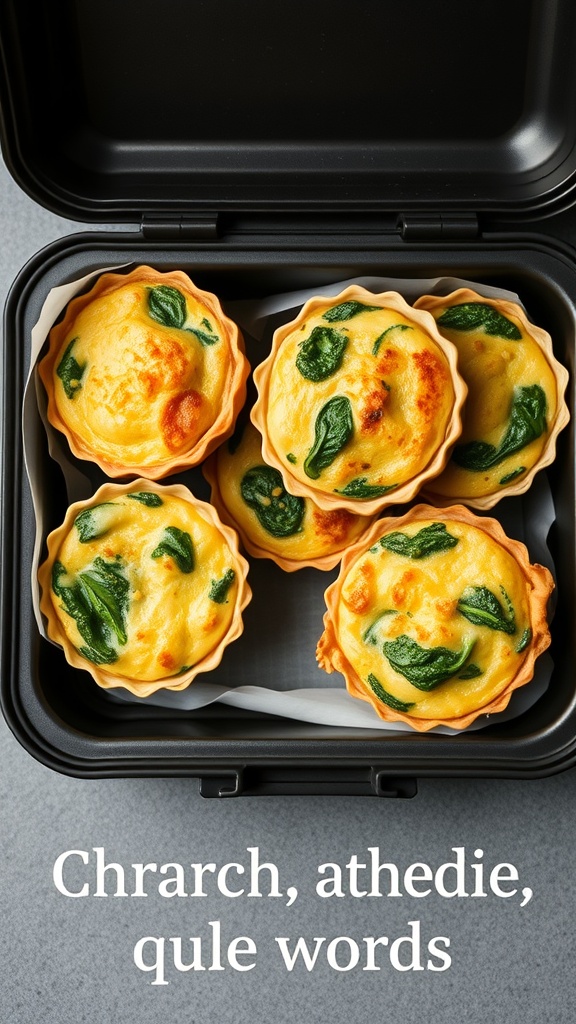
Mini quiches are a fantastic option for a packable lunch. They are easy to make and can be customized with your favorite ingredients. The image shows delightful mini quiches filled with vibrant spinach and melted cheese, all nestled in a golden crust. These little bites are not just tasty; they are also nutritious, making them a perfect choice for a midday meal.
These quiches are versatile. You can enjoy them warm or cold, which makes them ideal for lunchboxes or picnics. Plus, they are great for using up leftover vegetables or cheese you have on hand. Just pop them in a container, and you’re ready to go!
Ingredients
- 1 cup fresh spinach, chopped
- 1 cup shredded cheese (cheddar or your choice)
- 4 large eggs
- 1/2 cup milk
- 1/2 teaspoon salt
- 1/4 teaspoon black pepper
- 1 package pre-made pastry shells or phyllo dough
Instructions
- Preheat your oven to 375°F (190°C).
- In a bowl, whisk together the eggs, milk, salt, and pepper until well combined.
- Stir in the chopped spinach and shredded cheese.
- Place the pastry shells in a muffin tin or on a baking sheet.
- Pour the egg mixture into each shell, filling them about 3/4 full.
- Bake for 20-25 minutes, or until the quiches are set and golden on top.
- Let them cool slightly before removing from the tin. Enjoy warm or store in a lunchbox!
Savory Oatmeal Bowl
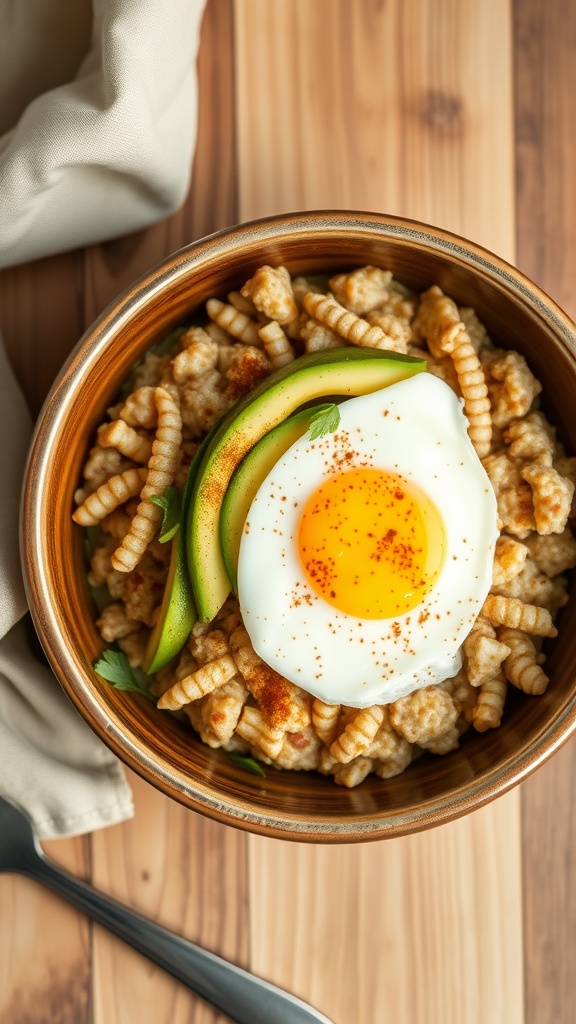
Looking for a tasty and filling lunch option? A savory oatmeal bowl is a fantastic choice! This dish combines the heartiness of oatmeal with fresh toppings, making it perfect for a quick meal on the go. The image shows a beautiful bowl filled with creamy oatmeal, topped with a perfectly cooked egg, fresh avocado slices, and a sprinkle of spices. It’s not just visually appealing but also packed with nutrients.
To make this savory oatmeal bowl, you can start with basic ingredients like rolled oats, water or broth, and your favorite seasonings. The key is to cook the oats until they are creamy and then layer on your toppings. The egg adds protein, while the avocado provides healthy fats. Feel free to mix in vegetables or herbs to suit your taste!
Ingredients
- 1 cup rolled oats
- 2 cups water or vegetable broth
- 1 large egg
- 1/2 avocado, sliced
- Salt and pepper to taste
- 1/4 teaspoon paprika or chili powder
- Fresh herbs (like cilantro or parsley) for garnish
Instructions
- Cook the Oats: In a pot, bring the water or broth to a boil. Add the rolled oats and a pinch of salt. Reduce the heat and simmer for about 5 minutes, stirring occasionally until creamy.
- Prepare the Egg: While the oats are cooking, poach or fry the egg to your liking.
- Assemble the Bowl: Once the oats are ready, transfer them to a bowl. Top with the cooked egg, avocado slices, and sprinkle with paprika or chili powder.
- Garnish: Add fresh herbs on top for an extra burst of flavor. Enjoy your savory oatmeal bowl!
Fruit and Yogurt Parfait
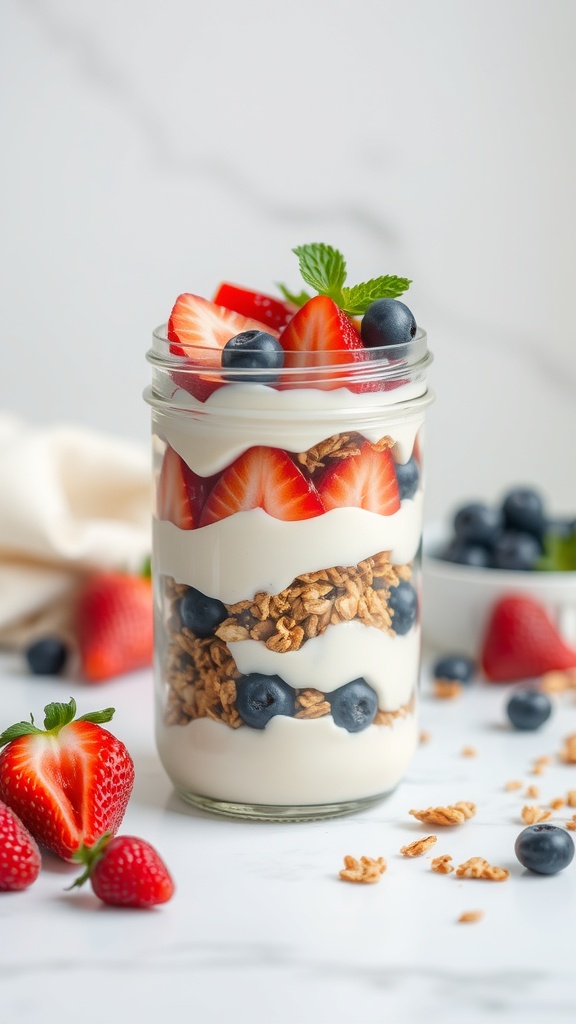
A fruit and yogurt parfait is a delightful and nutritious option for a packable lunch. This layered treat is not only visually appealing but also packed with flavor and texture. You can see the vibrant colors of fresh strawberries and blueberries, which add a sweet and tangy taste to creamy yogurt. The crunchy granola in between layers provides a satisfying crunch, making each bite enjoyable.
This parfait is perfect for busy days. You can prepare it in advance and store it in a jar, making it easy to grab and go. Plus, it’s a great way to incorporate fruits into your diet while enjoying a delicious snack or meal.
To make your own fruit and yogurt parfait, gather your favorite fruits, yogurt, and granola. You can customize it to your taste by using different fruits or yogurt flavors. It’s a simple yet satisfying choice that can brighten up your lunch routine!
Ingredients
- 2 cups yogurt (plain or flavored)
- 1 cup granola
- 1 cup strawberries, sliced
- 1 cup blueberries
- Fresh mint leaves for garnish (optional)
Instructions
- Start by choosing a clear jar or glass for layering.
- Add a layer of yogurt at the bottom of the jar.
- Next, add a layer of granola over the yogurt.
- Then, add a layer of sliced strawberries and blueberries.
- Repeat the layers until the jar is filled, finishing with a layer of yogurt and a sprinkle of granola on top.
- Garnish with fresh mint leaves if desired.
- Cover the jar and refrigerate until ready to enjoy.
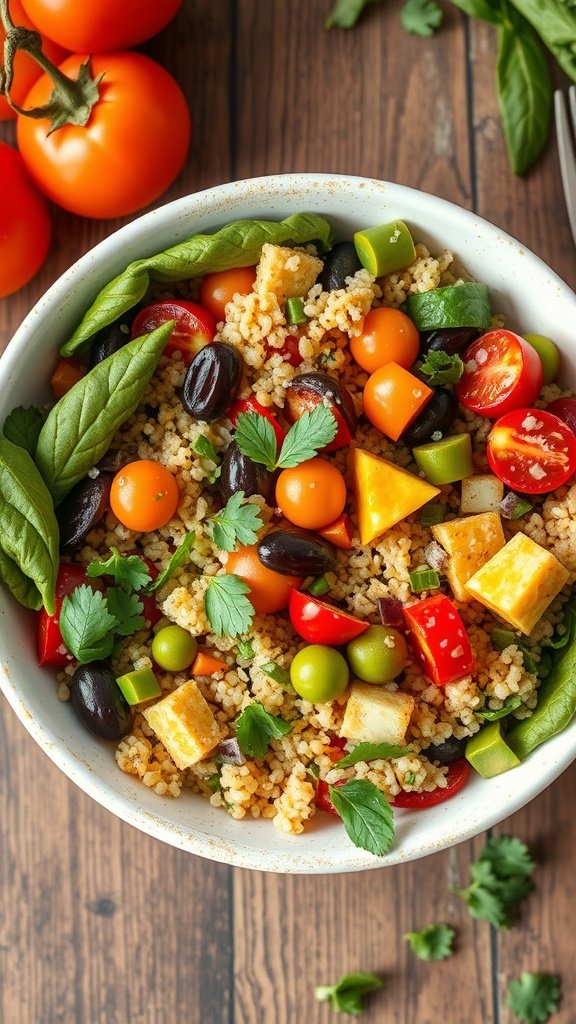
Mediterranean Quinoa Salad
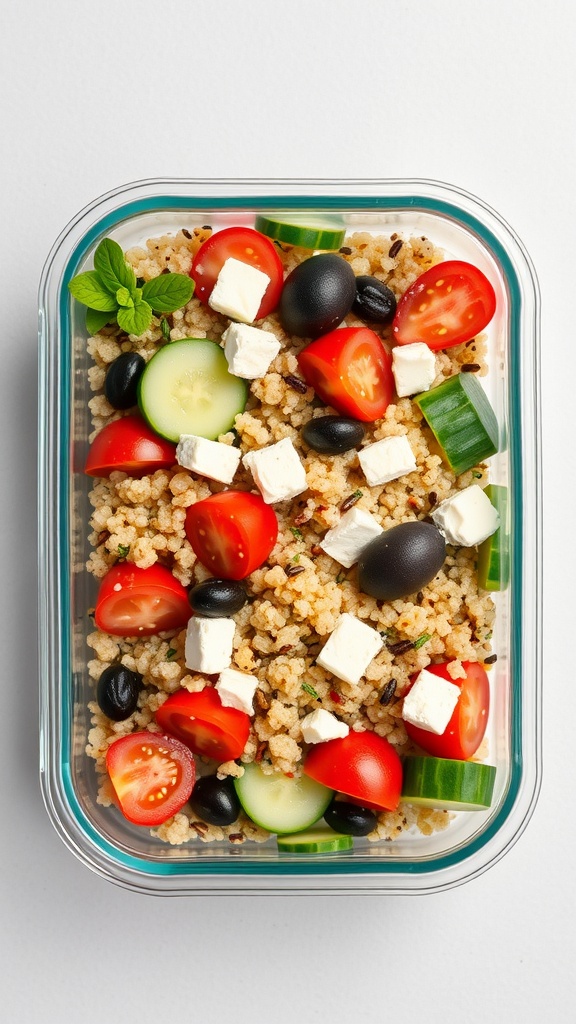
This Mediterranean Quinoa Salad is a perfect choice for a packable lunch. It’s colorful, nutritious, and full of flavor. The combination of quinoa, fresh vegetables, and feta cheese makes it satisfying and refreshing. Plus, it’s easy to prepare and store in a container, making it ideal for busy days.
The salad features vibrant cherry tomatoes, crunchy cucumbers, and briny olives, all mixed with fluffy quinoa. The feta adds a creamy texture that complements the crisp veggies. You can enjoy it cold or at room temperature, which is great for lunchboxes or picnics.
To make this salad, simply cook the quinoa and let it cool. Then, chop your veggies and mix everything together with a drizzle of olive oil and a splash of lemon juice. It’s that simple! This dish is not just tasty; it’s also packed with protein and fiber, keeping you full and energized.
Ingredients
- 1 cup quinoa
- 2 cups water
- 1 cup cherry tomatoes, halved
- 1 cucumber, diced
- 1/2 cup black olives, pitted and sliced
- 1/2 cup feta cheese, cubed
- 2 tablespoons olive oil
- 1 tablespoon lemon juice
- Salt and pepper to taste
Instructions
- Rinse the quinoa under cold water. In a pot, combine quinoa and water. Bring to a boil, then reduce heat to low. Cover and simmer for about 15 minutes or until water is absorbed.
- Remove from heat and let it sit covered for 5 minutes. Fluff with a fork and let it cool.
- In a large bowl, combine the cooled quinoa, cherry tomatoes, cucumber, olives, and feta cheese.
- Drizzle with olive oil and lemon juice. Season with salt and pepper. Toss gently to combine.
- Store in an airtight container in the fridge until ready to serve.
Veggie Sushi Rolls

Veggie sushi rolls are a fun and healthy option for a packable lunch. They are colorful, tasty, and easy to make. You can customize them with your favorite vegetables, making them a great way to use up what you have on hand. The image shows beautifully rolled sushi, filled with fresh veggies like carrots, cucumbers, and leafy greens, all wrapped in seaweed. They are not just visually appealing but also packed with nutrients.
Making veggie sushi rolls is simple. You just need sushi rice, nori sheets, and your choice of fresh vegetables. These rolls are perfect for lunchboxes or picnics. Plus, they can be enjoyed with a side of soy sauce or your favorite dipping sauce.
Ingredients
- 1 cup sushi rice
- 1 1/4 cups water
- 3 tablespoons rice vinegar
- 1 tablespoon sugar
- 1/2 teaspoon salt
- 4 sheets nori (seaweed)
- 1 small cucumber, julienned
- 1 carrot, julienned
- 1 bell pepper, thinly sliced
- 1 cup spinach or lettuce leaves
- Soy sauce for serving
Instructions
- Cook the Rice: Rinse the sushi rice under cold water until the water runs clear. Combine the rice and water in a pot and bring to a boil. Reduce heat, cover, and simmer for 20 minutes. Remove from heat and let it sit for 10 minutes.
- Season the Rice: In a small bowl, mix rice vinegar, sugar, and salt until dissolved. Gently fold this mixture into the cooked rice. Allow it to cool.
- Prepare the Rolls: Place a sheet of nori on a bamboo mat. Spread a thin layer of sushi rice over the nori, leaving a 1-inch border at the top. Layer your veggies on top of the rice.
- Roll It Up: Starting from the bottom, roll the sushi tightly away from you. Use the bamboo mat to help shape it. Seal the edge with a bit of water.
- Slice and Serve: Use a sharp knife to slice the roll into bite-sized pieces. Serve with soy sauce for dipping.
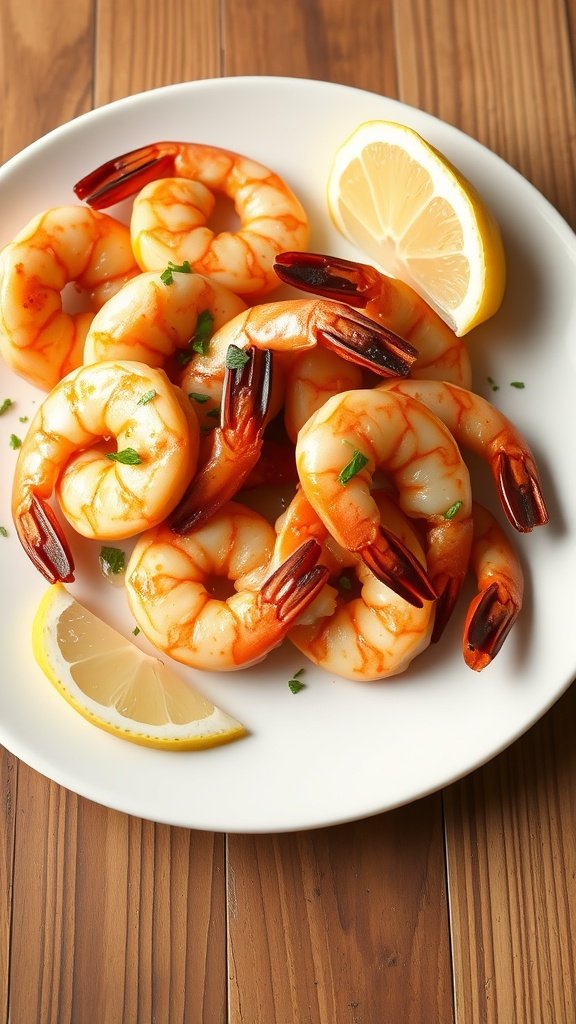
Tuna Salad Lettuce Wraps
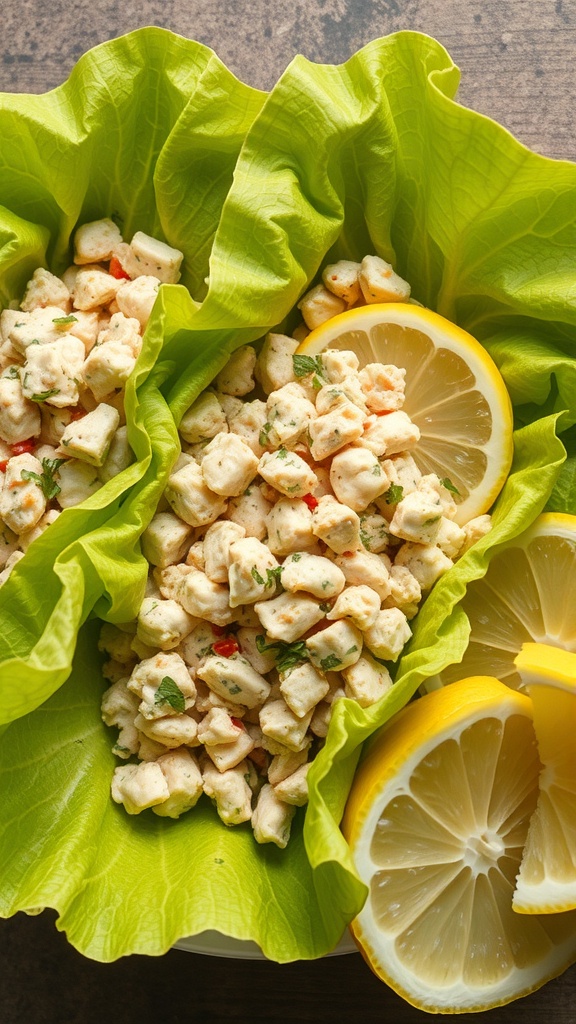
Tuna salad lettuce wraps are a fresh and fun way to enjoy a classic dish. The image showcases vibrant green lettuce leaves filled with a creamy tuna salad, making it a perfect low-carb option. The bright lemon slices add a zesty touch, inviting you to dig in.
This meal is not only tasty but also easy to prepare. You can whip it up in no time, making it ideal for busy days. The crunchy lettuce provides a satisfying texture, while the tuna salad is packed with protein, keeping you full and energized.
Let’s get into the details of making these delicious wraps!
Ingredients
- 1 can of tuna, drained
- 1/4 cup mayonnaise
- 1 tablespoon Dijon mustard
- 1/4 cup diced celery
- 1/4 cup diced red bell pepper
- 1 tablespoon chopped fresh parsley
- Salt and pepper to taste
- 4 large lettuce leaves (like romaine or butter lettuce)
- Lemon wedges for serving
Instructions
- Mix the Tuna: In a bowl, combine the drained tuna, mayonnaise, Dijon mustard, diced celery, diced red bell pepper, and chopped parsley. Stir until well mixed. Season with salt and pepper to taste.
- Prepare the Lettuce: Carefully wash and dry the lettuce leaves. Choose the largest leaves to hold the filling.
- Assemble the Wraps: Spoon the tuna salad mixture into each lettuce leaf, filling them generously.
- Serve: Arrange the wraps on a plate and serve with lemon wedges on the side for a fresh squeeze of juice.
Caprese Skewers
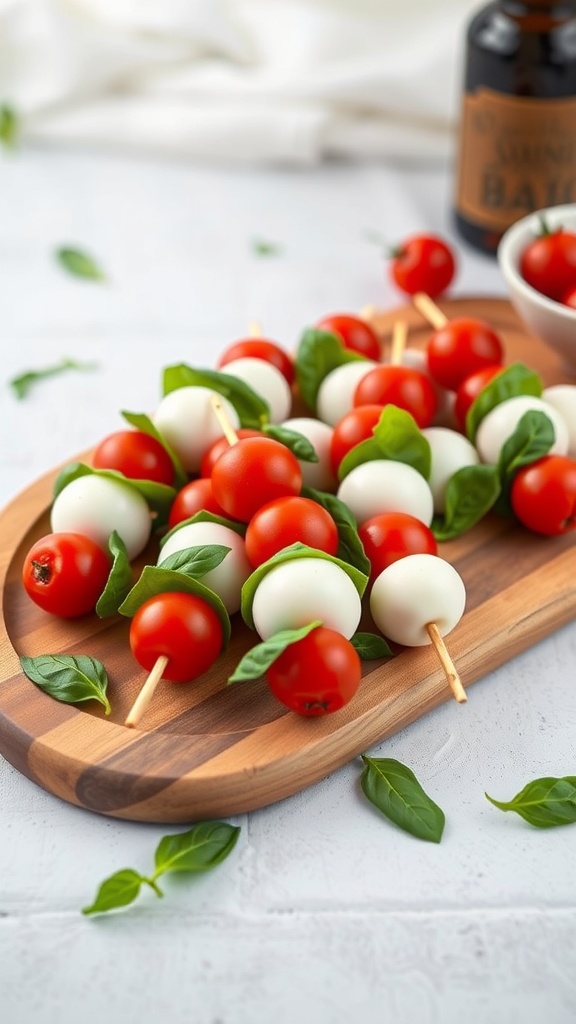
Caprese skewers are a simple yet delightful option for a packed lunch. They combine fresh ingredients that are both tasty and visually appealing. The vibrant red cherry tomatoes, creamy mozzarella balls, and bright green basil leaves create a colorful presentation that’s sure to impress.
These skewers are not only easy to make, but they also travel well, making them perfect for picnics or lunchboxes. Just grab some wooden skewers, and you’re ready to assemble. You can drizzle them with balsamic glaze for an extra touch of flavor. They’re a great way to enjoy the classic Caprese salad in a fun, portable form!
Ingredients
- 1 pint cherry tomatoes
- 8 ounces fresh mozzarella balls
- 1 bunch fresh basil leaves
- Balsamic glaze (optional)
- Wooden skewers
Instructions
- Prepare the Skewers: Take a wooden skewer and start by threading a cherry tomato onto it.
- Add Mozzarella: Next, add a mozzarella ball onto the skewer.
- Include Basil: Follow with a basil leaf, then repeat the process until the skewer is filled, leaving some space at the end for easy handling.
- Finish Up: Once all ingredients are threaded, drizzle with balsamic glaze if desired.
- Serve: Enjoy your Caprese skewers fresh or pack them for later!
Sweet Potato and Black Bean Burrito
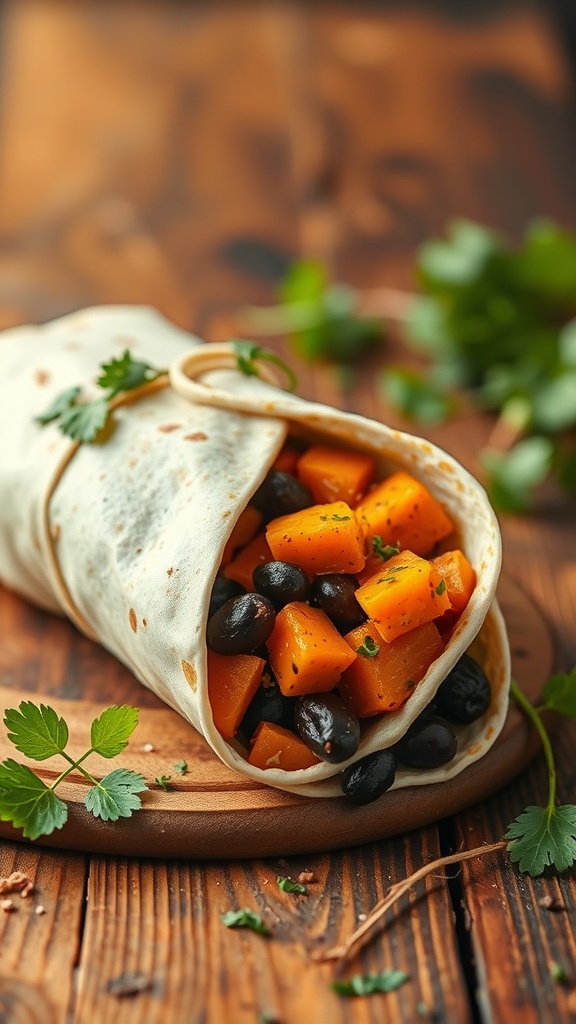
Sweet potato and black bean burritos are a fantastic option for a packable lunch. They are not only tasty but also packed with nutrients. The vibrant colors of the sweet potato and black beans create an inviting look that makes you want to dig in.
This burrito is perfect for meal prep. You can make a batch at the beginning of the week and enjoy them throughout. The combination of creamy sweet potatoes and hearty black beans provides a satisfying meal that keeps you energized.
To make these burritos, you’ll need a few simple ingredients. The recipe is straightforward and can be customized with your favorite spices or toppings. Wrap them up tightly, and they’re ready to go!
Ingredients
- 2 medium sweet potatoes, peeled and diced
- 1 can black beans, drained and rinsed
- 1 tablespoon olive oil
- 1 teaspoon cumin
- 1 teaspoon chili powder
- Salt and pepper to taste
- 4 large tortillas
- Fresh cilantro, chopped (optional)
Instructions
- Preheat your oven to 400°F (200°C). Toss the diced sweet potatoes with olive oil, cumin, chili powder, salt, and pepper. Spread them on a baking sheet and roast for 25-30 minutes until tender.
- In a large bowl, combine the roasted sweet potatoes and black beans. Mix well and adjust seasoning if needed.
- Lay a tortilla flat and place a generous scoop of the sweet potato and black bean mixture in the center. Add some chopped cilantro if you like.
- Fold in the sides of the tortilla and roll it up tightly from the bottom. Repeat with the remaining tortillas.
- Wrap each burrito in foil or parchment paper for easy transport. Enjoy them warm or cold!
Egg Salad Sandwiches
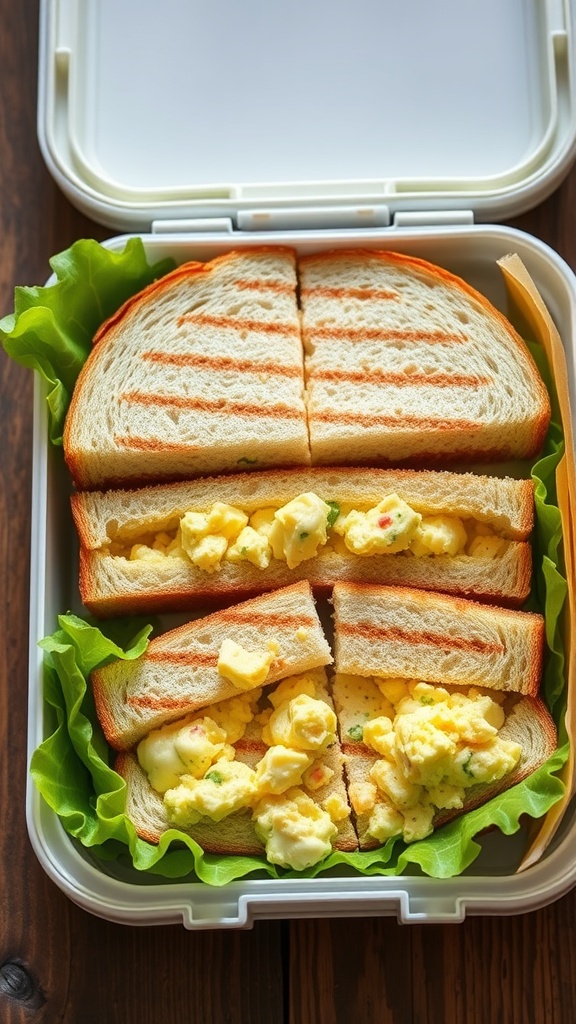
Egg salad sandwiches are a classic choice for a packable lunch. They are simple to make and can be enjoyed at home or on the go. The image shows delicious egg salad spread generously on slices of bread, garnished with fresh herbs. This adds a nice touch of color and flavor.
Making egg salad is easy and requires just a few ingredients. You can customize it to suit your taste by adding different herbs or spices. It’s a great way to use up leftover eggs and can be prepared in advance.
To pack these sandwiches, simply place them in a container or wrap them in parchment paper. They hold up well and are perfect for picnics or lunchboxes.
Ingredients
- 4 hard-boiled eggs, chopped
- 1/4 cup mayonnaise
- 1 teaspoon Dijon mustard
- 1 tablespoon fresh parsley, chopped
- Salt and pepper to taste
- 4 slices of bread
Instructions
- In a bowl, combine the chopped eggs, mayonnaise, Dijon mustard, parsley, salt, and pepper. Mix well until combined.
- Spread the egg salad mixture evenly on two slices of bread.
- Top with the remaining slices of bread to form sandwiches.
- Cut the sandwiches into halves or quarters, if desired.
- Pack the sandwiches in a container or wrap them for your lunch.
Chocolate Energy Bites
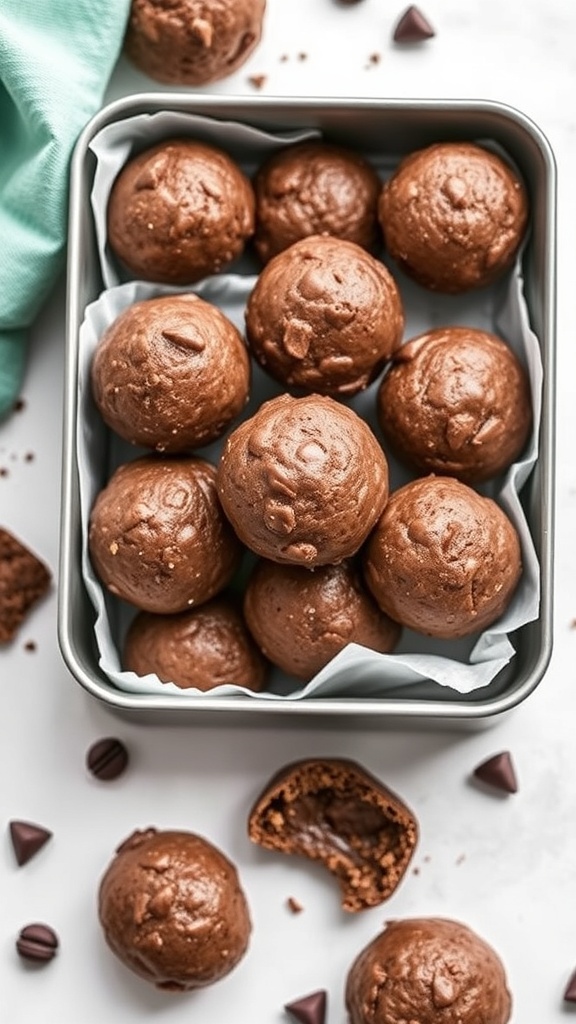
Chocolate energy bites are a fantastic snack option that packs a punch of flavor and nutrition. These little balls of goodness are perfect for a quick pick-me-up during the day. They are made with simple ingredients and are easy to prepare, making them a great addition to your lunchbox or as a post-workout treat.
In the image, you can see a bowl filled with chocolate energy bites, each one coated with a sprinkle of nuts. The rich chocolate color is inviting, and the texture looks soft yet satisfying. These bites are not just tasty; they also provide energy to keep you going.
To make these energy bites, you’ll need ingredients like oats, nut butter, and honey. The combination of these ingredients creates a chewy texture that is hard to resist. Plus, you can customize them with your favorite add-ins like chocolate chips or dried fruit.
Ingredients
- 1 cup rolled oats
- 1/2 cup nut butter (like almond or peanut)
- 1/3 cup honey or maple syrup
- 1/4 cup cocoa powder
- 1/4 cup chocolate chips (optional)
- 1/4 cup chopped nuts (like peanuts or almonds)
- 1 teaspoon vanilla extract
Instructions
- In a large bowl, mix together the rolled oats, nut butter, honey, cocoa powder, and vanilla extract until well combined.
- If using, fold in the chocolate chips and chopped nuts.
- Using your hands, form the mixture into small balls, about 1 inch in diameter.
- Place the energy bites on a baking sheet lined with parchment paper.
- Refrigerate for at least 30 minutes to firm up before enjoying.
- Store in an airtight container in the fridge for up to a week.
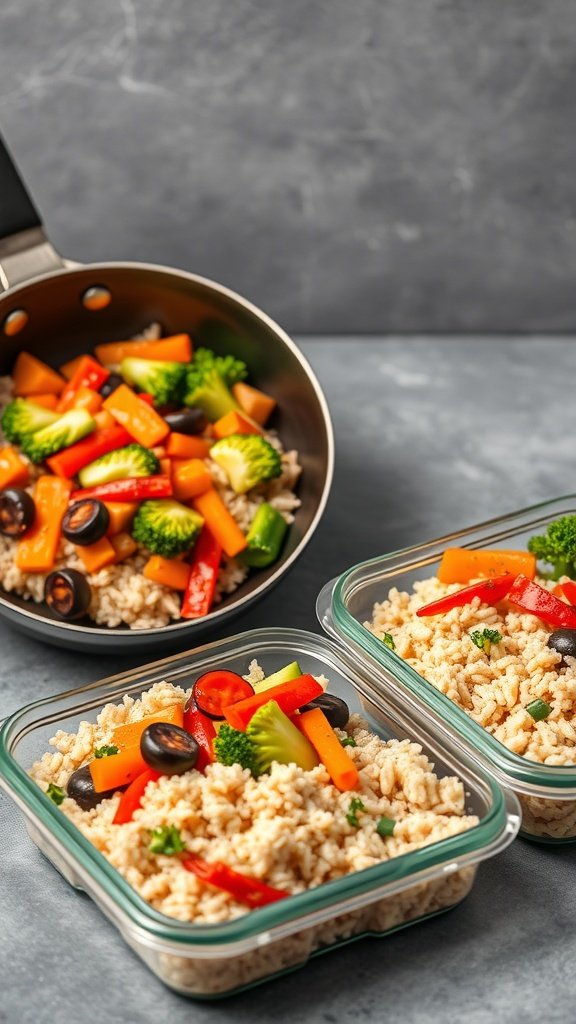
Couscous with Roasted Vegetables
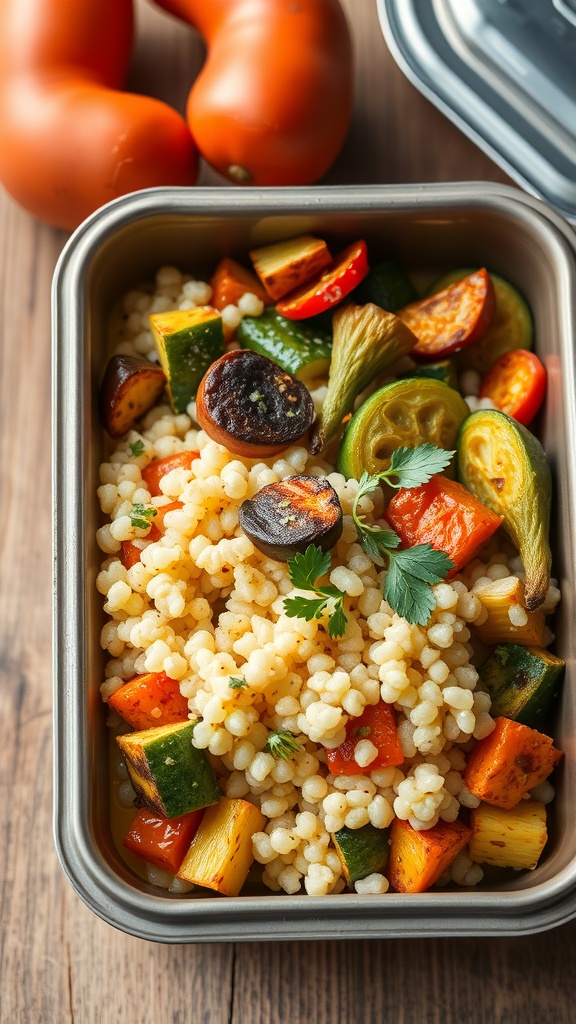
Couscous with roasted vegetables is a fantastic option for a packable lunch. It’s colorful, nutritious, and super easy to prepare. The image shows a lovely mix of fluffy couscous paired with vibrant roasted veggies like zucchini, bell peppers, and cherry tomatoes. This dish not only looks appetizing but also offers a delightful combination of flavors.
To make this meal, you can use any vegetables you have on hand. Roasting them brings out their natural sweetness, making them a perfect match for the light and fluffy couscous. Plus, it’s a great way to sneak in some extra nutrients!
Here’s how to whip up this delicious dish:
Ingredients
- 1 cup couscous
- 1 1/4 cups vegetable broth or water
- 1 zucchini, diced
- 1 red bell pepper, diced
- 1 yellow bell pepper, diced
- 1 cup cherry tomatoes, halved
- 2 tablespoons olive oil
- Salt and pepper to taste
- Fresh parsley for garnish
Instructions
- Preheat your oven to 400°F (200°C).
- In a bowl, toss the diced zucchini, bell peppers, and cherry tomatoes with olive oil, salt, and pepper. Spread them on a baking sheet.
- Roast the vegetables for about 20-25 minutes, or until they are tender and slightly caramelized.
- While the veggies are roasting, bring the vegetable broth or water to a boil in a saucepan. Add the couscous, stir, and remove from heat. Cover and let it sit for about 5 minutes.
- Fluff the couscous with a fork and mix in the roasted vegetables.
- Garnish with fresh parsley before packing into your lunch container.
This couscous with roasted vegetables is not only easy to make but also perfect for meal prep. Enjoy it warm or cold, and feel free to customize it with your favorite spices or additional ingredients!
Stuffed Bell Peppers
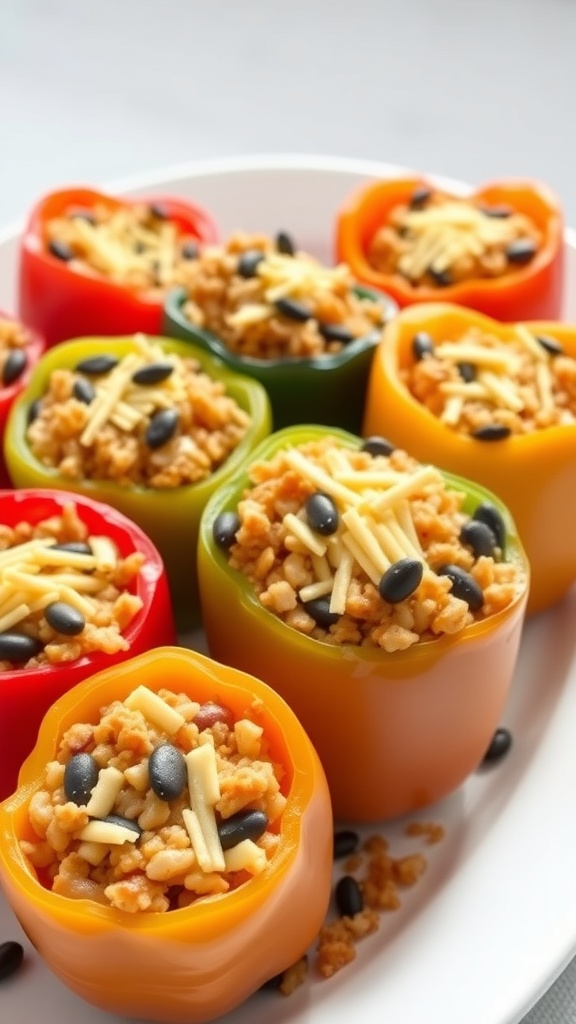
Stuffed bell peppers are a colorful and tasty option for a packed lunch. They look inviting with their vibrant hues of red, green, yellow, and orange. Each pepper is filled with a hearty mixture, making them both nutritious and filling.
The beauty of stuffed bell peppers is in their versatility. You can customize the filling to suit your taste. Whether you prefer rice, quinoa, or a mix of beans, the options are endless. Plus, they are easy to prepare ahead of time and perfect for on-the-go meals.
These peppers not only taste great but also provide a good balance of protein, carbs, and veggies. They can be enjoyed warm or cold, making them a fantastic choice for lunchboxes.
Ingredients
- 4 large bell peppers (any color)
- 1 cup cooked rice or quinoa
- 1 can black beans, rinsed and drained
- 1 cup corn (fresh or frozen)
- 1 cup diced tomatoes
- 1 teaspoon cumin
- 1 teaspoon chili powder
- Salt and pepper to taste
- 1 cup shredded cheese (optional)
Instructions
- Preheat your oven to 375°F (190°C).
- Cut the tops off the bell peppers and remove the seeds. Place them upright in a baking dish.
- In a large bowl, mix together the cooked rice or quinoa, black beans, corn, diced tomatoes, cumin, chili powder, salt, and pepper.
- Stuff each bell pepper with the mixture, pressing down gently to pack it in.
- If using cheese, sprinkle it on top of each stuffed pepper.
- Cover the dish with foil and bake for 30 minutes. Remove the foil and bake for an additional 10-15 minutes until the peppers are tender.
- Let them cool slightly before packing them for lunch.