15 Family-Sized Budget Meal Prep Ideas for the Week
Finding budget-friendly meals for the whole family can be tricky, but meal prepping for the week makes it easy and delicious. With a little planning and some tasty recipes, you can whip up nutritious dishes that keep everyone happy without breaking the bank. Let’s dig into some simple, cost-effective options that make mealtime a breeze!
Vegetarian Lentil Soup for Easy Lunches
Vegetarian lentil soup is a fantastic choice for meal prep. It’s hearty, healthy, and packed with flavor. This soup is not only filling but also easy to make. You can whip up a big batch and enjoy it throughout the week. The vibrant colors of the lentils and veggies make it visually appealing, too!
This soup is perfect for lunch. You can pair it with some crusty bread for a complete meal. The combination of lentils, carrots, and spices creates a comforting dish that warms you up. Plus, it’s budget-friendly, making it a great option for families.
Let’s get into the recipe so you can start enjoying this delicious soup!
Ingredients
- 1 cup dried lentils (green or brown)
- 1 medium onion, chopped
- 2 carrots, diced
- 2 celery stalks, diced
- 3 cloves garlic, minced
- 1 can (14 oz) diced tomatoes
- 6 cups vegetable broth
- 1 teaspoon cumin
- 1 teaspoon paprika
- Salt and pepper to taste
- 2 tablespoons olive oil
- Fresh parsley for garnish
Instructions
- Rinse the lentils under cold water and set aside.
- In a large pot, heat olive oil over medium heat. Add chopped onion, carrots, and celery. Sauté for about 5 minutes until softened.
- Add minced garlic, cumin, and paprika. Cook for another minute until fragrant.
- Stir in the lentils, diced tomatoes, and vegetable broth. Bring to a boil.
- Reduce heat and let it simmer for about 30-35 minutes, or until the lentils are tender.
- Season with salt and pepper to taste. Serve hot, garnished with fresh parsley.
Savory Beef and Broccoli Stir-Fry
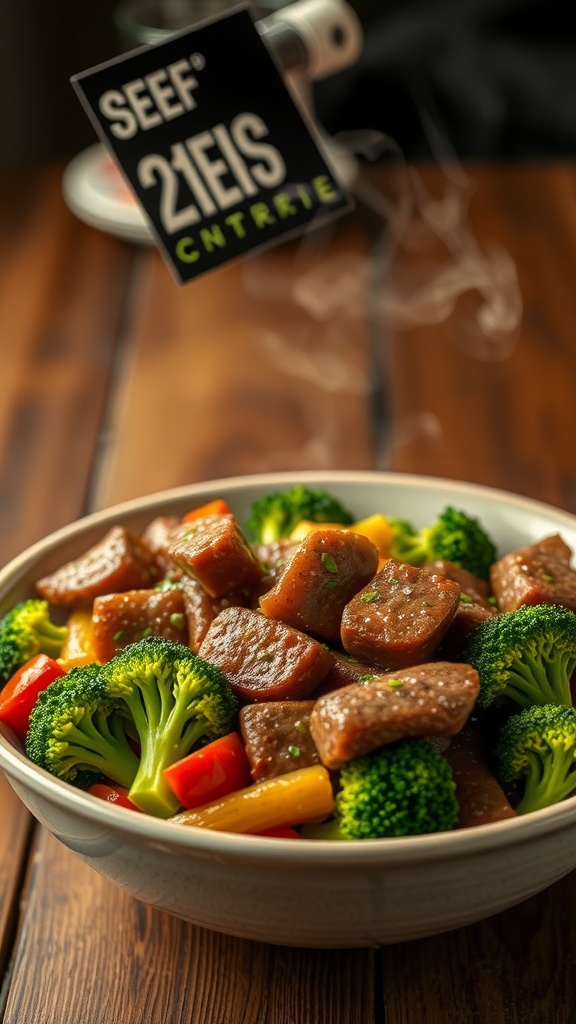
This beef and broccoli stir-fry is a fantastic meal prep option for families. It’s colorful, nutritious, and packed with flavor. The vibrant green broccoli and bright bell peppers make the dish visually appealing, while the tender beef adds heartiness. Plus, it’s quick to whip up, making it perfect for busy weeknights.
To make this dish, you’ll need some simple ingredients. Start with fresh broccoli, bell peppers, and beef strips. A savory sauce made from soy sauce, garlic, and ginger ties everything together. This stir-fry is not just tasty; it’s also a great way to get your veggies in!
Here’s how to prepare it:
Ingredients
- 1 pound beef sirloin, sliced into thin strips
- 2 cups broccoli florets
- 1 red bell pepper, sliced
- 1 yellow bell pepper, sliced
- 3 tablespoons soy sauce
- 2 tablespoons vegetable oil
- 2 cloves garlic, minced
- 1 teaspoon ginger, minced
- Salt and pepper to taste
Instructions
- Heat the vegetable oil in a large pan over medium-high heat.
- Add the beef strips and cook until browned, about 3-4 minutes. Remove the beef and set aside.
- In the same pan, add garlic and ginger, stirring for about 30 seconds until fragrant.
- Add the broccoli and bell peppers, cooking for another 3-4 minutes until they are tender-crisp.
- Return the beef to the pan, pour in the soy sauce, and stir everything together. Cook for an additional 2 minutes.
- Season with salt and pepper to taste. Serve hot over rice or noodles.
Taco Night with Seasoned Ground Turkey
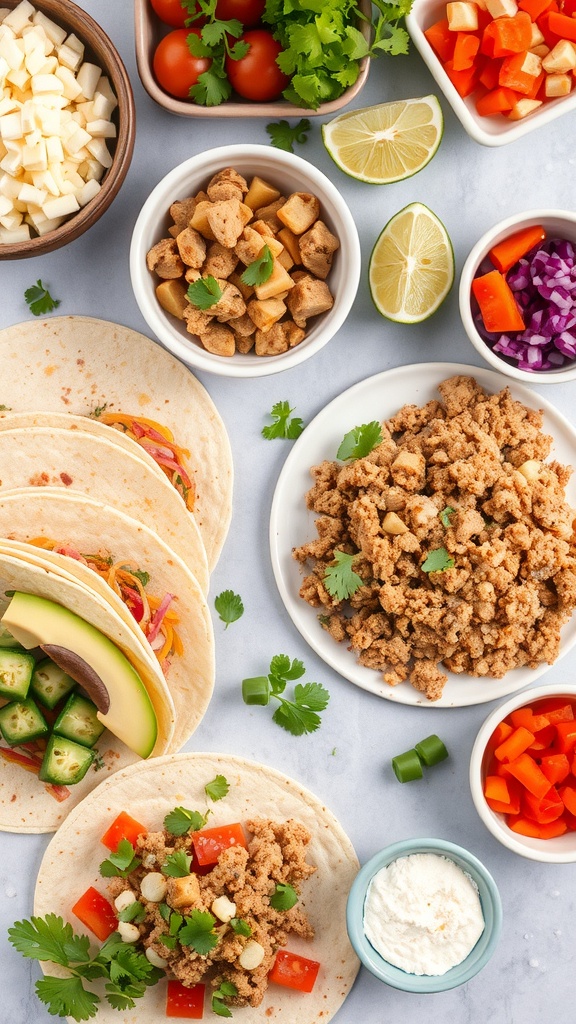
Taco night is a favorite for many families, and it’s easy to see why. The vibrant colors and fresh ingredients make it a fun meal to prepare and enjoy together. In the image, you can see a spread of taco essentials, including seasoned ground turkey, fresh veggies, and toppings that add flavor and crunch.
The seasoned ground turkey is a lean protein that can be easily cooked and flavored to suit everyone’s taste. You can see tortillas ready to be filled with delicious ingredients. The bowls of chopped tomatoes, peppers, and cilantro add a fresh touch, while lime wedges provide a zesty kick.
This meal is not just tasty; it’s also budget-friendly and perfect for meal prep. You can prepare the turkey and chop the veggies ahead of time, making it a quick option for busy weeknights. Everyone can customize their tacos, which makes it a hit with both kids and adults.
Ingredients
- 1 pound ground turkey
- 1 tablespoon olive oil
- 1 small onion, diced
- 2 cloves garlic, minced
- 1 tablespoon taco seasoning
- Salt and pepper to taste
- 8 small tortillas
- 1 cup diced tomatoes
- 1 cup diced bell peppers
- 1/2 cup chopped cilantro
- 1 lime, cut into wedges
- 1/2 cup shredded cheese (optional)
- 1/2 cup sour cream (optional)
Instructions
- Cook the Turkey: In a skillet, heat olive oil over medium heat. Add diced onion and garlic, cooking until soft. Add ground turkey and cook until browned, about 5-7 minutes.
- Season: Stir in taco seasoning, salt, and pepper. Cook for another 2-3 minutes until well combined.
- Prepare Toppings: While the turkey cooks, chop the tomatoes, bell peppers, and cilantro. Set aside.
- Warm Tortillas: In a separate pan or microwave, warm the tortillas until soft.
- Assemble Tacos: Fill each tortilla with seasoned turkey and top with tomatoes, bell peppers, cilantro, cheese, and sour cream if desired.
- Serve: Squeeze fresh lime juice over the tacos and enjoy!
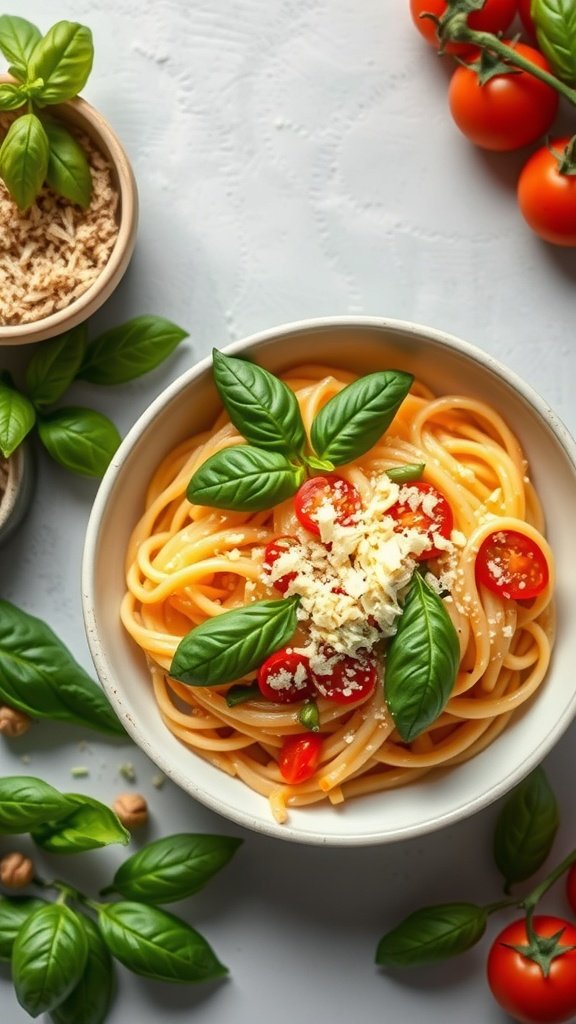
Creamy Tomato Basil Pasta
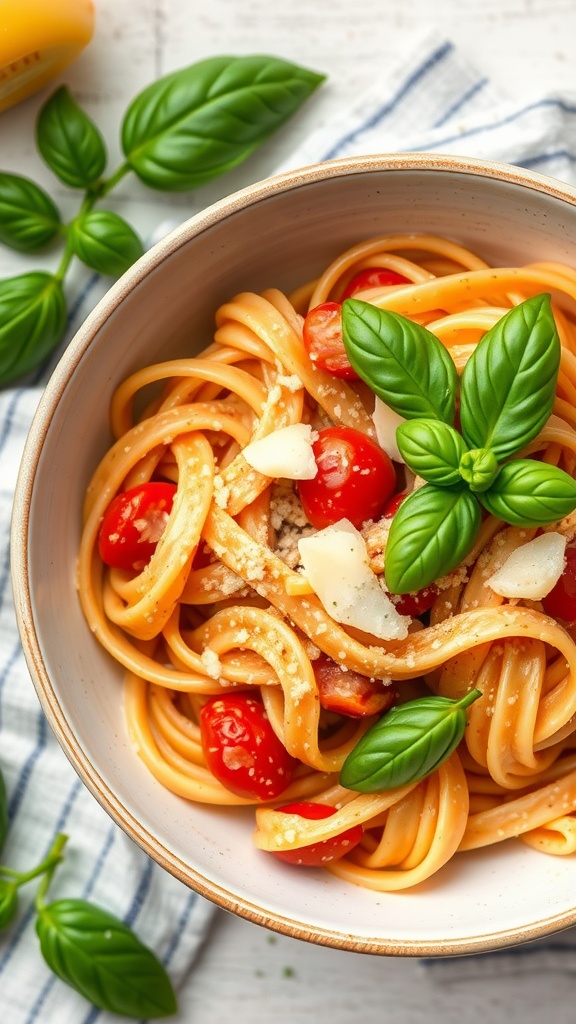
Creamy Tomato Basil Pasta is a delightful dish that brings comfort and flavor to your family meals. The vibrant colors of the fresh tomatoes and basil make it visually appealing, while the creamy sauce adds a rich texture that everyone will love. This dish is perfect for meal prep, as it can be easily made in large batches and stored for the week.
To make this pasta, you’ll need simple ingredients that pack a punch. Fresh basil adds a fragrant aroma, while ripe tomatoes provide a sweet and tangy flavor. The creamy sauce is made with just a few pantry staples, making it a budget-friendly option for families.
Gather your ingredients and get ready to whip up a delicious meal that will satisfy everyone at the table. This recipe is not only easy to prepare but also a great way to enjoy a wholesome dish without breaking the bank.
Ingredients
- 12 oz spaghetti or your favorite pasta
- 2 cups cherry tomatoes, halved
- 1 cup heavy cream
- 1/2 cup grated Parmesan cheese
- 1/4 cup fresh basil, chopped
- 2 tablespoons olive oil
- 2 cloves garlic, minced
- Salt and pepper to taste
Instructions
- Cook the Pasta: In a large pot of boiling salted water, cook the pasta according to package instructions until al dente. Drain and set aside.
- Sauté the Garlic: In a large skillet, heat olive oil over medium heat. Add minced garlic and sauté for about 1 minute until fragrant.
- Add Tomatoes: Stir in the halved cherry tomatoes and cook for 3-4 minutes until they start to soften.
- Create the Sauce: Pour in the heavy cream and bring to a simmer. Stir in the Parmesan cheese until melted and smooth. Season with salt and pepper.
- Combine: Add the cooked pasta to the skillet and toss to coat in the creamy sauce. Stir in the chopped basil just before serving.
- Serve: Garnish with extra basil and Parmesan cheese if desired. Enjoy your creamy tomato basil pasta!
Baked Ziti with Spinach and Cheese
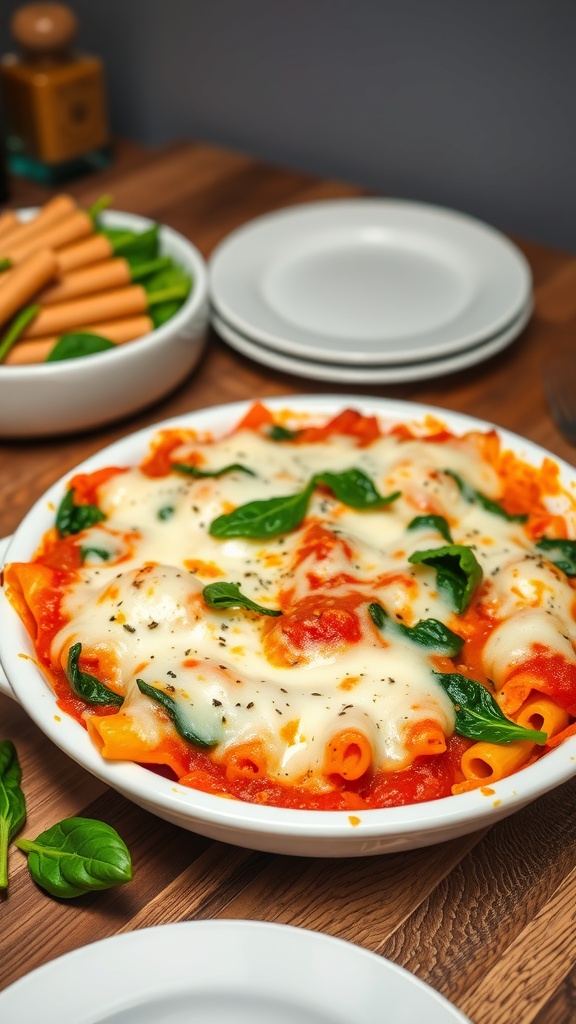
Baked Ziti with Spinach and Cheese is a comforting dish that brings warmth to any family meal. The image shows a vibrant casserole filled with ziti pasta, fresh spinach, and melted cheese, all swimming in a rich tomato sauce. This dish is not only delicious but also a great way to sneak in some veggies for the kids.
Making baked ziti is simple and perfect for meal prep. You can whip up a large batch and enjoy it throughout the week. It’s a crowd-pleaser that everyone will love, making it ideal for busy nights or family gatherings.
Here’s how to make this tasty dish:
Ingredients
- 1 pound ziti pasta
- 2 cups marinara sauce
- 2 cups fresh spinach, chopped
- 2 cups ricotta cheese
- 2 cups mozzarella cheese, shredded
- 1/2 cup grated Parmesan cheese
- 1 teaspoon Italian seasoning
- Salt and pepper to taste
Instructions
- Cook the Pasta: Preheat your oven to 375°F (190°C). Cook the ziti according to package instructions until al dente. Drain and set aside.
- Mix the Filling: In a large bowl, combine the ricotta cheese, chopped spinach, Italian seasoning, salt, and pepper. Stir in half of the mozzarella cheese.
- Combine Ingredients: In a large baking dish, spread a layer of marinara sauce on the bottom. Add the cooked ziti and the ricotta mixture. Pour the remaining marinara sauce on top and sprinkle with the rest of the mozzarella and Parmesan cheese.
- Bake: Cover with foil and bake for 25 minutes. Remove the foil and bake for an additional 15 minutes, or until the cheese is bubbly and golden.
- Serve: Let it cool for a few minutes before serving. Enjoy your delicious baked ziti with a side salad or garlic bread!
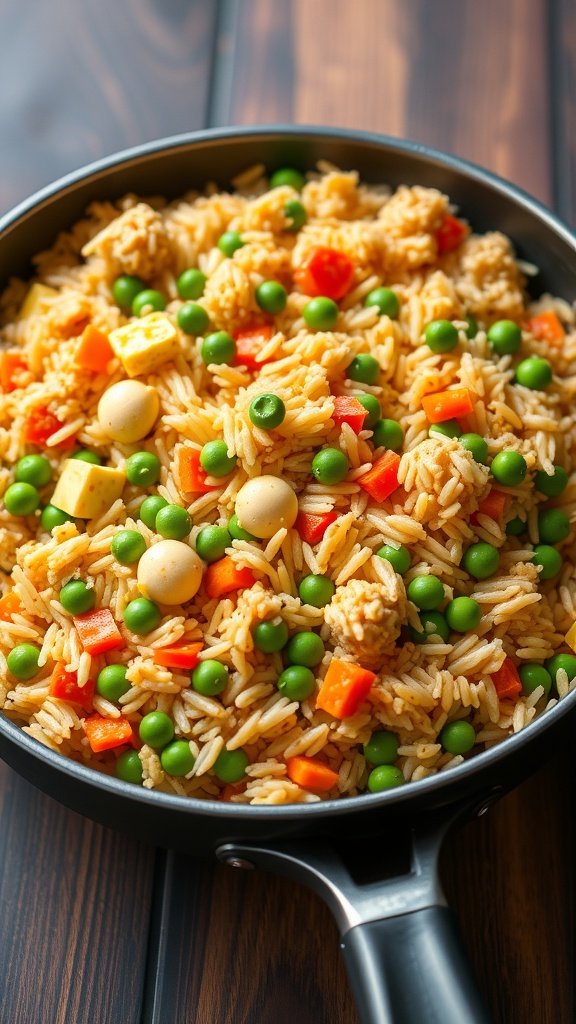
One-Pan Chicken and Rice Bake

This One-Pan Chicken and Rice Bake is a simple, hearty meal that brings the family together. The image shows juicy chicken breasts nestled in a bed of fluffy rice, garnished with fresh lime slices and cilantro. It’s colorful and inviting, making it perfect for a family dinner.
Cooking everything in one pan saves time on cleanup, which is a win for busy weeknights. The chicken is seasoned to perfection, and the rice absorbs all the delicious flavors as it cooks. It’s a comforting dish that everyone will love.
Let’s get started with the recipe!
Ingredients
- 4 chicken breasts
- 1 cup long-grain rice
- 2 cups chicken broth
- 1 tablespoon olive oil
- 1 teaspoon paprika
- 1 teaspoon garlic powder
- 1 teaspoon onion powder
- Salt and pepper to taste
- 1 lime, sliced
- Fresh cilantro for garnish
Instructions
- Preheat your oven to 375°F (190°C).
- In a large oven-safe pan, heat olive oil over medium heat. Season the chicken breasts with paprika, garlic powder, onion powder, salt, and pepper.
- Brown the chicken in the pan for about 5 minutes on each side until golden.
- Add the rice to the pan, stirring it around to coat with the oil and spices.
- Pour in the chicken broth and bring it to a simmer.
- Place lime slices on top of the chicken and cover the pan with a lid or foil.
- Bake in the preheated oven for 25-30 minutes, or until the chicken is cooked through and the rice is tender.
- Remove from the oven, garnish with fresh cilantro, and serve warm.
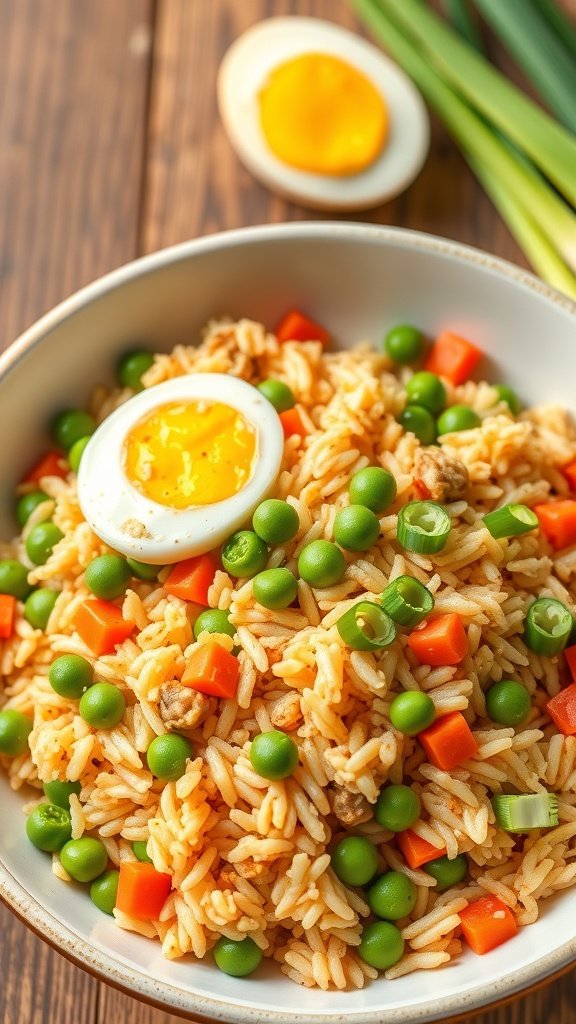
Stuffed Bell Peppers with Quinoa and Black Beans
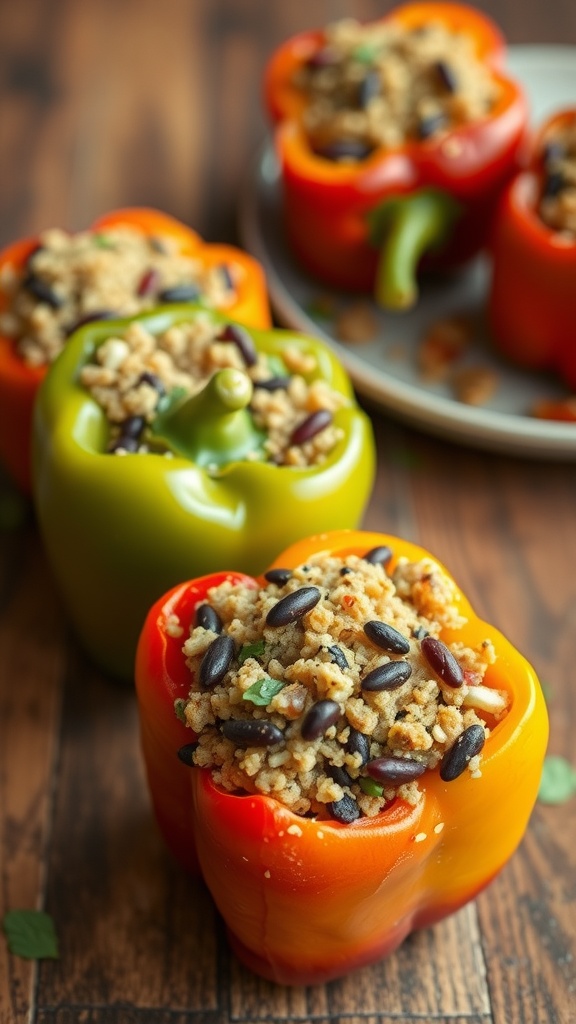
Stuffed bell peppers are a colorful and nutritious meal option that everyone in the family will love. These vibrant peppers are filled with a hearty mix of quinoa and black beans, making them both filling and healthy. The combination of flavors and textures creates a satisfying dish that’s perfect for meal prep.
To make these stuffed peppers, start by cooking your quinoa according to the package instructions. While that’s cooking, you can prepare the bell peppers. Cut the tops off and remove the seeds. This is where the magic happens as you fill them with the delicious quinoa and black bean mixture.
Once the peppers are filled, they can be baked until tender. The result is a colorful platter of stuffed peppers that not only looks great but also tastes amazing. Serve them with a sprinkle of fresh cilantro on top for an extra burst of flavor.
Ingredients
- 4 large bell peppers (any color)
- 1 cup quinoa, rinsed
- 2 cups vegetable broth or water
- 1 can (15 oz) black beans, drained and rinsed
- 1 cup corn (fresh or frozen)
- 1 teaspoon cumin
- 1 teaspoon chili powder
- Salt and pepper to taste
- Fresh cilantro for garnish
Instructions
- Preheat your oven to 375°F (190°C).
- In a medium pot, combine quinoa and vegetable broth. Bring to a boil, then reduce heat and simmer for about 15 minutes or until liquid is absorbed.
- While the quinoa cooks, prepare the bell peppers by cutting off the tops and removing the seeds.
- In a large bowl, mix cooked quinoa, black beans, corn, cumin, chili powder, salt, and pepper.
- Stuff each bell pepper with the quinoa mixture, pressing down gently to pack it in.
- Place the stuffed peppers upright in a baking dish. Add a splash of water to the bottom of the dish to help steam the peppers.
- Bake for 25-30 minutes until the peppers are tender.
- Garnish with fresh cilantro before serving.
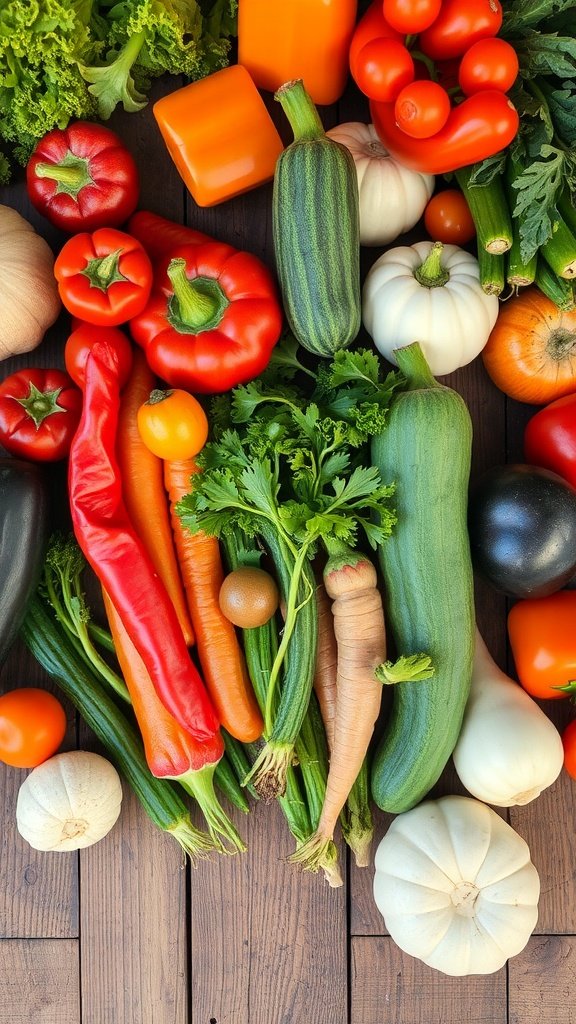
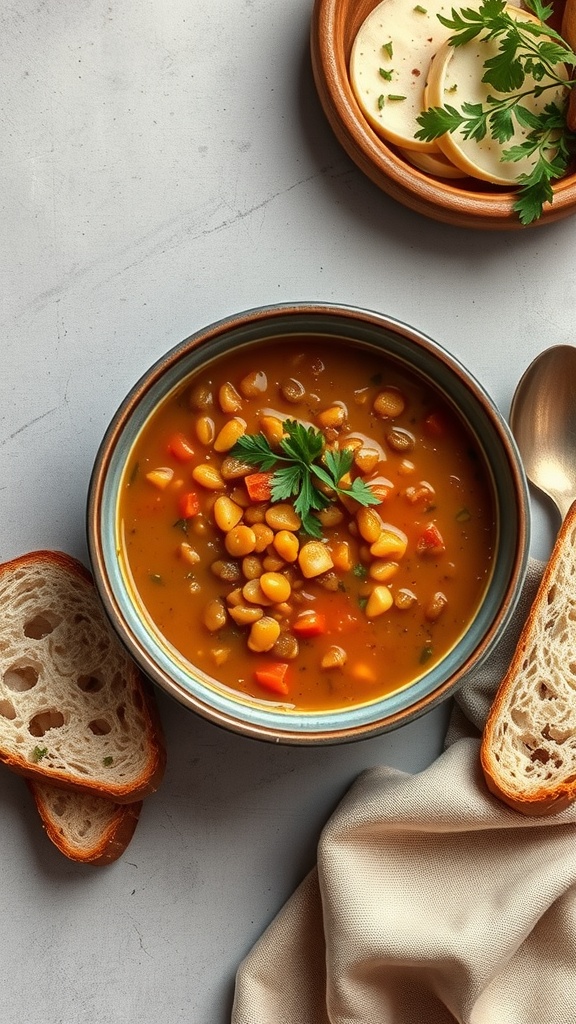
Hearty Vegetable Chili for the Whole Family
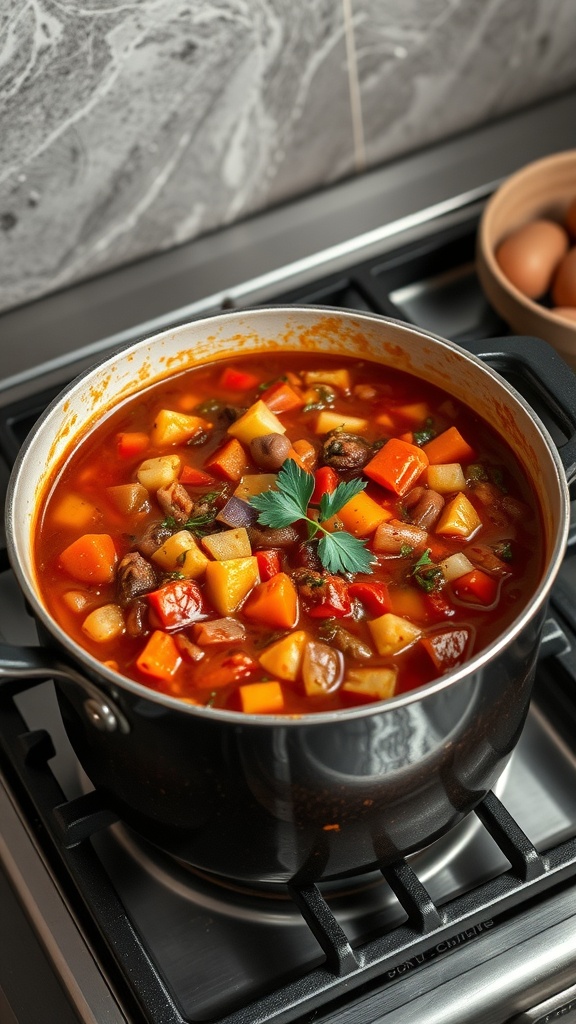
Hearty vegetable chili is the perfect dish for family meal prep. It’s warm, comforting, and packed with nutrients. The vibrant colors of the vegetables in the pot make it look inviting and delicious. This chili is not just filling; it’s also a great way to sneak in those veggies that kids might shy away from.
In the image, you can see a pot brimming with a mix of diced potatoes, bell peppers, and tomatoes, all simmering together. The rich red broth hints at the spices that make this dish so flavorful. Topped with fresh herbs, it’s a feast for the eyes as well as the stomach!
Making this chili is simple and can be done in one pot, making cleanup a breeze. It’s a great recipe to batch cook, so you can enjoy it throughout the week. Serve it with some crusty bread or over rice for a complete meal.
Ingredients
- 2 tablespoons olive oil
- 1 onion, chopped
- 2 cloves garlic, minced
- 1 bell pepper, diced
- 2 carrots, diced
- 2 potatoes, diced
- 1 zucchini, diced
- 1 can (14 oz) diced tomatoes
- 1 can (15 oz) kidney beans, drained and rinsed
- 2 cups vegetable broth
- 2 tablespoons chili powder
- 1 teaspoon cumin
- Salt and pepper to taste
- Fresh cilantro for garnish
Instructions
- Heat olive oil in a large pot over medium heat. Add chopped onion and garlic, sautéing until soft.
- Add the diced bell pepper, carrots, and potatoes. Cook for about 5 minutes, stirring occasionally.
- Stir in the zucchini, diced tomatoes, kidney beans, vegetable broth, chili powder, and cumin. Bring to a boil.
- Reduce heat to low, cover, and let it simmer for 30 minutes, stirring occasionally.
- Season with salt and pepper to taste. Serve hot, garnished with fresh cilantro.
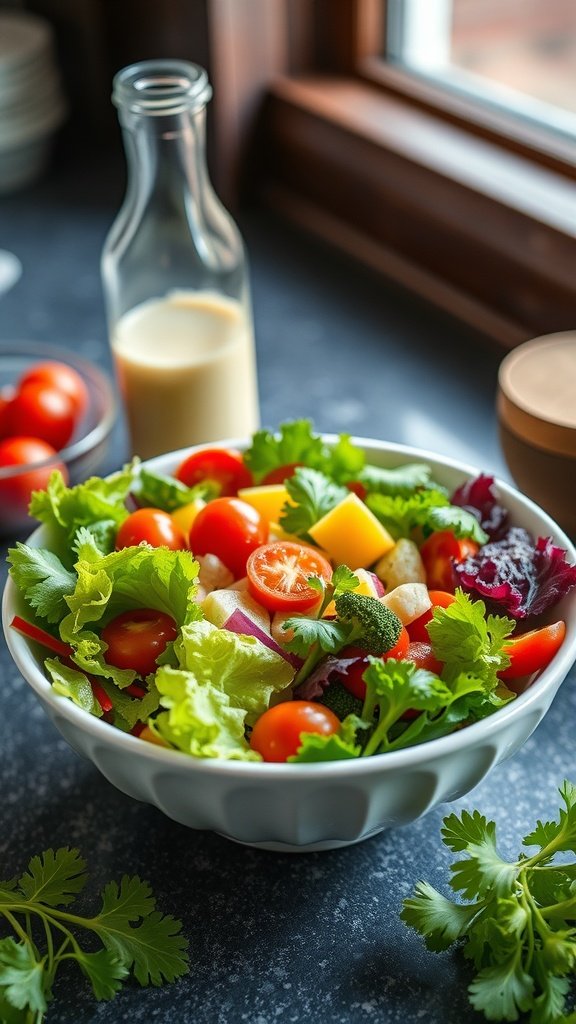
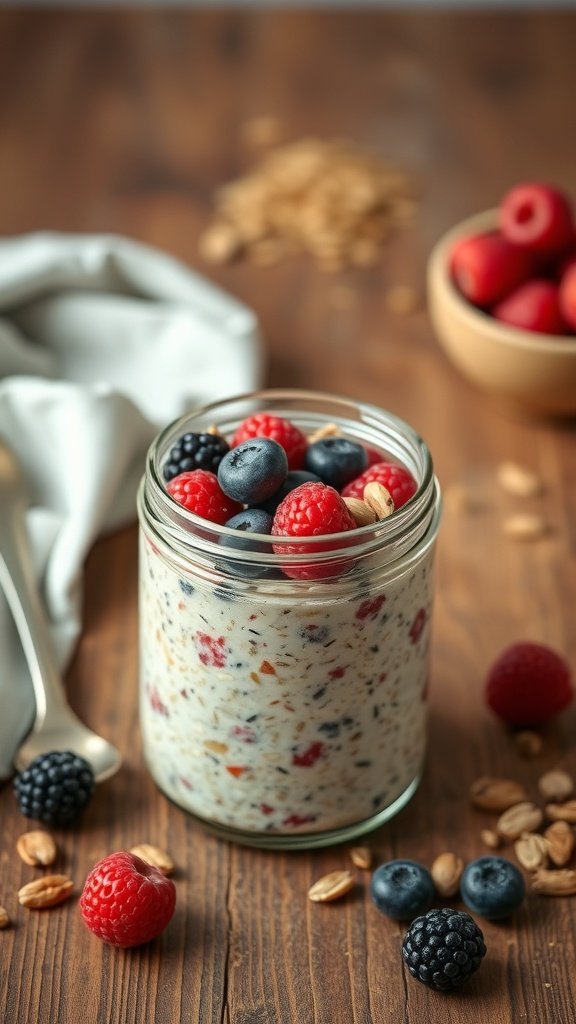
Fruit and Yogurt Parfaits for Snacks

Fruit and yogurt parfaits are a fantastic way to keep snacks healthy and delicious. These layered treats are not only visually appealing but also packed with nutrients. You can customize them with your favorite fruits and toppings, making them perfect for any family member.
Start with a base of creamy yogurt, then add layers of fresh fruits like strawberries, blueberries, and raspberries. Each layer brings a burst of flavor and color. Top it off with some crunchy granola for added texture. These parfaits are great for meal prep, as you can prepare them in advance and store them in the fridge for quick snacks throughout the week.
Not only are these parfaits tasty, but they also provide a good balance of protein, fiber, and vitamins. They make for a refreshing snack after school or a light dessert after dinner. Plus, kids love them!
Ingredients
- 2 cups Greek yogurt
- 1 cup strawberries, sliced
- 1 cup blueberries
- 1 cup raspberries
- 1 cup granola
- 2 tablespoons honey (optional)
Instructions
- In a glass or bowl, start with a layer of Greek yogurt at the bottom.
- Add a layer of sliced strawberries, followed by a layer of blueberries.
- Next, add a layer of raspberries and then a sprinkle of granola.
- Repeat the layers until the glass is full, finishing with a layer of yogurt and a topping of granola and a drizzle of honey if desired.
- Serve immediately or cover and refrigerate for later.
Chickpea Curry with Coconut Milk
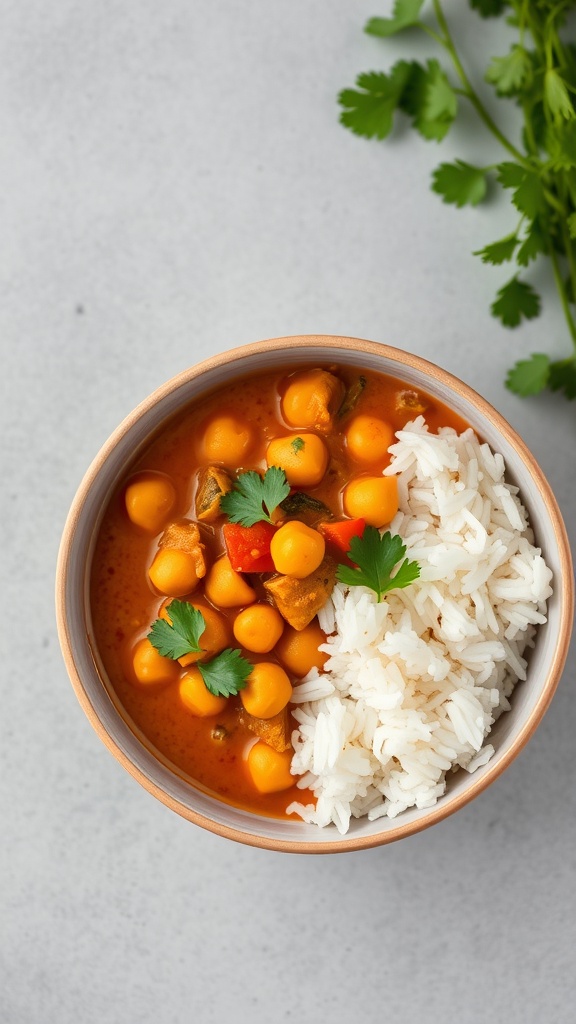
Chickpea curry with coconut milk is a delightful dish that brings warmth and comfort to any meal. The creamy coconut milk pairs perfectly with the chickpeas, creating a rich and satisfying flavor. This dish is not only tasty but also budget-friendly, making it a great choice for family meal prep.
The vibrant colors in the bowl, with the golden chickpeas and fresh cilantro, make it visually appealing. Served alongside fluffy rice, it’s a complete meal that everyone will enjoy. Plus, it’s easy to make in large batches, perfect for prepping for the week ahead.
Let’s get into the ingredients and steps to whip up this delicious chickpea curry!
Ingredients
- 2 cans chickpeas, drained and rinsed
- 1 can coconut milk
- 1 onion, chopped
- 2 cloves garlic, minced
- 1 tablespoon ginger, grated
- 1 bell pepper, diced
- 2 tablespoons curry powder
- 1 teaspoon cumin
- Salt and pepper to taste
- 2 tablespoons olive oil
- Fresh cilantro for garnish
- Cooked rice for serving
Instructions
- Heat olive oil in a large pot over medium heat. Add chopped onion and sauté until translucent.
- Stir in minced garlic and grated ginger, cooking for another minute until fragrant.
- Add the diced bell pepper, curry powder, and cumin. Cook for about 2-3 minutes, stirring frequently.
- Pour in the coconut milk and add the chickpeas. Stir well to combine.
- Season with salt and pepper. Let the curry simmer for about 15-20 minutes, allowing the flavors to meld.
- Serve hot over cooked rice, garnished with fresh cilantro.
Oven-Baked Sweet Potato Fries

Oven-baked sweet potato fries are a fantastic addition to your family-size budget meal prep. They are crispy, delicious, and packed with nutrients. Plus, they are easy to make and perfect for dipping!
To start, you’ll need some fresh sweet potatoes. Slice them into fry shapes, making sure they are uniform for even cooking. Toss them in a little olive oil, salt, and your favorite spices. Paprika or garlic powder works wonders!
Spread the fries out on a baking sheet, ensuring they are not overcrowded. This helps them get that perfect crispiness. Bake them in a preheated oven until they are golden brown and crispy on the outside. Serve them with a creamy dip or your favorite sauce.
Ingredients
- 2 large sweet potatoes
- 2 tablespoons olive oil
- 1 teaspoon salt
- 1 teaspoon paprika (optional)
- 1 teaspoon garlic powder (optional)
- Cooking spray (for the baking sheet)
Instructions
- Preheat your oven to 425°F (220°C).
- Wash and peel the sweet potatoes. Cut them into fry shapes, about 1/4 inch thick.
- In a large bowl, toss the sweet potato fries with olive oil, salt, and any optional spices you like.
- Spray a baking sheet with cooking spray and spread the fries out in a single layer.
- Bake for 25-30 minutes, flipping halfway through, until they are golden and crispy.
- Remove from the oven and let them cool slightly before serving with your favorite dip.
Zucchini Noodles with Marinara Sauce
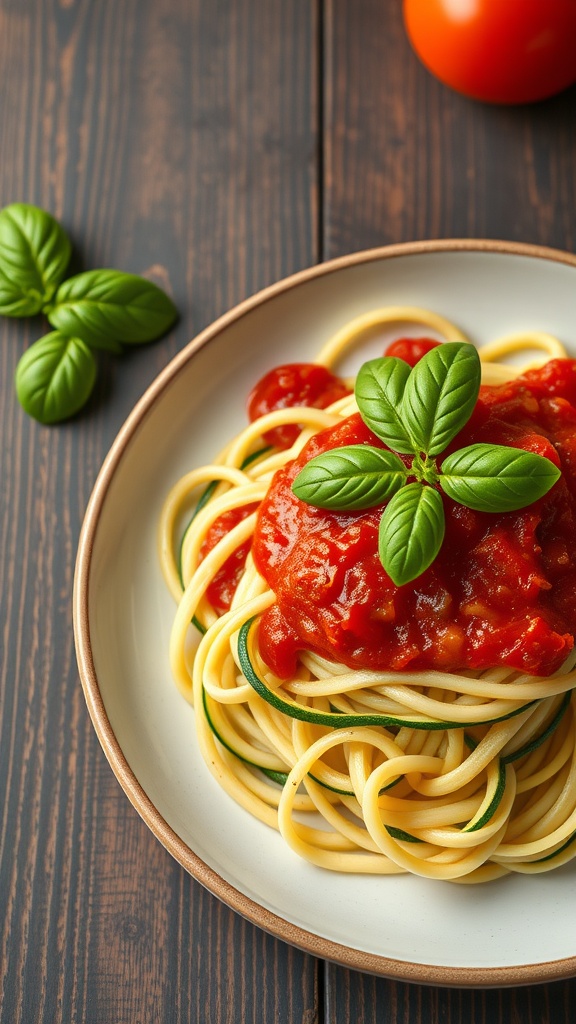
Zucchini noodles, or zoodles, are a fun and healthy twist on traditional pasta. They are light, refreshing, and perfect for a family-size budget meal prep. This dish is not only easy to make but also packed with flavor.
In the image, you can see a bowl of zucchini noodles topped with a rich marinara sauce. The vibrant red sauce contrasts beautifully with the pale noodles, making it visually appealing. Fresh tomatoes and herbs in the background hint at the fresh ingredients used in this dish.
To make this meal, you’ll need a spiralizer or a vegetable peeler to create the zucchini noodles. The marinara sauce can be homemade or store-bought, depending on your time constraints. This dish is great for meal prep, as it can be stored in the fridge and reheated throughout the week.
Let’s get cooking!
Ingredients
- 4 medium zucchinis
- 2 cups marinara sauce
- 1 tablespoon olive oil
- 1 teaspoon garlic powder
- Salt and pepper to taste
- Fresh basil for garnish
- Grated Parmesan cheese (optional)
Instructions
- Spiralize the Zucchini: Use a spiralizer to create noodles from the zucchinis. If you don’t have one, a vegetable peeler can also work to make thin strips.
- Cook the Zoodles: Heat olive oil in a large skillet over medium heat. Add the zucchini noodles and sauté for about 3-4 minutes until they are slightly tender. Be careful not to overcook them.
- Add Marinara Sauce: Pour the marinara sauce over the cooked zoodles. Stir to combine and heat through for another 2-3 minutes.
- Season: Sprinkle garlic powder, salt, and pepper to taste. Mix well.
- Serve: Plate the zucchini noodles and top with fresh basil and grated Parmesan cheese if desired. Enjoy your healthy meal!
Homemade Pizza Night with Family Toppings

Homemade pizza night is a fun way to bring the family together. Everyone can get involved by choosing their favorite toppings. The image shows a delicious pizza topped with fresh tomatoes, basil, and mozzarella cheese. The vibrant colors make it look inviting and tasty!
Start by gathering your ingredients. You can use pre-made dough or make your own. Set out a variety of toppings like pepperoni, bell peppers, onions, and olives. This way, everyone can create their own perfect slice.
Once the pizzas are assembled, bake them until the cheese is bubbly and the crust is golden. The smell will fill your kitchen, making everyone excited for dinner. Enjoying homemade pizza together is not just about the food; it’s about the memories you create.
Ingredients
- 2 cups all-purpose flour
- 1 packet (2 1/4 teaspoons) active dry yeast
- 1 teaspoon sugar
- 3/4 teaspoon salt
- 3/4 cup warm water
- 1 tablespoon olive oil
- 1 cup pizza sauce
- 2 cups shredded mozzarella cheese
- Your choice of toppings (pepperoni, bell peppers, onions, olives, etc.)
Instructions
- Make the Dough: In a bowl, combine warm water, sugar, and yeast. Let it sit for about 5 minutes until frothy. Add flour, salt, and olive oil. Mix until a dough forms.
- Knead the Dough: Turn the dough onto a floured surface and knead for about 5-7 minutes until smooth. Place in a greased bowl, cover, and let rise for 1 hour.
- Preheat the Oven: Preheat your oven to 475°F (245°C).
- Shape the Pizza: Roll out the dough on a floured surface to your desired thickness. Transfer to a pizza stone or baking sheet.
- Add Sauce and Toppings: Spread pizza sauce over the crust. Sprinkle with mozzarella cheese and add your favorite toppings.
- Bake: Bake in the preheated oven for 12-15 minutes until the crust is golden and the cheese is bubbly. Let cool slightly before slicing.
Slow Cooker Pulled Pork Sandwiches

Slow cooker pulled pork sandwiches are a fantastic choice for family meal prep. They are easy to make and perfect for busy weeks. The image shows delicious pulled pork piled high on soft buns, topped with crunchy slaw and pickles. This meal is not only satisfying but also budget-friendly.
To make these sandwiches, you’ll need a few simple ingredients. Start with pork shoulder, which becomes tender and flavorful when cooked slowly. Add your favorite BBQ sauce for that classic taste. The slaw adds a nice crunch, balancing the richness of the pork.
These sandwiches are great for feeding a crowd or for meal prepping. You can make a big batch and enjoy leftovers throughout the week. Just reheat the pork and assemble the sandwiches as needed. It’s a simple way to keep meals exciting without spending too much time in the kitchen.
Ingredients
- 3-4 lbs pork shoulder
- 1 cup BBQ sauce
- 1 onion, sliced
- 2 cloves garlic, minced
- 1 teaspoon smoked paprika
- 1 teaspoon salt
- 1/2 teaspoon black pepper
- 8 hamburger buns
- 1 cup coleslaw mix
- Pickles for topping
Instructions
- Prepare the Pork: Place the sliced onion and minced garlic at the bottom of the slow cooker. Season the pork shoulder with smoked paprika, salt, and pepper, then place it on top of the onions.
- Add BBQ Sauce: Pour the BBQ sauce over the pork, making sure it’s well coated. Cover the slow cooker and cook on low for 8 hours or until the pork is tender and easily shredded.
- Shred the Pork: Once cooked, remove the pork from the slow cooker and shred it using two forks. Return the shredded pork to the slow cooker and mix it with the sauce.
- Assemble the Sandwiches: Toast the hamburger buns if desired. Pile the pulled pork onto the bottom half of each bun, top with coleslaw, and add pickles.
- Serve: Place the top half of the bun on each sandwich and serve immediately. Enjoy your delicious pulled pork sandwiches!
Breakfast Burritos for Busy Mornings

Breakfast burritos are a fantastic option for busy mornings. They are easy to make, filling, and can be customized to suit everyone’s taste. Imagine waking up to a delicious burrito filled with scrambled eggs, fresh veggies, and maybe even some cheese. You can grab one on your way out the door, making them perfect for hectic days.
The image shows a stack of breakfast burritos, each packed with colorful ingredients like red and green peppers, spinach, and chunks of mango. These vibrant colors not only make the burritos appealing but also add a variety of flavors and nutrients. You can easily prepare a batch of these burritos over the weekend and store them in the fridge or freezer for quick breakfasts throughout the week.
Making breakfast burritos is simple. You can use tortillas of your choice and fill them with scrambled eggs, sautéed vegetables, and your favorite toppings. They can be enjoyed warm or cold, making them versatile for any morning routine.
Ingredients
- 8 large flour tortillas
- 8 large eggs
- 1 cup cooked and crumbled sausage or tofu
- 1 cup diced bell peppers (red and green)
- 1 cup fresh spinach, chopped
- 1 cup diced mango
- 1 cup shredded cheese (optional)
- Salt and pepper to taste
- Olive oil for cooking
Instructions
- In a large skillet, heat a little olive oil over medium heat. Add the diced bell peppers and cook until they are soft.
- Add the cooked sausage or tofu and chopped spinach to the skillet. Stir until the spinach wilts.
- In a bowl, beat the eggs with salt and pepper. Pour the eggs into the skillet and scramble until fully cooked.
- Remove the skillet from heat and stir in the diced mango and cheese if using.
- To assemble the burritos, lay a tortilla flat and spoon some of the egg mixture onto the center. Fold in the sides and roll it up tightly.
- Repeat with the remaining tortillas and filling. You can wrap them in foil or plastic wrap for easy storage.
- To reheat, simply microwave for about 1-2 minutes or warm in a skillet.