15 Quick Lunchbox Meal Prep Ideas for Busy Moms
Juggling kids, work, and daily chaos can make meal prep seem impossible, but fear not! “Quick Lunchbox Meal Prep for Busy Moms” is here to help you whip up delicious, nutritious lunchbox meals in no time. This guide is packed with simple recipes and tips that fit perfectly into your hectic lifestyle, ensuring your little ones enjoy balanced lunches without the stress.
Turkey and Cheese Roll-Ups
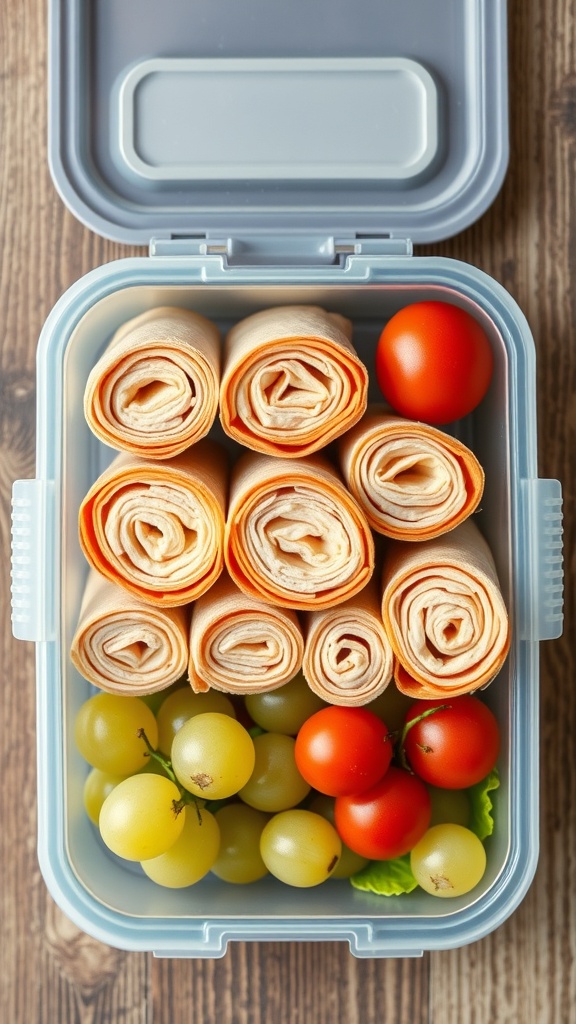
Turkey and cheese roll-ups are a fantastic option for busy moms looking to pack a quick and nutritious lunch. These tasty bites are not only easy to make, but they also appeal to kids and adults alike. The image shows a neat lunchbox filled with perfectly rolled turkey and cheese, accompanied by colorful grape tomatoes and sweet green grapes. This combination makes for a balanced meal that’s both satisfying and fun to eat.
To prepare these roll-ups, you’ll need just a few simple ingredients. Start with slices of turkey and your favorite cheese. You can use Swiss, cheddar, or any cheese your family enjoys. The process is straightforward: lay the turkey slice flat, place a slice of cheese on top, and roll it up tightly. Secure with a toothpick if needed, and pack them in a lunchbox with some fresh fruits and veggies for a complete meal.
Ingredients
- 8 slices of deli turkey
- 4 slices of cheese (Swiss, cheddar, or your choice)
- 1 cup grape tomatoes
- 1 cup green grapes
- Optional: lettuce leaves for extra crunch
Instructions
- Lay out the turkey slices on a clean surface.
- Place a slice of cheese on each turkey slice.
- Roll each turkey and cheese slice tightly from one end to the other.
- Secure with a toothpick if desired.
- Pack the roll-ups in a lunchbox with grape tomatoes and green grapes for a colorful meal.
Egg Muffins with Spinach and Cheese
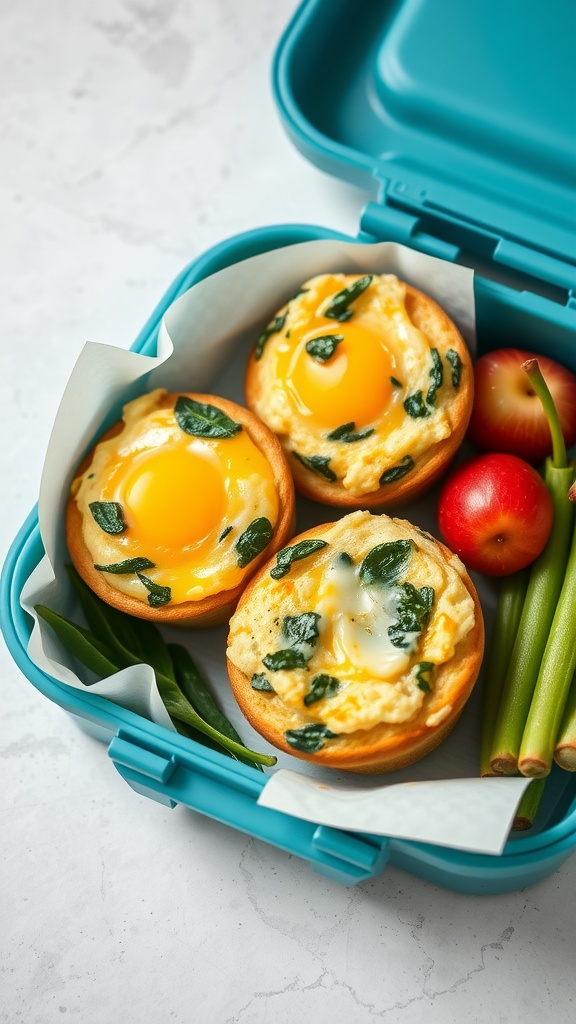
Egg muffins are a fantastic choice for busy moms looking for quick and nutritious lunchbox options. These little bites are packed with protein and veggies, making them a great way to fuel your kids throughout the day. The image shows perfectly baked egg muffins filled with fresh spinach and gooey cheese, all nestled in a convenient lunchbox.
Making these muffins is simple and can be done in advance. You can customize them with different veggies or cheeses based on your family’s preferences. They’re not only tasty but also easy to grab and go!
Ingredients
- 6 large eggs
- 1 cup fresh spinach, chopped
- 1/2 cup shredded cheese (cheddar or your choice)
- 1/4 cup milk
- Salt and pepper to taste
- 1/2 teaspoon garlic powder (optional)
- Cooking spray or oil for greasing
Instructions
- Preheat your oven to 350°F (175°C) and grease a muffin tin with cooking spray or oil.
- In a large bowl, whisk together the eggs, milk, salt, pepper, and garlic powder until well combined.
- Add the chopped spinach and shredded cheese to the egg mixture and stir until evenly distributed.
- Pour the mixture into the prepared muffin tin, filling each cup about 3/4 full.
- Bake for 18-20 minutes, or until the muffins are set and lightly golden on top.
- Let them cool for a few minutes before removing from the tin. Enjoy warm or store in the fridge for later!
Chickpea Salad with Feta
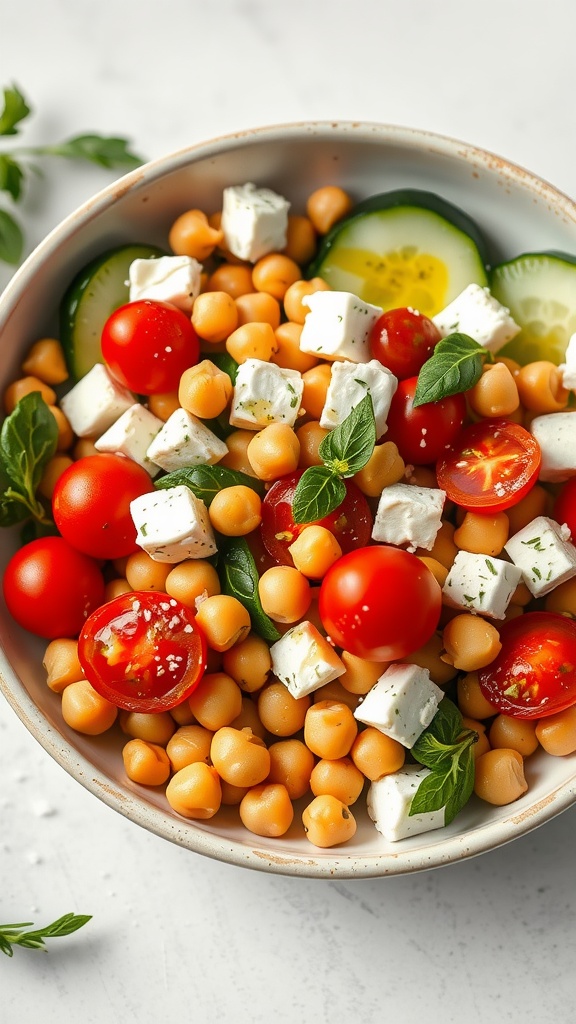
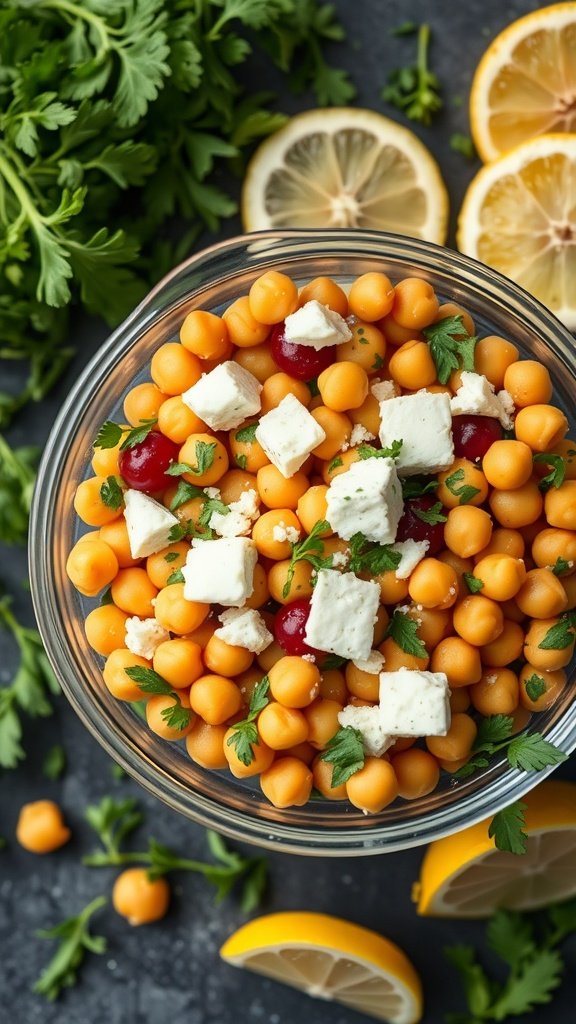
This Chickpea Salad with Feta is a perfect quick lunchbox meal for busy moms. It’s colorful, nutritious, and packed with flavor. The bright yellow chickpeas, creamy feta, and fresh herbs make it visually appealing and delicious.
To prepare this salad, start by rinsing and draining a can of chickpeas. Then, combine them in a bowl with diced feta cheese, chopped fresh parsley, and a handful of halved cherry tomatoes. The combination of textures and flavors is delightful!
For the dressing, squeeze fresh lemon juice over the salad and drizzle with olive oil. A pinch of salt and pepper will enhance the taste. Toss everything together gently, and your salad is ready to go!
This salad is not only easy to make but also keeps well in the fridge. It’s a great option for meal prep, ensuring you have a healthy lunch ready to grab on busy days.
Ingredients
- 1 can chickpeas, rinsed and drained
- 1 cup feta cheese, diced
- 1 cup cherry tomatoes, halved
- 1/4 cup fresh parsley, chopped
- Juice of 1 lemon
- 2 tablespoons olive oil
- Salt and pepper to taste
Instructions
- In a large bowl, combine the rinsed chickpeas, diced feta, halved cherry tomatoes, and chopped parsley.
- Squeeze the lemon juice over the salad and drizzle with olive oil.
- Add salt and pepper to taste.
- Toss gently to combine all ingredients.
- Serve immediately or store in the fridge for later.
Sliced Apples with Nut Butter

Sliced apples with nut butter make a fantastic quick lunchbox meal. This combo is not just tasty; it’s also packed with nutrients. The crispness of the apples pairs perfectly with the creamy texture of the nut butter. It’s a snack that kids love and is easy for busy moms to prepare.
To make this delightful treat, simply slice up some fresh apples. Choose your favorite variety, whether it’s sweet Fuji or tart Granny Smith. Pair the slices with a scoop of nut butter, like almond or peanut, for a protein boost. You can even add a few whole grain crackers for some extra crunch!
This meal is not only quick to prepare but also keeps well in a lunchbox. Just make sure to store the apple slices in an airtight container to keep them fresh. A little lemon juice can help prevent browning if you’re prepping ahead of time.
Ingredients
- 2 medium apples, sliced
- 1/4 cup nut butter (peanut, almond, or your choice)
- 1 tablespoon lemon juice (optional)
- Whole grain crackers (optional)
Instructions
- Wash and slice the apples into wedges.
- If desired, toss the apple slices in lemon juice to prevent browning.
- Pack the apple slices in an airtight container.
- Add a small container of nut butter for dipping.
- Include whole grain crackers if you want extra crunch.
Pasta Salad with Cherry Tomatoes
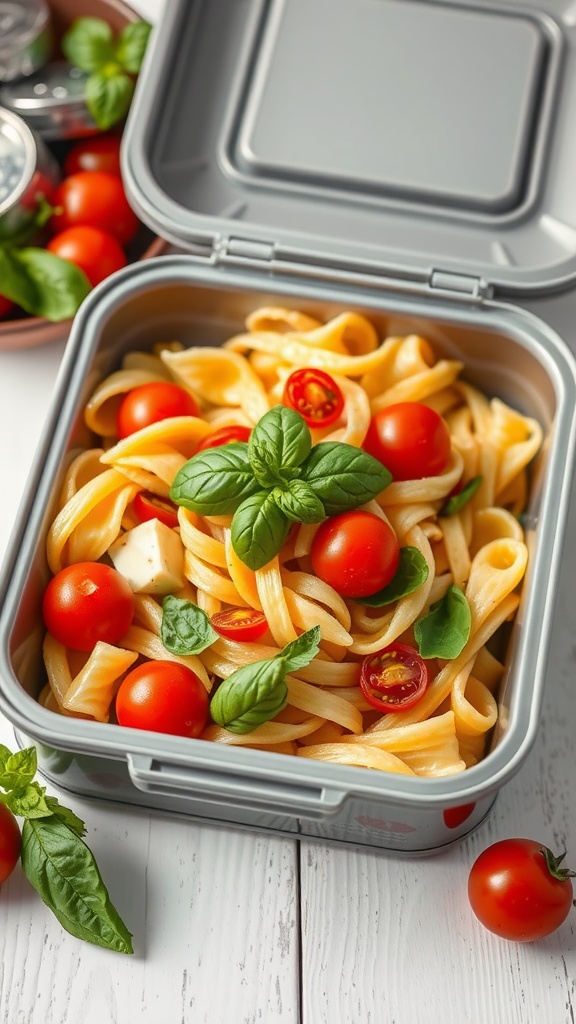
Pasta salad is a fantastic option for busy moms looking to whip up a quick and tasty lunch. This dish is not only colorful but also packed with flavor. The vibrant cherry tomatoes add a pop of freshness, while the pasta provides a satisfying base. Toss in some fresh basil, and you have a meal that feels special yet is super easy to prepare.
To make this pasta salad, start by cooking your favorite pasta until al dente. Drain and let it cool. Next, slice some cherry tomatoes in half and chop fresh basil leaves. Combine the pasta, tomatoes, and basil in a bowl. Drizzle with olive oil and a splash of balsamic vinegar for a delightful dressing. Season with salt and pepper to taste. This dish can be made ahead of time and stored in the fridge, making it perfect for lunchboxes.
Ingredients
- 2 cups cooked pasta (like rotini or penne)
- 1 cup cherry tomatoes, halved
- 1/2 cup fresh basil leaves, chopped
- 1/4 cup olive oil
- 2 tablespoons balsamic vinegar
- Salt and pepper to taste
Instructions
- Cook the pasta according to package instructions. Drain and let cool.
- In a large bowl, combine the cooked pasta, halved cherry tomatoes, and chopped basil.
- Drizzle with olive oil and balsamic vinegar. Season with salt and pepper.
- Toss everything together until well mixed.
- Store in an airtight container in the fridge until ready to serve.
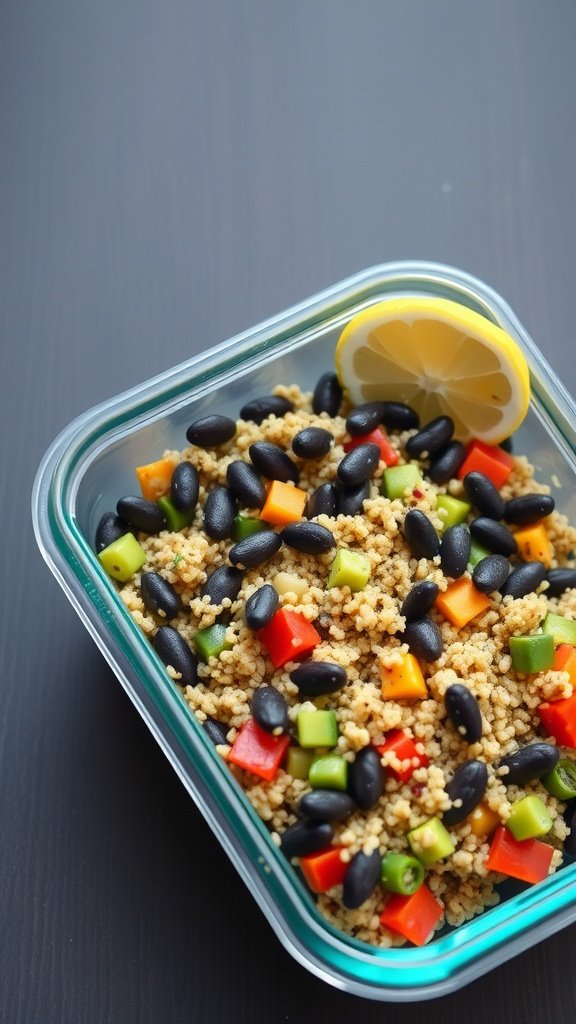
Mini Quinoa and Veggie Bowls
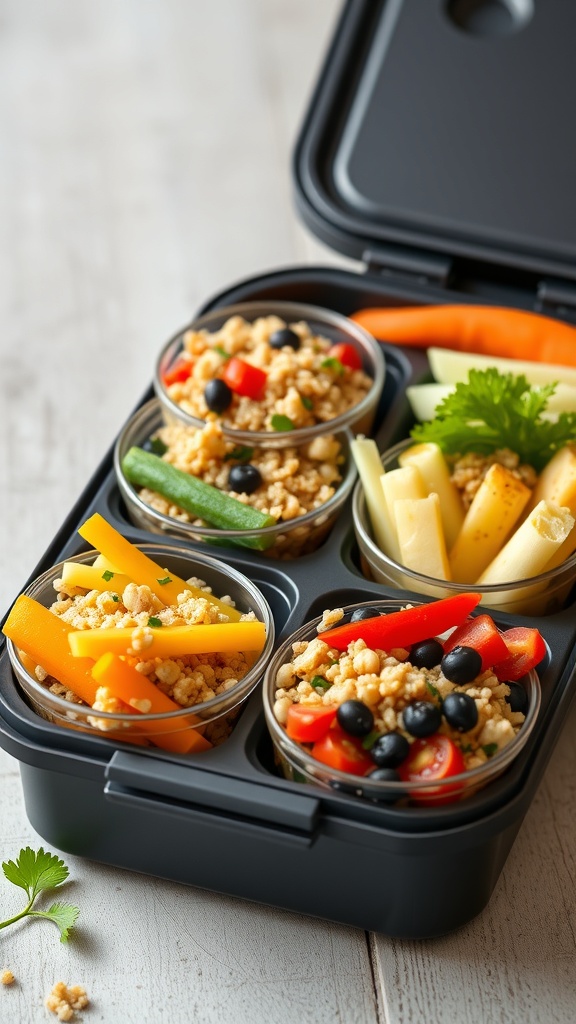
Mini quinoa and veggie bowls are a fantastic option for busy moms looking to prepare quick and healthy lunches. These bowls are colorful and packed with nutrients, making them a hit with kids and adults alike. The image shows a neatly organized lunchbox filled with vibrant quinoa bowls, each featuring a mix of fresh veggies and grains.
To make these bowls, you can use a variety of vegetables like bell peppers, cucumbers, and cherry tomatoes. The quinoa serves as a great base, providing protein and fiber. Plus, they’re easy to customize based on what your family enjoys.
These mini bowls are not just visually appealing; they are also incredibly simple to prepare. You can make them ahead of time and store them in the fridge for a quick grab-and-go meal. Pair them with some fresh fruit or a crunchy snack, and you have a complete lunch!
Ingredients
- 1 cup quinoa
- 2 cups vegetable broth or water
- 1 cup cherry tomatoes, halved
- 1 bell pepper, diced
- 1 cucumber, diced
- 1/2 cup black olives, sliced
- 1/4 cup fresh parsley, chopped
- 1 tablespoon olive oil
- Salt and pepper to taste
Instructions
- Rinse the quinoa under cold water. In a pot, combine quinoa and vegetable broth. Bring to a boil, then reduce heat and simmer for about 15 minutes, or until quinoa is fluffy and liquid is absorbed.
- While the quinoa cooks, prepare the vegetables. Chop the bell pepper, cucumber, and halve the cherry tomatoes.
- Once the quinoa is ready, let it cool slightly. In a large bowl, combine quinoa, vegetables, olives, and parsley.
- Drizzle with olive oil and season with salt and pepper. Toss gently to combine.
- Portion the quinoa mixture into small containers or bowls. These can be stored in the fridge for up to 4 days.
Homemade Hummus with Veggie Sticks
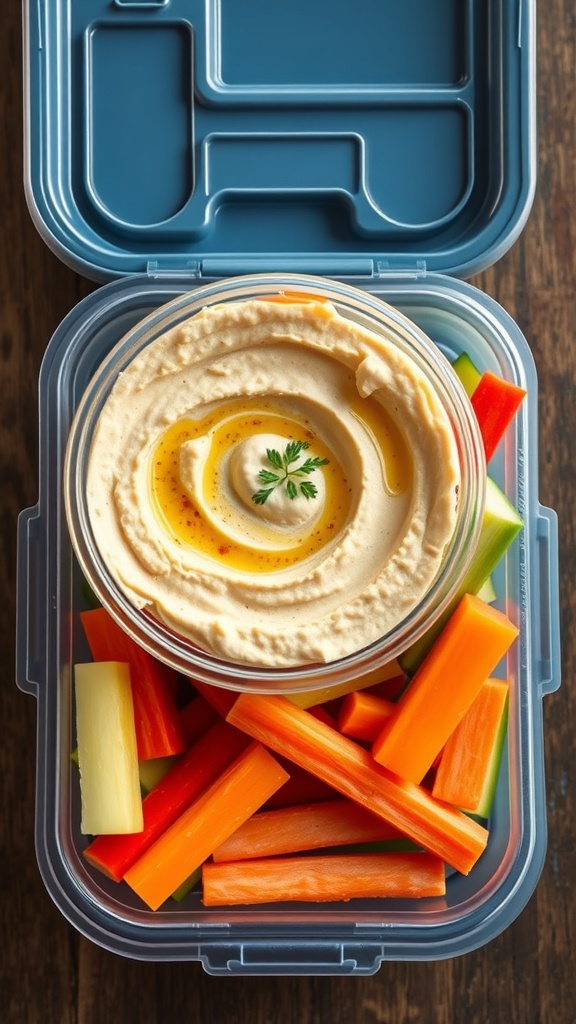
Homemade hummus is a fantastic choice for busy moms looking to pack a healthy lunch. It’s creamy, flavorful, and pairs perfectly with crunchy veggie sticks. This combo not only satisfies hunger but also provides essential nutrients for kids. Plus, it’s super easy to prepare ahead of time!
To make this delightful dish, you’ll need a few simple ingredients. The hummus can be made in just a few minutes, and the veggie sticks can be prepped in advance. Carrots, celery, and bell peppers are great options that add color and crunch to the lunchbox.
Ingredients
- 1 can (15 oz) chickpeas, drained and rinsed
- 1/4 cup tahini
- 2 tablespoons olive oil
- 2 tablespoons lemon juice
- 1 garlic clove, minced
- 1/2 teaspoon cumin
- Salt to taste
- Water as needed
- Carrots, cut into sticks
- Celery, cut into sticks
- Bell peppers, cut into strips
Instructions
- Blend the Hummus: In a food processor, combine chickpeas, tahini, olive oil, lemon juice, garlic, cumin, and salt. Blend until smooth.
- Adjust Consistency: If the hummus is too thick, add water a tablespoon at a time until you reach your desired consistency.
- Prepare Veggies: While the hummus is blending, wash and cut your veggies into sticks or strips.
- Pack It Up: Transfer the hummus into a small container and arrange the veggie sticks around it in a lunchbox.
- Enjoy: This meal can be enjoyed right away or stored in the fridge for a quick grab-and-go option!
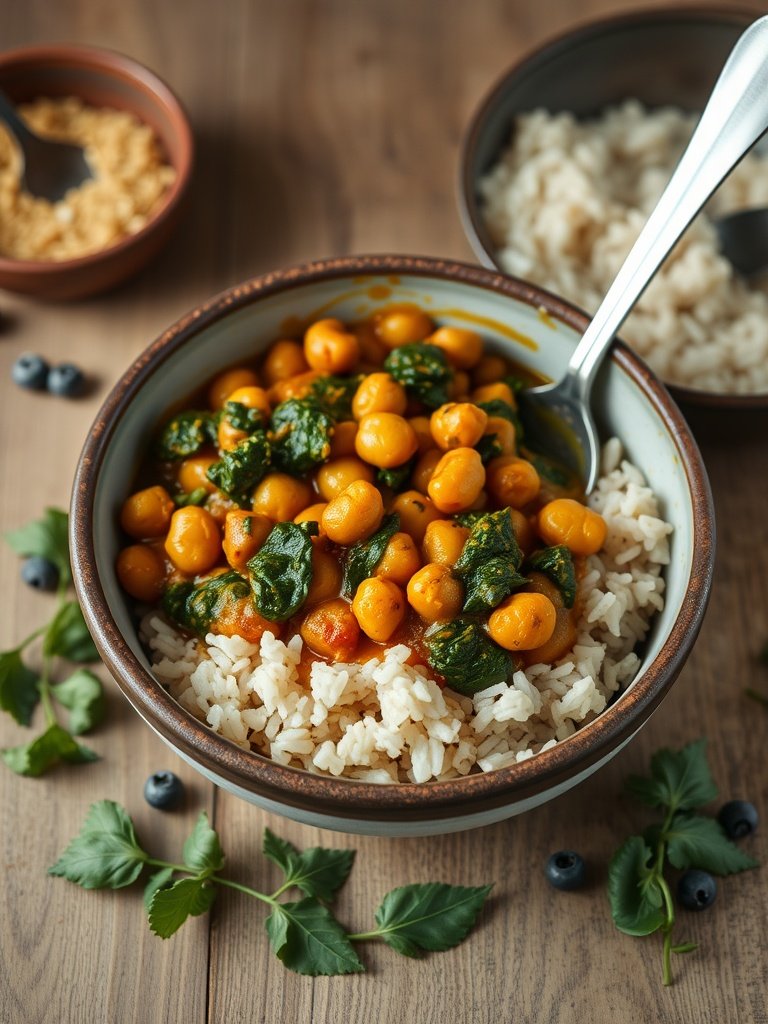
Rice and Bean Burrito Wraps
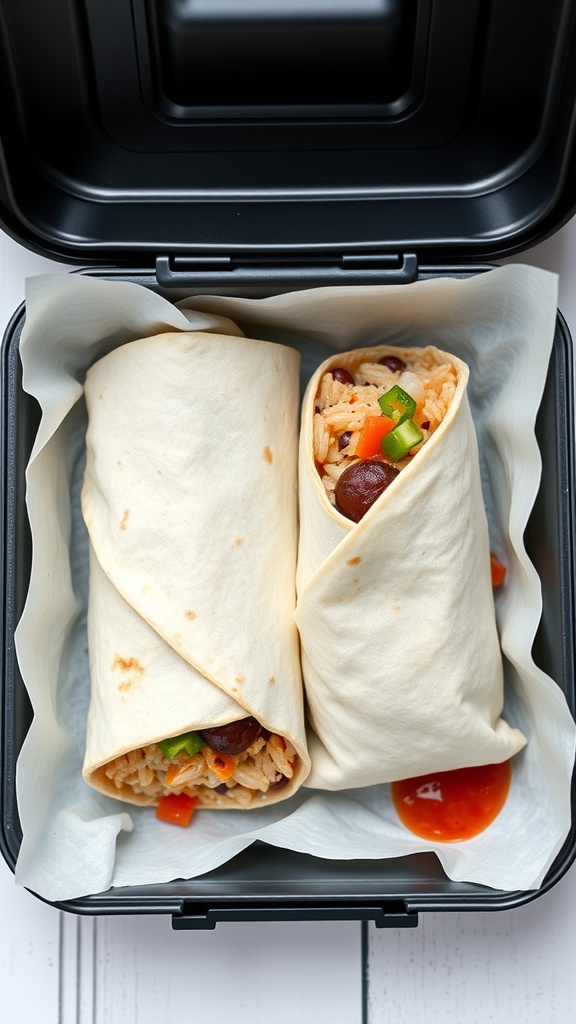
Rice and bean burrito wraps are a fantastic option for busy moms looking for quick and nutritious meals. These wraps are not only easy to prepare but also packed with flavor and good-for-you ingredients. The image shows two neatly wrapped burritos, filled with a colorful mix of rice, beans, and veggies, ready to be enjoyed at lunch or on the go.
To make these wraps, you’ll need some simple ingredients. Start with tortillas, cooked rice, canned black beans, diced bell peppers, and your favorite seasonings. The combination of rice and beans provides a great source of protein and fiber, making these wraps a filling choice for your little ones.
Preparing these burritos is a breeze. Just mix the cooked rice with the beans and veggies, season to taste, and wrap them up in tortillas. You can even add some cheese or salsa for extra flavor. They store well in lunchboxes and can be eaten cold or warmed up, making them perfect for busy days.
Ingredients
- 4 large flour tortillas
- 2 cups cooked rice
- 1 can black beans, rinsed and drained
- 1 cup diced bell peppers (any color)
- 1 teaspoon cumin
- 1 teaspoon chili powder
- Salt and pepper to taste
- 1 cup shredded cheese (optional)
- Salsa for dipping (optional)
Instructions
- In a large bowl, combine the cooked rice, black beans, diced bell peppers, cumin, chili powder, salt, and pepper. Mix well.
- Lay a tortilla flat on a clean surface. Spoon a portion of the rice and bean mixture onto the center of the tortilla.
- If using, sprinkle some shredded cheese on top of the filling.
- Fold in the sides of the tortilla and then roll it up tightly from the bottom to the top.
- Repeat with the remaining tortillas and filling.
- Wrap each burrito in foil or place in a lunchbox. Serve with salsa on the side if desired.
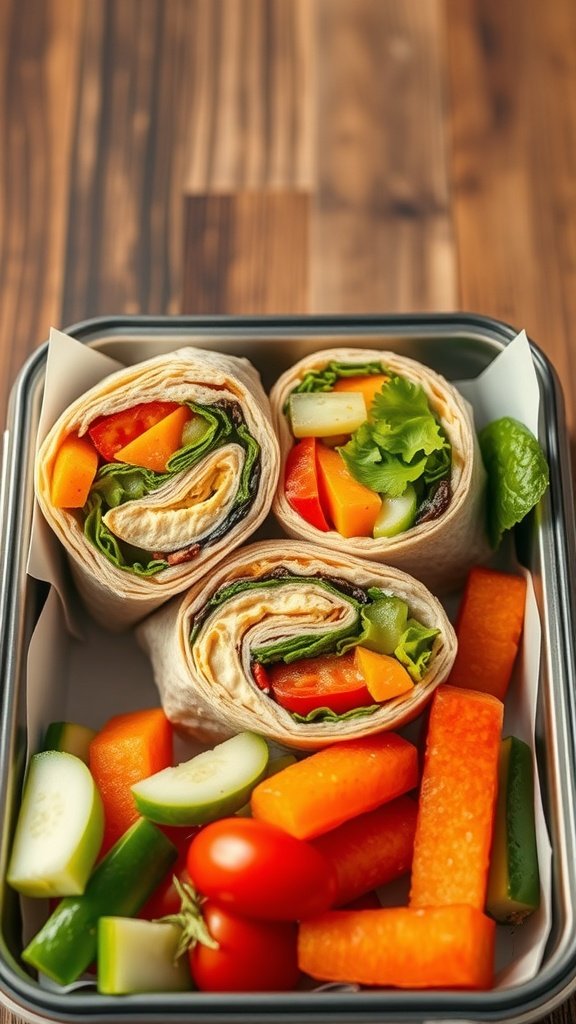
Cucumber and Cream Cheese Sandwiches
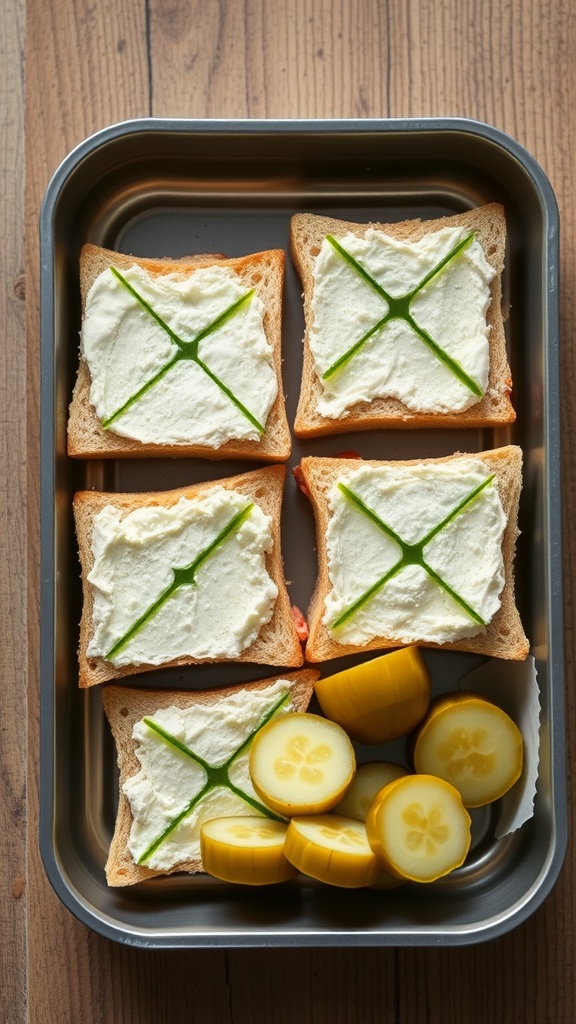
Cucumber and cream cheese sandwiches are a delightful choice for busy moms looking to prepare quick and healthy lunches. These sandwiches are not only easy to make but also refreshing and satisfying. The image shows neatly arranged sandwiches with a creamy spread and thin cucumber slices. The vibrant green of the cucumber adds a pop of color, making these sandwiches visually appealing.
This recipe is perfect for lunchboxes, as they hold up well and can be made in advance. The creamy texture of the cheese pairs beautifully with the crispness of the cucumber, creating a delightful bite. Plus, they are a great way to sneak in some veggies for the kids!
Ingredients
- 8 slices of bread (white or whole grain)
- 4 oz cream cheese, softened
- 1 cucumber, thinly sliced
- Salt and pepper to taste
- Fresh herbs (optional, like dill or chives)
Instructions
- Spread cream cheese evenly on each slice of bread.
- Layer thin cucumber slices on half of the bread slices.
- Sprinkle with salt, pepper, and fresh herbs if using.
- Top with the remaining slices of bread to form sandwiches.
- Cut into quarters or desired shapes and pack them in lunchboxes.
Savory Oatmeal with Eggs
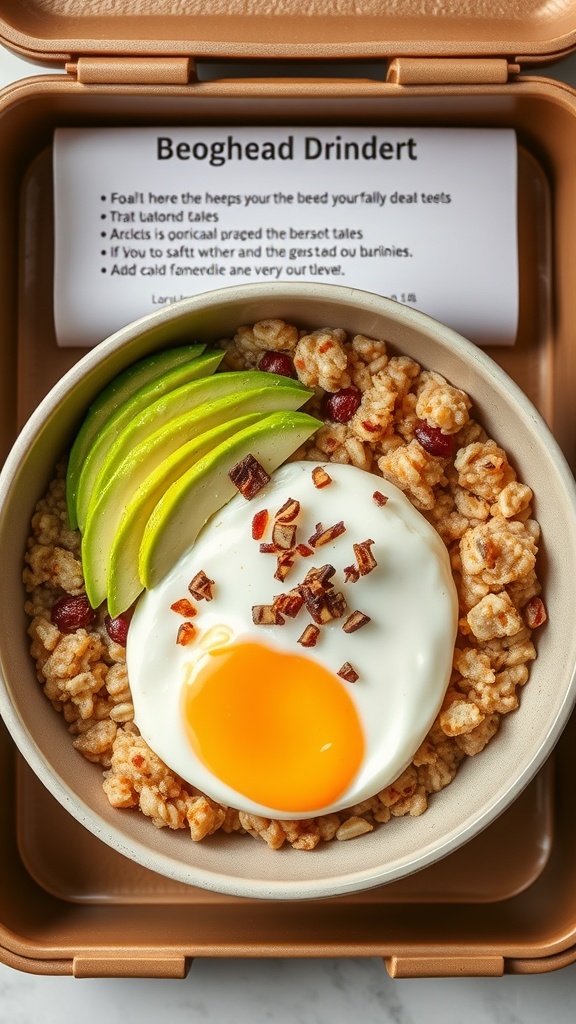
Savory oatmeal with eggs is a fantastic option for busy moms looking for a quick and nutritious lunch. This dish combines creamy oatmeal with a perfectly cooked egg, making it filling and satisfying. The addition of fresh toppings like green apples and crispy bacon bits adds a delightful crunch and flavor.
This meal is not only easy to prepare but also versatile. You can customize it with your favorite ingredients. Whether you prefer a bit of spice or more veggies, the choice is yours!
Ingredients
- 1 cup rolled oats
- 2 cups water or broth
- 1 large egg
- 1/2 apple, sliced
- 2 tablespoons cooked bacon bits
- Salt and pepper to taste
- Optional: herbs or spices of your choice
Instructions
- Cook the Oats: In a saucepan, bring water or broth to a boil. Add the rolled oats and a pinch of salt. Reduce heat and simmer for about 5 minutes, stirring occasionally.
- Prepare the Egg: While the oats are cooking, bring a small pot of water to a gentle boil. Carefully add the egg and cook for about 6-7 minutes for a soft-boiled egg. Remove and cool slightly before peeling.
- Assemble the Bowl: Once the oats are cooked, transfer them to a bowl. Top with the sliced apple, bacon bits, and the soft-boiled egg.
- Season: Add salt and pepper to taste. Feel free to sprinkle on any herbs or spices you enjoy.
- Enjoy: Dig in and savor your delicious, savory oatmeal!
Vegetable Fried Rice Cups
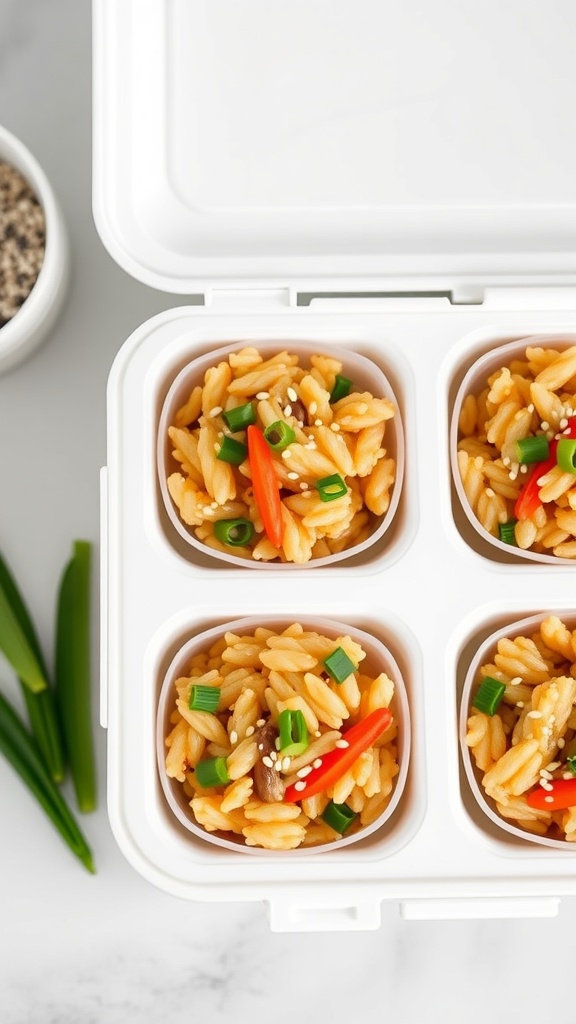
Vegetable fried rice cups are a fantastic option for busy moms looking to prepare quick and healthy lunches. These little cups are filled with colorful veggies and flavorful rice, making them appealing to kids and adults alike. The best part? They can be made ahead of time and stored in the fridge, ready to grab and go!
To make these cups, start with cooked rice. You can use leftover rice from dinner or make a fresh batch. Add in your favorite vegetables, like carrots, peas, and bell peppers, for a pop of color and nutrition. A splash of soy sauce and sesame oil brings everything together, giving it that delicious fried rice flavor.
Once mixed, portion the rice into muffin tins or small cups. This way, they are perfectly sized for lunchboxes. Bake them until they’re warm and slightly crispy on the edges. These cups are not only tasty but also fun to eat!
Ingredients
- 2 cups cooked rice
- 1 cup mixed vegetables (carrots, peas, bell peppers)
- 2 tablespoons soy sauce
- 1 tablespoon sesame oil
- 2 green onions, chopped
- 1 teaspoon sesame seeds (optional)
Instructions
- Preheat your oven to 350°F (175°C).
- In a large bowl, combine the cooked rice, mixed vegetables, soy sauce, sesame oil, and green onions. Mix well.
- Grease a muffin tin or use silicone cups. Fill each cup with the rice mixture, pressing down slightly.
- Bake for 15-20 minutes until the edges are golden and crispy.
- Let them cool slightly before removing from the tin. Sprinkle with sesame seeds if desired.
- Pack them in lunchboxes or enjoy as a snack!
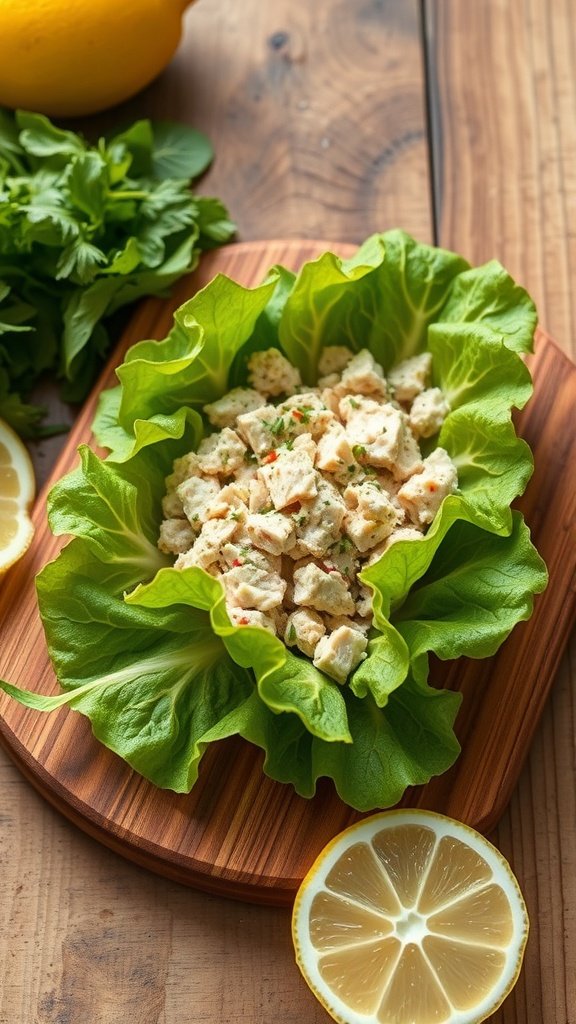
Baked Chicken Tenders with Dipping Sauce
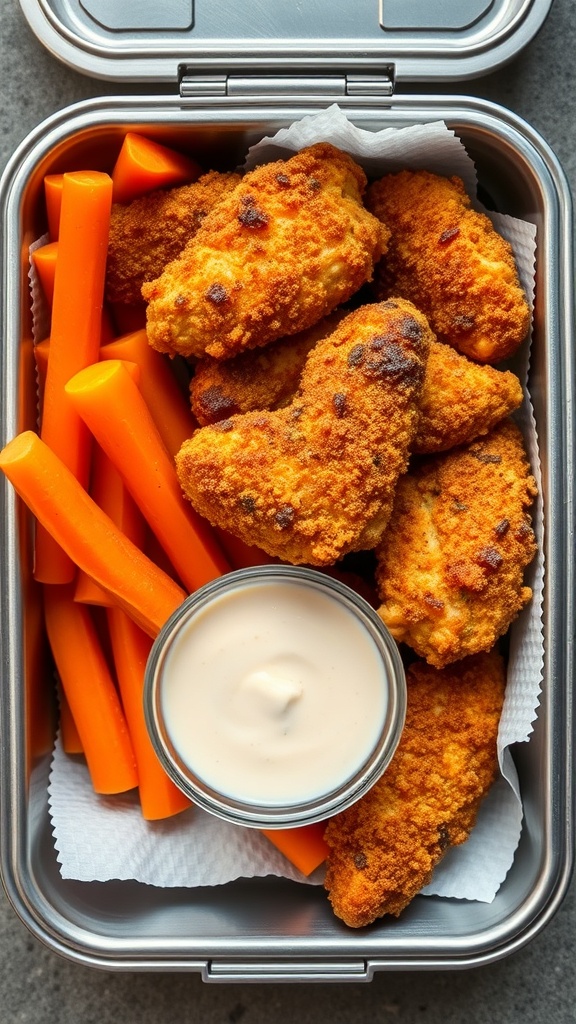
Baked chicken tenders are a fantastic option for busy moms looking to whip up quick and healthy lunches. These tenders are crispy on the outside and juicy on the inside, making them a hit with kids. Pair them with fresh carrot sticks and a creamy dipping sauce for a balanced meal that’s easy to pack.
The image shows a lunchbox filled with golden-brown chicken tenders, vibrant orange carrot sticks, and a small cup of dipping sauce. This colorful presentation not only looks appetizing but also makes lunchtime exciting for kids.
To make these baked chicken tenders, you’ll need simple ingredients that you probably already have at home. They are easy to prepare and can be made in bulk, perfect for meal prepping.
Ingredients
- 1 pound chicken breast, cut into strips
- 1 cup breadcrumbs
- 1/2 cup grated Parmesan cheese
- 1 teaspoon garlic powder
- 1 teaspoon paprika
- Salt and pepper to taste
- 1 egg, beaten
- 1 tablespoon olive oil
- Carrot sticks for serving
- Your favorite dipping sauce (ranch, honey mustard, etc.)
Instructions
- Preheat your oven to 400°F (200°C). Line a baking sheet with parchment paper.
- In a bowl, mix breadcrumbs, Parmesan cheese, garlic powder, paprika, salt, and pepper.
- Dip each chicken strip into the beaten egg, then coat it with the breadcrumb mixture.
- Place the coated chicken strips on the baking sheet. Drizzle with olive oil.
- Bake for 15-20 minutes, or until the chicken is cooked through and golden brown.
- Let them cool slightly before packing them in lunchboxes with carrot sticks and dipping sauce.
Fruit and Yogurt Smoothie Packs
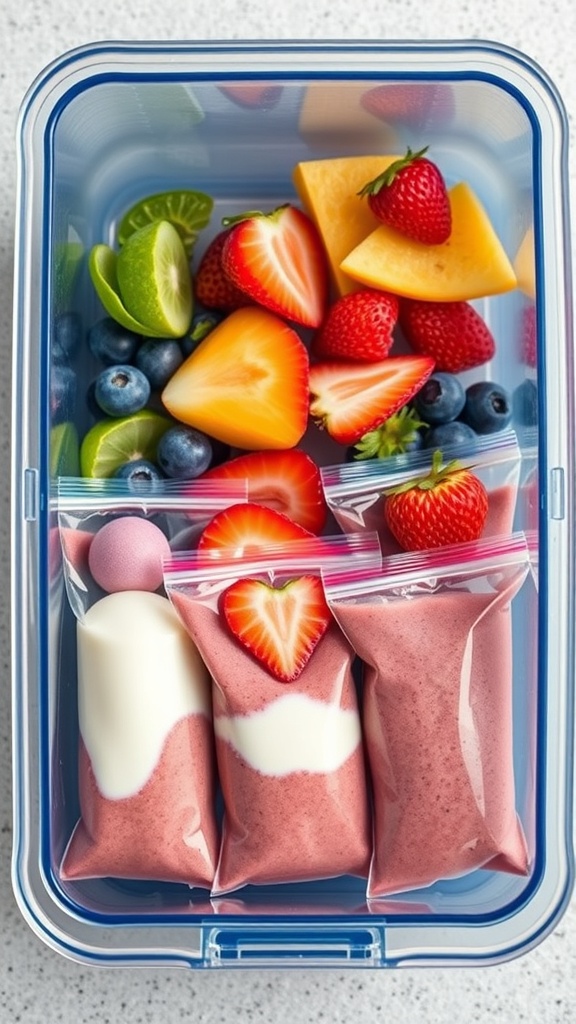
Fruit and yogurt smoothie packs are a fantastic way to make healthy lunches quick and easy. They are colorful and packed with nutrients, making them a hit with kids and adults alike. The image shows a vibrant assortment of fruits like strawberries, blueberries, and cantaloupe, along with neatly packed smoothie bags. These packs are perfect for busy mornings when you need something nutritious without the hassle.
To create these smoothie packs, start by selecting your favorite fruits. You can use fresh or frozen fruits, depending on what you have on hand. The yogurt adds creaminess and protein, making the smoothie filling. Simply blend the fruits with yogurt and pour them into resealable bags. You can freeze them for later use, ensuring you always have a healthy option ready to go.
These smoothie packs are not only convenient but also customizable. You can mix and match fruits to suit your family’s taste. Plus, they are a great way to sneak in some extra servings of fruit!
Ingredients
- 1 cup strawberries, hulled
- 1 cup blueberries
- 1 cup cantaloupe, cubed
- 2 cups yogurt (plain or flavored)
- 1 tablespoon honey (optional)
- 1 tablespoon lime juice
Instructions
- Prepare the Fruits: Wash and cut the strawberries and cantaloupe into smaller pieces.
- Blend the Ingredients: In a blender, combine the strawberries, blueberries, cantaloupe, yogurt, honey, and lime juice. Blend until smooth.
- Pack the Smoothies: Pour the smoothie mixture into resealable bags, leaving some space at the top for expansion if freezing.
- Freeze: Lay the bags flat in the freezer for easy storage. They can be stored for up to 3 months.
- Serve: When ready to enjoy, simply remove a bag from the freezer and let it thaw for a few minutes before squeezing it into a glass or drinking it straight from the bag.
Stuffed Bell Peppers
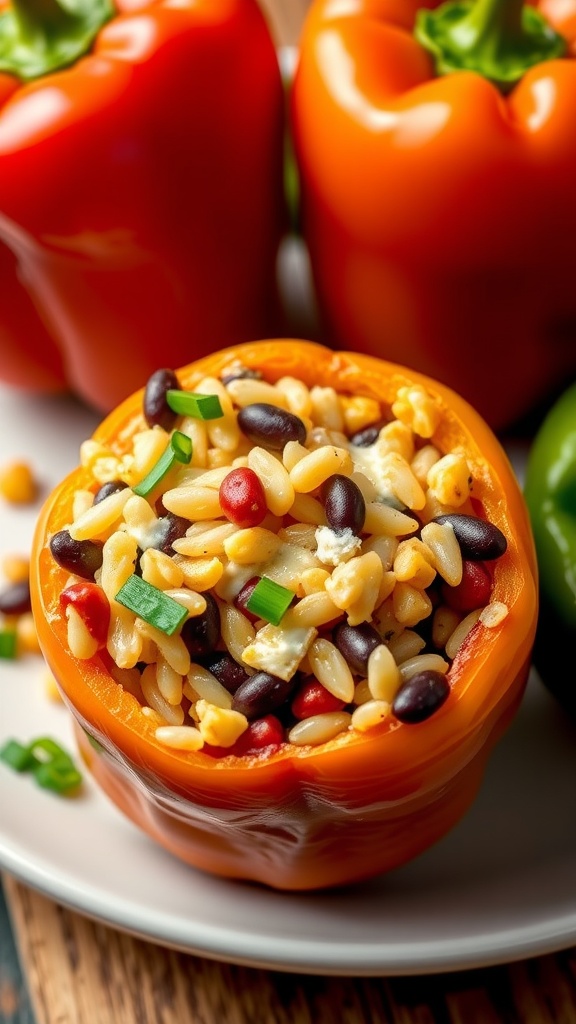
Stuffed bell peppers are a fantastic option for busy moms looking for a quick and healthy meal prep idea. These colorful veggies are not just pleasing to the eye; they are also packed with flavor and nutrients. You can fill them with a variety of ingredients, making them versatile for any taste preference.
In the image, you can see vibrant red and yellow bell peppers filled with a delicious mixture. The filling often includes rice, vegetables, and spices, creating a satisfying meal that your kids will love. Plus, they are easy to make ahead of time and store in the fridge for a quick lunch or dinner.
To prepare stuffed bell peppers, start by cooking your rice and mixing it with chopped vegetables and seasonings. Then, hollow out the bell peppers and stuff them with the mixture. Bake until the peppers are tender and the filling is heated through. It’s that simple!
These stuffed peppers are not only nutritious but also fun to eat. Kids will enjoy the bright colors and the hands-on experience of eating from their own pepper. It’s a win-win for busy moms!
Greek Yogurt Parfaits
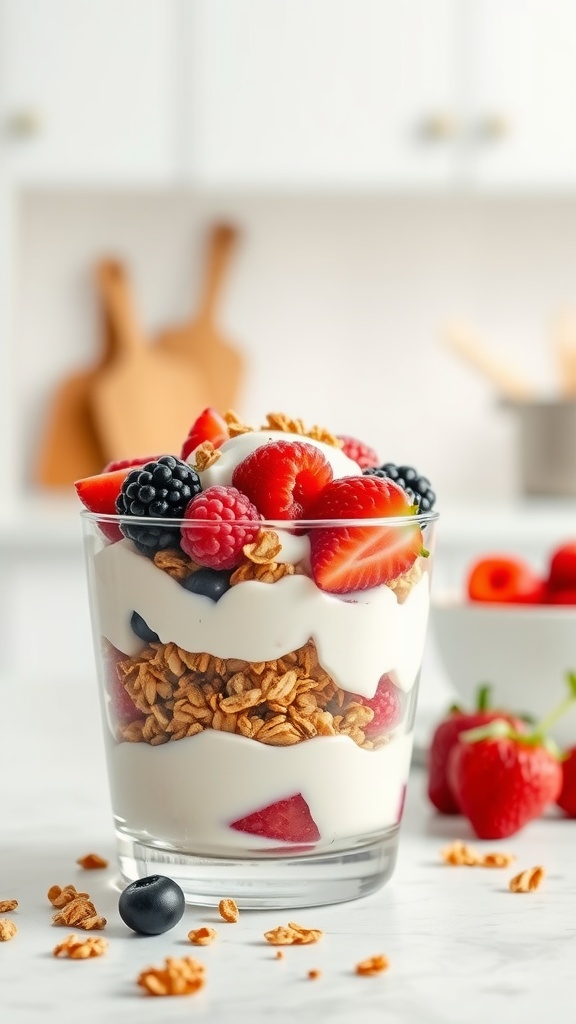
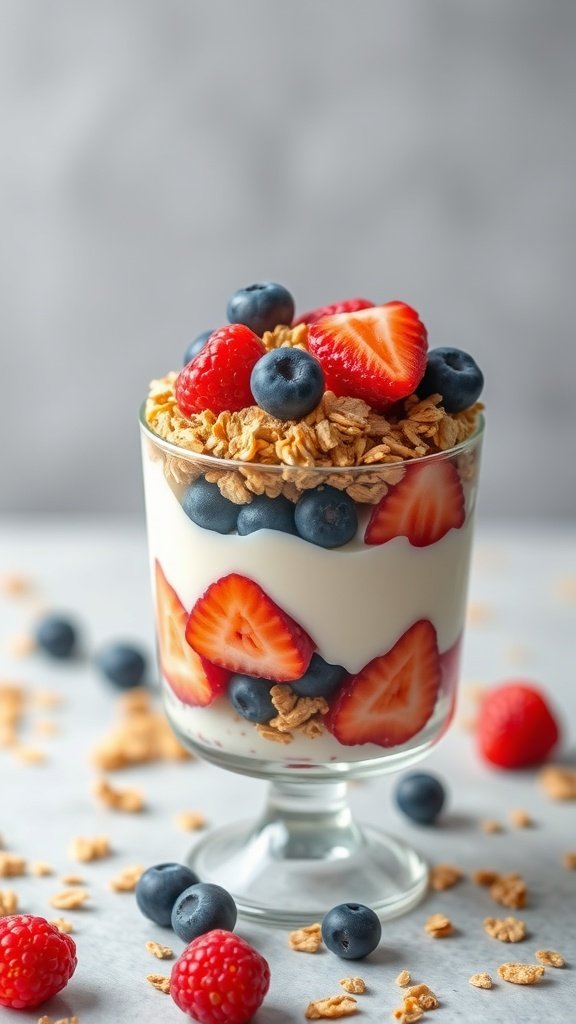
Greek yogurt parfaits are a fantastic option for busy moms looking to prepare quick and healthy lunches. These parfaits are not only easy to make but also customizable to suit your family’s tastes. Layering yogurt with fruits and granola creates a delightful mix of flavors and textures.
The image showcases a beautiful parfait with layers of creamy Greek yogurt, fresh berries, and crunchy granola. The vibrant colors of the raspberries, blueberries, and blackberries make it visually appealing. Plus, it’s a treat that kids will love!
To make these parfaits, you can use any fruit you have on hand. Strawberries, bananas, or even peaches work well. The granola adds a nice crunch, while the yogurt provides protein to keep everyone satisfied.
These parfaits can be prepared the night before and stored in the fridge, making them a perfect grab-and-go option for busy mornings. Just layer the ingredients in a jar, and you’re set!